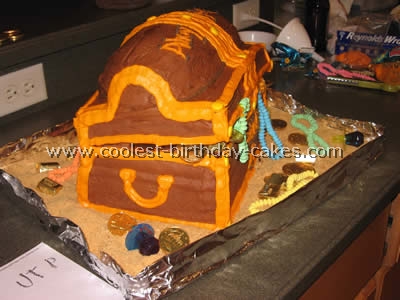
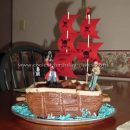
My friend was in a bind for a pirate-themed birthday cake since her son is just crazy about Pirates of the Caribbean. I told her I could come up with something and after messing around looking at pictures on the web and other cake decorating ideas, we decided on making a treasure chest. Honestly the most difficult part was finding the candy. Since there are only two frosting colors it seemed to take far less time to make and assemble than some of the cakes I’ve made in the past.
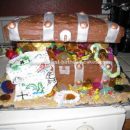
I made two 9×13 chocolate cakes and one more cake using the egg pan I got a few years ago (it’s basically two halves of an egg). Once I cooked, cooled, and put the egg halves in the freezer for a while I sized them up and cut them to make the arc for the top of the chest.
But I’m getting ahead of myself… I thought 3 cakes was enough cake to eat but the bottom of the chest would have been too shallow with only one cake on the bottom. I got an empty cereal box stuffed it with balled up paper so it wouldn’t collapse, then wrapped it in foil to form the bottom of the chest. I then cut the first 9×13 cake to match the size of the cereal box, put some icing on the top of the cereal box so the layer would stick, and placed the layer on top of the cereal box.
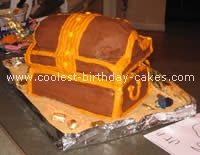
For the next layer I just used the trimmings from the first cake and the egg shape to prop the “lid” open. I frosted the top of the chest part, put the cake pieces I was using to prop up the lid, and then put the second 9×13 cake (trimmed appropriately) on top. I put several pieces of cake trimmings in the front where the lock to the box would go; this seemed to really help hold the cake up so it looked slightly open.
I had trimmed the egg shapes to make a barrel form for the top of the chest. I think I could have used some loaf pans and then cut the curves in, but since I had something on hand that was curved – I used that. I frosted the top of the 9×13 and the two ends of the “barrel” that would touch one another and put them centered on the top of the lid. At this point my husband was scared. He didn’t say it, but I could see it on his face. Honestly the rest was just icing.
I frosted the cake in homemade chocolate frosting and made more frosting with a golden/orange tint. I printed off a picture of a treasure chest from the web and just frosted the gold to make it match. I put the candy in between the lid and the chest prior to frosting the lid and doing the decorative frosting. I was afraid that doing it later might mess up the frosting somehow.
When the lid started to droop a little more than I wanted, I used a really large spatula and lifted part of the lid and slid more cake scraps in to keep it propped up. The nugget candies really helped to hold the lid up too. I used some yellow spree candies to accent the gold on the chest and also crushed about 3 packs of graham crackers to make the chest look like it was resting in sand.
The birthday boy thought the graham crackers were magic sand! I then put extra jewels around the chest for a better effect. I’ve done cakes for my kids about 6 years now; this was the first one I did for a non-relative and I’m really proud of it. I’ve never taken a class – I mention this only to say that if you like doing cakes just keep at it. The more you do it the better they turn out. Don’t try to tackle a cake like this in a day. Do all your baking and making your frosting one day and the next devote to assembling. The cakes trim better after they’ve been in the freezer for a night anyway… Good luck with all of your cake decorating ideas!
More Treasure Chest Cake Decorating Ideas
Treasure Chest cake decorating idea by Carol P., Ancaster, Ontario
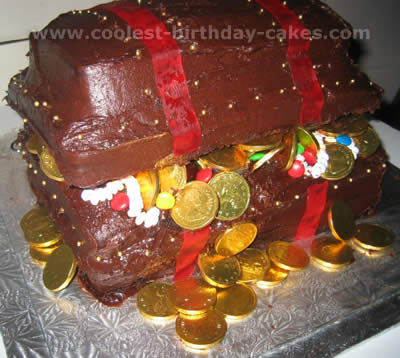
This was made from 4 cake mixes. 2 rectangles layered on bottom and 2 on top (the one that is on the way top is a bit smaller to look like the top of the lid). The “lid” is propped open with candy (there is no cardboard). Icing is used to smooth and shape the outside of the chest. Decorations are fruit leather and dragees. Lots of gold coins and candies inside the treasure chest.
Treasure Chest cake decorating idea by Beverly B., Helotes, TX
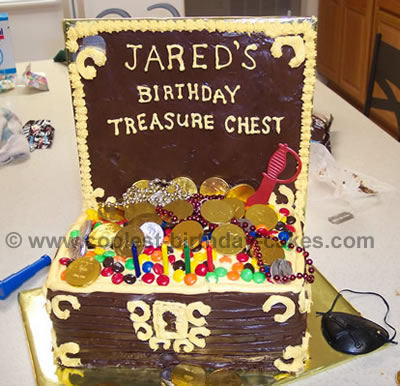
We had a pirate party for my son’s 4th birthday. I made some really cute treasure chest invitations and wanted a cake with the same theme. I thought “how hard could it be to make a treasure chest cake?” It was a lot of work but it turned out great and got tons of compliments!
The cake was made with 7″ x 11″ pans (it was 3 cakes stacked on top of each other). The back of the cake was a piece of cardboard which I decorated with icing. To get the cardboard to stick to the cake, I had to stick long wooden skewers through the cardboard and into the cake. Also, I put a lot of icing on the bottom of the cardboard to help it stick to the cake better as well.
The back of the cardboard can be decorated with pretty gold wrapping paper to cover where the skewers were stuck. The rest of the cake was pretty easy to decorate. I just used yellow icing for the top of the cake and chocolate on the rest.
I put M&Ms on top of the trunk because I wanted to put some gold coins and other pirate treasures on the cake and didn’t want it to stick to the icing. The M&Ms helped the other goodies not to stick to the icing and the kids loved eating them!!
I have one tip to give: After you decorate the cardboard piece with the icing and Happy Birthday writing…I’d advise you to not actually stick it to the cake until a few hours before the party. I made my son’s cake the night before his party and by the morning the icing had started to slide down. It wasn’t terrible but I did have to fix it up a bit.
The cake I used was just the standard chocolate cake recipe that you can find in any Betty Crocker cookbook. For the icing, I actually just bought the white and chocolate icing from the grocery store and colored the white icing yellow. I like the store icing because it tends to be more stiff and stays put.
This cake probably took me 2 hours to decorate. It also took a little more time to find the right piece of cardboard and the other goodies to go on top of the cake. However, it wasn’t that hard to do and my son completely loved the cake and so did everyone else! I’ll probably use this cake again someday for my younger son.
Hope you enjoy these treasure chest cake decorating ideas.
Treasure Chest cake decorating idea by Christina S., Cape Coral, Florida
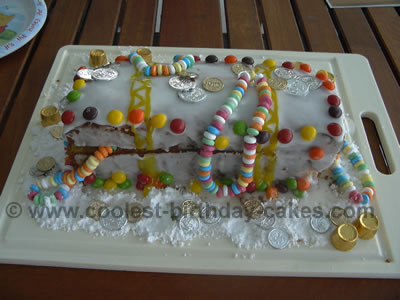
Ahoy Mateys,
Our cake was for a Pirate’s party. We got the treasure box cake idea from a magazine but I wanted to do a cake that is easy to prepare.
The treasure box cake is made from a regular cake mix (we took vanilla).
I used a pound cake baking pan and baked it for 45 minutes.
After cooling loosen the sides and remove the cake from the pan. Cut a lid with a sharp knife and fill the cake with candy necklaces. Add water in teaspoon amounts to powder sugar and cover the cake. The jewels are Skittles, furthermore I used yellow icing from a tube for the top. I found a package of coins for about $2 for 144 pieces (not eadable but a great decoration). Around the cake is powder sugar with coins and some golden-wrapped Rollo. The cake was a really big treasure.
Treasure Chest cake decorating idea by Mitzi H., Athens, GA
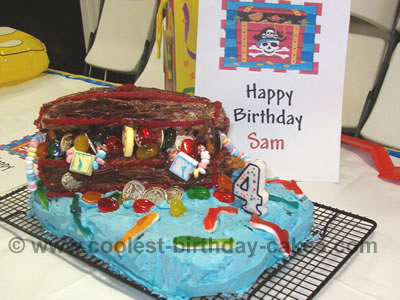
This was so much fun and one of the coolest cake decorating ideas. I got the idea from just looking at examples of pirate themed parties. I decided to use a loaf pan for the chest. I took a package (18.25 oz) of moist chocolate cake mix, added 1 cup of water, 1/3 cup of oil, and 3 eggs. This was my batter for the treasure chest. I poured the batter into a greased and floured loaf pan and baked for 50-60 min @ 350 degrees. I always like to cool my cakes in the fridge to avoid crumbles:-)
Once cooled (in pan) just pat until the cake releases. I cut top long ways leaving base about 1 3/4 inches high. I placed chest base on a platter and frosted. I used 2 cans of (16oz) creamy frosting. One was chocolate the other was vanilla with brown color gel (to make a lighter shade of brown). You probably could use one can of dark choc. and one can of light choc. to save time. I used two colors to create a wood grain affect. Once the base was frosted I put top of cake on and propped up the 2 front sides with large pretzel sticks (broken in half).
Once I frosted it I ran a fork through the frosting all over to try to master my wood grain affect. I then baked a yellow 9×13 sheet cake. Once cooled, I turned it over onto a foil covered cake board. Then I frosted with tinted vanilla icing (blue gel color) to look like an ocean. I carefully placed the chest on the cake and began to add goodies. (Tip: you may want to frost chest after placing on the sheet cake).
Some of my cake decorating ideas were to cut rope licorice for trim and then to add misc. candies to look like jewels and gold chocolate coins for treasure. I put gummy sharks all over the ocean around the chest. I had never done anything like this and I had great time and the cake was a huge hit with the kids and the parents. The kids gathered around and picked out what candies and cake they wanted. I had a very proud 4 yr old and I must say I was rather pleased myself.
Treasure Chest cake decorating idea by Vanessa W., Miami, FL
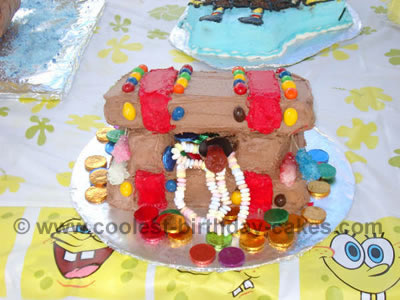
Recipe for this Treasure Chest cake:
1 baked 13- x 9- x 2-inch cake, 6 cups chocolate frosting – 1/2 cup red icing
Cake decorating ideas: Cake treasures, such as chocolate coins, Rolo candies, chocolate almond kisses or Necco Wafers, mini jawbreakers, candy jewels, such as candy necklaces and rock candy
Step 1: Cut a section approximately 2-inches wide in the center of the cake. The two remaining 5 1/2- x 9- x 2-inch rectangular pieces will form the bottom and top of the chest.
Step 2: Slice the 2-inch section on an angle to form two long triangular wedges. Place the wedges on the bottom half of the chest, about an inch apart. Both wedges should face the same direction (tall end toward the front of the cake) as they will support the top of the treasure chest and keep it propped open. Then frost the bottom half of cake, including the wedges.
Step 3: To add further support for the top of the chest, stand a few large gold coins under the lid.
Step 4: With the “hinged” end (left side of photo) at the back, place the top of the chest on the bottom and frost.
Step 5: Frost red leather straps around the chest with red icing and press mini jawbreaker “nails” into the frosting alongside the straps. Fill the chest and the surrounding area with edible treasures and jewels.
Treasure Chest cake decorating idea by Jennifer C., Phoenix, AZ
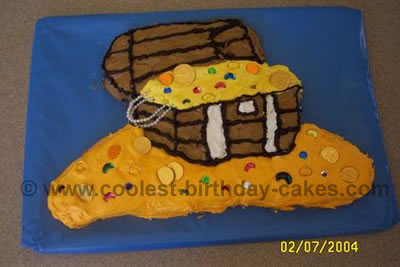
Once I had the idea for a treasure hunt theme party, I traced a picture of the treasure chest from one that was on a crayon box. I then took it to a copy store and had them blow it up as large as I wanted the cake to be. I then made 2 cakes that were baked in 9×13 Pyrex pans.
Once cooled I took the cakes out of the pans and placed them on top of a board that was covered with coordinating wrapping paper. Once both cakes were on, I placed the blown up drawing on top and began to cut all around the cake. Once the cake was cut to size I put the extra pieces aside for people to nibble on. I then started to cut my template little by little, frosting everything color by color, like a paint by number. I used more frosting when I had variances in the height of the cakes. The black was put on using a frosting can that you buy at the grocery store. The jewels, etc were all from a craft store.
Treasure Chest cake decorating idea by Amy G., Juneau, Alaska
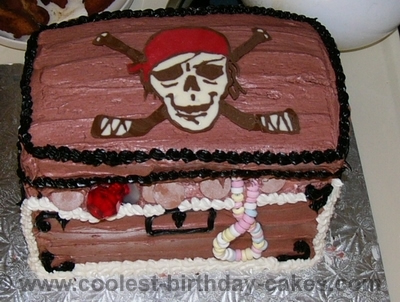
This cake was actually made for a hockey banquet. My co-ed team’s name was the Ice Pirates and I baked this using a very large square pan. I then cut it so that I could get 4 squares stacked to form the bottom part of the chest and the lid.
I used homemade whipped cream and a half box of chocolate pudding mixed with that for the filling. I then iced the entire thing with chocolate buttercream. I used a spatula to make the plank-like marks on the buttercream. I then took the last remaining square and using a piece of cardboard cut to the same size to make the lid of the box. I propped it open with candy necklaces, nekko wafers, and jewel ring pops to look like treasure.
The logo on the top was actually our team logo. I did a chocolate transfer using Wilton white chocolate wafers colored. Using wax paper and the logo underneath the paper, outline and then fill in your image. Place in the freezer and let firm up. Then take it out and immediately place it on the cake and pull the paper off. (Remember to do it in reverse as it will be the underside that shows.)
I did some shells around the outside of the chest for additional details. It was a huge hit at the banquet and people thought it was one of the coolest cake decorating ideas.
Treasure Chest cake decorating idea by Heather J., Lecanto, FL
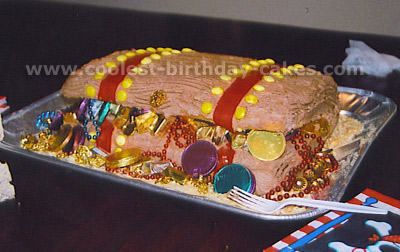
My son was having a pirate party for his 3rd birthday and I got cake decorating ideas from several different cakes to come up with this treasure chest. I baked 1 chocolate and 1 yellow cake from a cake mix in a 9×13 pan (I add a package of instant pudding to a cake mix to make it more dense and moist). I then froze the cakes overnight to make them easier to cut.
I placed one cake on the tray and frosted it using chocolate buttercream frosting. I cut a wedge out of the 2nd cake to make it look like the lid is open. On the bottom cake I placed the treasure (Hershey nuggets, chocolate & bubble gum coins & beads) on the front half of it and then laid the 2nd cake on top so the back of it was supported by the bottom cake and the front was supported by the treasure.
I frosted the rest and ran a fork through to make wood grain. The straps are made with strips of fruit by the foot and yellow M&Ms studs. I crushed graham crackers to put sand around the tray and added a few more pieces of treasure. I hope these cake decorating ideas helped you!
Treasure Chest cake decorating idea by Karen D., Gold Coast, Australia
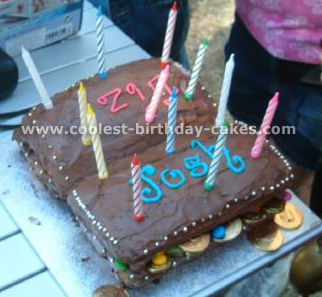
Read Karen’s “Party-Tale”: The story behind the cake…
Treasure Chest cake decorating idea by Erica G, Amherst, NY
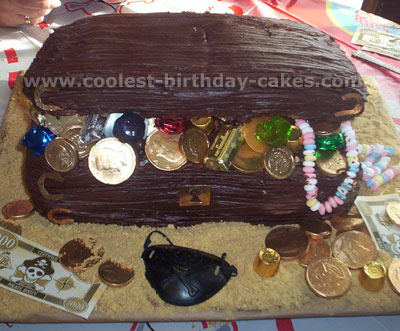
My son and I both love pirates and candy, so we decided on a pirate theme for his birthday. The treasure chest cake was the first thing that came to my mind. I remember seeing it in a magazine some time ago and it just looked so yummy and so much fun to bake.
I was having a large amount of people over so I wanted the cake to be big enough for all of us. I used store-bought cake mix and a 13 x 9 x 2 pan. I used 3 boxes of cake mix, made the cakes ahead of time and then froze them.
When it came time to frost, I simply frosted the 2 bottom cakes and stacked them on top of each other. I used milk chocolate and dark chocolate frosting to look like wood grain. I think I used about 3 cans of frosting.
Then I inserted unwrapped Hershey’s miniatures into the top of the second cake in order to prop open /support the third layer. Once I placed the third layer on, I frosted it and then inserted candy into the opening. I used candy coins, Rolos, Hershey miniatures, ring pops, and such. Then I took a fork and ran it over the frosting for a wood effect. I used some of the gold wrapper from the candy coins to cut out a keyhole and some gold accents for the corners.
Once I had the cake finished, I placed it on my cake board, and then sprinkled crushed graham crackers all around. I also used some pirate novelties. Everyone loved this cake and I will probably do it again sometime. I hope you enjoy my cake decorating ideas!
Treasure Chest cake decorating idea by Kristy B., Kelowna
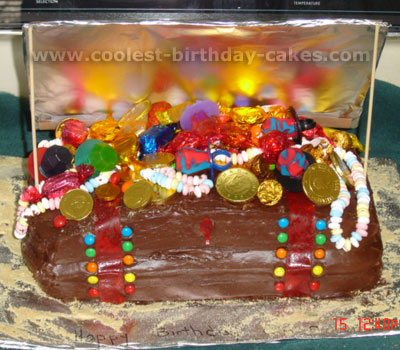
The cake is very simple to make. It is made of two 9×13 cakes frosted. Candy is placed on top to look like treasure spilling out. The top is made from a sheet of cardboard covered with foil (for the shiny inside) then a piece of brown construction paper on top.
It is propped open with 2 skewers. I used fruit by the fruit strips for the lines down and used small candies down each side for the rivets in the “treasure chest”. The keyhole is cut from fruit by the foot as well. I filled it with candies such as candy necklaces, ring pops, chocolate coins.
I had it sitting on a large piece of cardboard covered with foil. After the cake was frosted and completed, I sprinkled graham crumbs as “sand”. It was a huge hit at the party.
