This great collection of Castle cake ideas and designs is sure to provide you with inspiration as you set off to create the coolest Castle cake ever. Good luck!
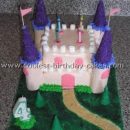
Simple Castle Cake for my Birthday Girl
Castle cake submitted by Jody B.
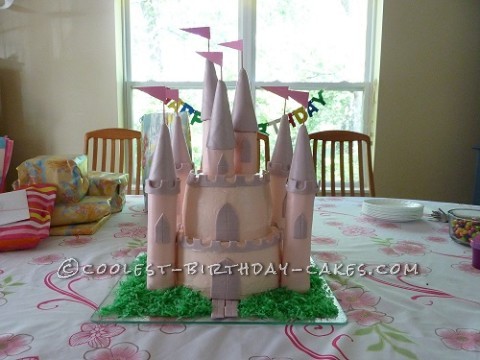
First of all, you need to know that I am a beginner when it comes to cake decorating. I’ve just started making birthday cakes since my sweet children came into my life. I really wanted to try a castle cake for my little girl.
For me the most daunting part of the whole thing was how to make the towers. I have avoided fondant up until now because it tastes terrible in my humble opinion. However, it was time to give it a try. I started off by experimenting with a simple marshmallow fondant and surprisingly it didn’t taste too bad. My girls loved playing with it and eating the leftovers. I used some Easter marshmallows that were already pink and purple colored.
Next, I made the towers by rolling the fondant out thick (just under a ¼ inch) and wrapping it around PVC pipes cut into different lengths. (I had covered the PVC in plastic wrap and a bit of Crisco to keep things from sticking). I let the towers dry standing up for a day and then removed the PVC and let the insides dry out. On the second day I also inserted toothpicks into the sides of the towers where they would be attached to the cake. The towers dried for three days and were still soft enough to trim the bottoms and tops to level them.
The day before the party, I made another batch of fondant. For the rooftops, I covered ice cream cones in fondant. I made toothpick sized holes in the top of the cones for the flags before covering them in fondant. I then used a knife to cut out fondant shapes for the doors, windows, and the edging for top of the walls. These I dried overnight.
For the cake I made two 8 inch and two 6 inch strawberry cakes, stacked, and frosted them with cream cheese frosting tinted pink to match the towers. I applied some corn syrup with a small paint brush to glue the cones to the top of the towers and to stick the windows and edging on the towers. The fondant pieces stuck to the cake frosting without any additional help.
I positioned the towers around the side of the cake, pressed in the toothpicks and they held just fine. I used some wooden skewers to keep the three towers on top of the cake. Then, I colored some coconut green and sprinkled it around the castle for grass.
My castle cake turned out well enough, although with more practice I hope to learn how to make the fondant smoother and do more with it. It was a fun project and my birthday girl loved it.
Medieval Fantasy Castle Cake
Castle cake submitted by Jennifer Z.
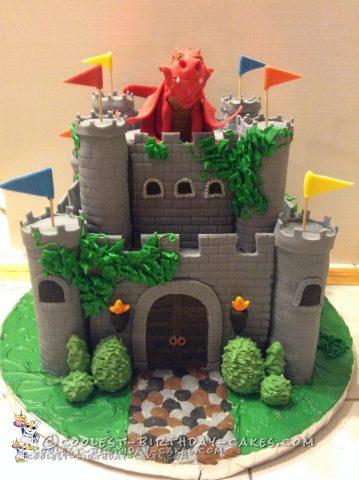
I am exhibiting this medieval fantasy castle cake at an upcoming fair. I picked this design because I thought it would be simple and easy. It was simple, but it was far from easy.
They say nothing worth having comes without hard work. Let me tell you, this cake drove that point home for me like nothing else! There were quite a few challenges along the way.
- I wanted the walls to look textured and realistic, so I ordered a brick impression mat online, but my biggest problem was getting the walls to stand up. Not sure how many of you have been to New York, but in the summer, the humidity is ridiculous!
- I knew my fondant walls would sag if I didn’t dry them out properly, so I did my homework and discovered Tylose powder (aka my new best friend for stabilizing fondant). It worked like a charm. I added it to my fondant, cut out the walls, textured them, and they were dry enough to use the next day. Needless to say, whoever invented Tylose should be rich.
- After I had solved that problem, I was faced with the daunting task of making the turrets. At the fair I am exhibiting at the guidelines say that everything has to be edible. Therein was my problem, No food is shaped like a turret.
- I gave it some thought, and finally settled on Rice Krispy treats. I squished them together, molded them inside a piece of plastic tubing, and stuck them in the refrigerator.
- Later, I covered them in white chocolate to fill in any cracks and holes in the Rice Krispy treats, and shaved off the excess so I was left with a near perfectly round turrets. I later covered those with textured fondant as well.
- Then, it was just a matter of putting everything together.
- I had baked a cake for the base of each tier, and when I placed the walls and turrets on, lo and behold, my castle appeared.
- Once my base was done, the fun part began. I loved adding all the little details that really make a cake come to life.
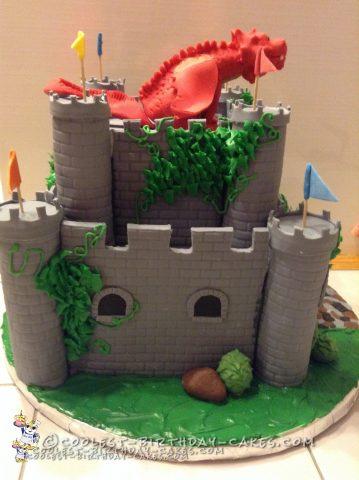
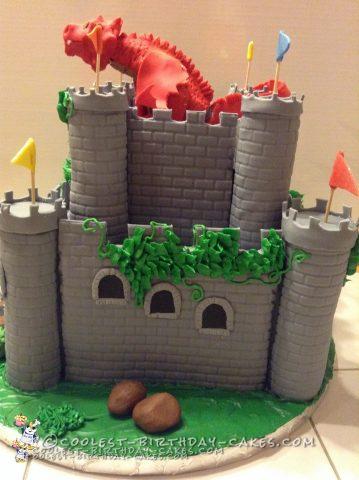
- I added the windows, a door, shrubbery, flags, and topped it all off with a dragon I sculpted out of fondant (which is a story in itself).
All in all, I was very happy with the way my cake came out; however, it was way harder than I expected. So if you’re up for a real challenge, try a castle cake for your next cake making and decorating project! :)
Princess Castle Rainbow Cake
Castle cake submitted by Anne-Marie J.
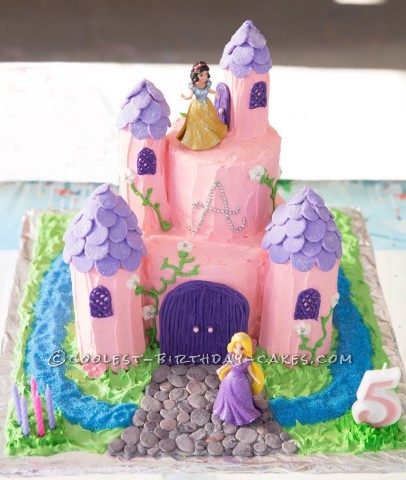
My daughter requested a castle cake for her 5th birthday. She was very specific in her desire – it had to have pink walls, a purple roof, and be rainbow cake inside. Nothing like setting mummy a challenge!
All the details
After determining the size of the cake by the dolls I was using, and what tins I had available for use, I made all the building details ahead of time. I drew everything beforehand, making sure my sketches were proportional to the cake, and also designing my decorations and colour theme for every element. For my very first time using fondant, I made individual purple roof tiles and marbled grey/black/brown to make pebbles for the path. I used blue food colouring to colour sugar for the moat. I very slowly and carefully coloured white chocolate purple (using Americolor gell paste Royal Purple) and piped windows and doors on baking paper to set.
The rainbow cakes
I made many small and normal sized (20cm) round cakes for use on the 2 main castle stories. To make the rainbow cakes, I mixed Betty Crocker vanilla cake as per packet instructions, then divided the mix into small bowls which were coloured with Americolor gell paste. Then I spooned in to an oiled and lined tin, building up the colours, and baked as normal. I chose to cut circles out of round cakes to layer and make the larger towers. I used small jam sponge rolls for the smaller towers.
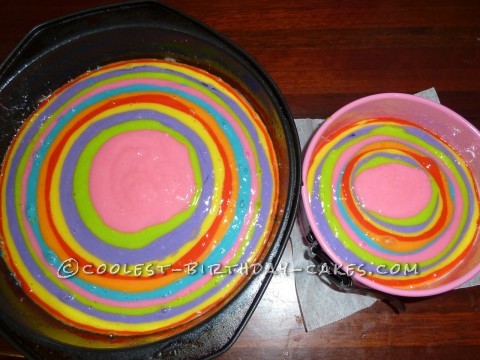
Decorating
I layered the cakes together with icing, and used thin dowel rods covered in alfoil to secure down through the towers and main cakes. I trimmed the tower cakes in to a point I was happy with. After a crumb coat, I covered the whole cake with white chocolate buttercream icing coloured with Americolor gel paste. I then placed the roof tiles on, the windows and the doors. Following my design sketches, I piped on vines and used premade sugar flowers as their blooms. I made my daughters initial \”A\” out of silver cashous. I iced the grass on, pouring the blue sugar as a moat. Then I iced the path grey and then placed the pebbles on top. Final touches on the day meant covering the roof tiles and path with opalescent edible shimmer and adding the dolls.
Is it the cake she dreamed of?
Upon revealing the cake to my daughter she was gobsmacked. She squealed and jumped up and down. It was exactly what she hoped for, and she was stoked to see Snow White and Rapunzel dolls on it, as she wished for them for her birthday.
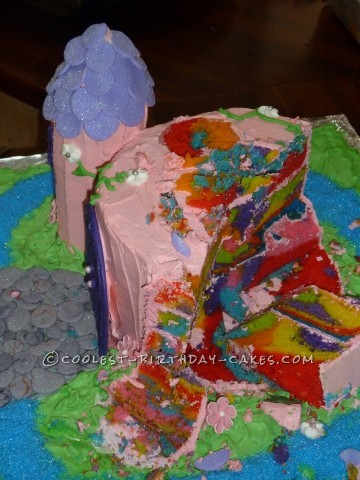
The party guests were all “oohing” and “aahhhing”, saying how I could never top making a cake like this. Keeping the rainbow part a secret, my daughter got a real thrill from cutting the cake and revealing the rainbow inside. Wow! was the general reaction! It tasted wonderful too. It was a lot of cake, but that meant we had leftovers for my daughter to enjoy the next day. I was incredibly proud of this cake. I have never done any cake decorating courses, just follow my instincts.
Personally, I don’t like children’s cakes being completely covered in fondant, so it’s always a goal for me to use soft icing, ready to make sticky fingers and icky faces. I think the memories of devouring birthday cakes as a child, should be full of sticky, gooey deliciousness. After all, kids enjoy getting messy!
Castle Cake for a Little Princess
Castle cake submitted by Mary
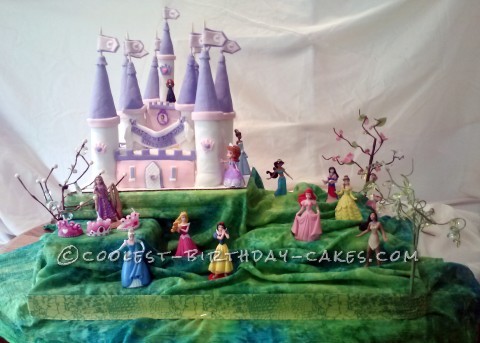
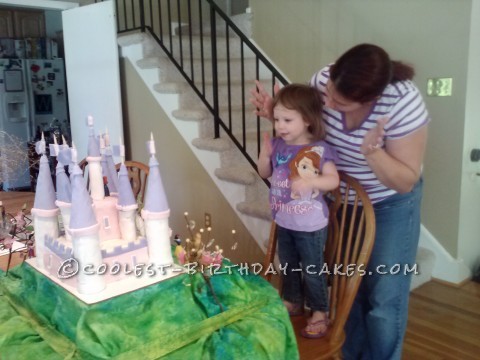
This castle cake is probably one of the most complex cakes I’ve made so far, and as always, it was a learning process, with some things that worked well, and others that needed to be done a little differently for future cakes! Overall, I was really pleased with how it turned out.
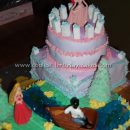
My granddaughter wanted “a princess cake” for her third birthday. Her favorite princesses are Sophia and Rapunzel (from Tangled), but I decided to include a few others too, so I raided Ebay and ended up with the full range of Disney princesses–a round dozen in all! Obviously, they weren’t all going to fit on one cake, so I made the castle as the cake, and arranged the others on a “hill,” coming to the party.
The main level of the castle was made of two 8″ square layers of moist yellow cake with heart-shaped sprinkles, sandwiched together with butter cream and apricot jam. The upper level was a “fake cake”–a small cardboard box covered with fondant icing. Altogether, there were nine round towers.
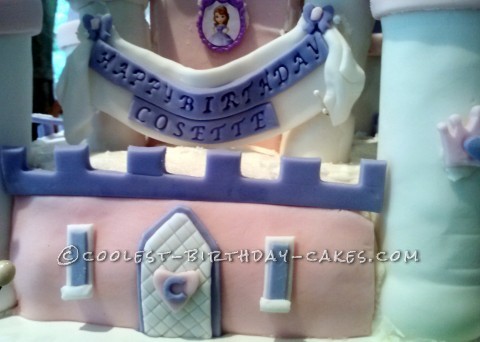
The lowest (and largest) four were cardboard tubes with fondant wrapped round them, while the upper five were formed from rice krispy treats with a skewer through the center. (The rice krispy molding was something new I tried out for the first time–I haven’t got it quite right yet, but I think with some practice it will be a useful technique.) Each tower was topped with a sugar cone “roof” and a flag with the letter C for Princess Cosette. I covered the cake with butter cream, then used rolled fondant for the walls, battlements, windows, and door. In the middle was a birthday banner, formed from fondant with lettering stamped out using a set of letter stamps intended for sculpey clay.
Assembling the cake was rather hair-raising–I ended up using some hidden toothpicks to “pin” it all together. Then I built up a multilevel “hill” to serve as a base, using various boxes, some fabric and ribbon, and three floral picks with plastic jewels for trees. My grandson and I distributed the princesses appropriately, then breathed a sigh of relief, and hoped it would all stay together till the party! (It did!)
It was worth all the effort–our little princess was overcome with delight when she saw it! And she even got to take all the princesses home with her!
Pretty Princess Castle Cake
Castle cake submitted by Teri H.
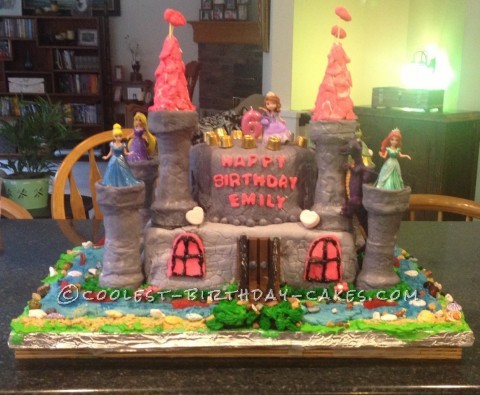
I started out on this castle cake with only having made three previous cakes and only one of them fondant. So why might you ask did I attempt such an undertaking? Several answers come to mind with the first one being, why not? It’s a cake. Even if the decorating goes horribly wrong it is still tasty!! Another, compelling reason for my undertaking is the person for whom the cake was being created wanted it really badly and had all the confidence in the world that Mommy would come through for her.
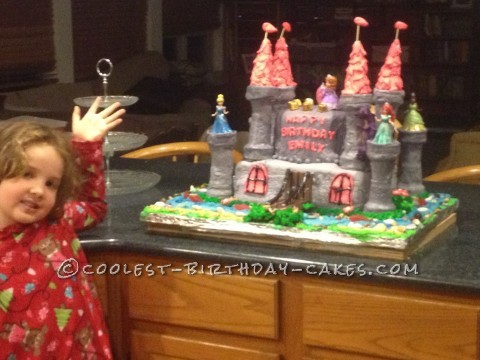
My daughter drew a picture of her cake that she wanted Mommy to make and she was so proud of her design and so excited for Mommy to create it that I just had to. This is the same little girl who in her words would rather go visit ” Carlo’s Bakery” than go to Disneyland so I also knew my audience was tough so I better do my best! Thirdly, my beloved grandma made special cakes for us. I remember them being magical and I particularly remember a castle cake and being amazed. I wanted nothing more than to pass that magic on to my daughter.
To start off I sketched the cake again and ran ideas by my daughter. I also Googled images of castle cakes and perused coolestbirthdaycakes.com for ideas. I came up with a plan based on many different ideas.
So I decided:
It would be made with homemade marshmallow fondant, box cake, cereal treats, homemade icing, ice cream cones, cookies and Kit Kat for the moat and lots of candy rocks!
I also decided to include toy princesses and a toy dragon. I think its great fun for the birthday child to be able to play with their cake when its all eaten!
After deciding on the basics I devised a plan:
Then I devised a Three day schedule: Three days before the party I baked the cake which was two layers done in a half sheet pan it took 5 boxes of cake mix for the first rectangular layer and two boxes for the second made out of 8″ rounds.
Two days before the party I made the fondant by melting and combining bags of marshmallows, confectioners sugar, water and color gel. I made grey for the castle and pink for the turrets. And left a batch white to be colored later as needed or kneaded. I know bad pun.
One day before the party I started bright and early coffee in hand and set out to finish the cake. First, I dirty iced stacked and covered the layers in fondant as well as covering the board with piped grass and fondant flowers. FYI I do not own any fondant cutting tools besides letters so the flowers I made up by trial and error but they seem to work nicely my friend thought I bought them!
After covering the main part of the cake it was time to tackle the towers and that was difficult!! First off cereal treats and fondant are trickier to work with than it looks on Cake Boss! I quickly abandoned that plan and went with two cake cones stuck together and covered in fondant. I however had not made enough grey fondant and let me tell you it is very difficult at least for me to match the color of already made grey and kneading black gel into the white fondant but it all seemed to work out after lots of working in of the color gel. After the towers were done I made blue frosting for the most and used Oreos, Kit Kats and licorice to make the drawbridge and castle door.
Then, I added details like the princess toys, A sneaky dragon, gummy fish for the moat and I learned that writing icing does not stick well to fondant so I scraped off the runny icing and tried again to make windows this time using more fondant. The best part for me was hand making the fondant flowers and adding all of the details to the cake. Including the candy rocks!
At this point my back was in spasm and I was exhausted. I was all done, my little birthday girl came skipping in the room ( a friend watched my kiddos all day for me while I did this… babysitting was a necessary ingredient) and she gasped then she said she never wanted to stop looking at her cake and that she was proud of me. With a melted heart I went to bed and slept well!
The day of the party everybody thoroughly enjoyed the looking at and eating the cake! Someone even commented, “Holy Princess Castle Cake Batman!” Now, I have four months until my youngest daughter’s birthday to recover!
Three Tier Castle Birthday Cake
Castle cake submitted by Nicole L. D
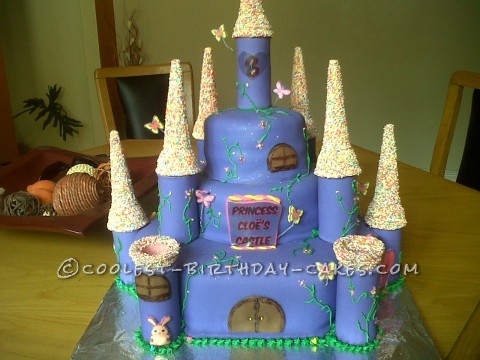
I have made a few cakes before, but I truly enjoyed this one! This three tier castle birthday cake was so much fun to make but like with any cake, there are always difficulties and also discovery of new techniques.
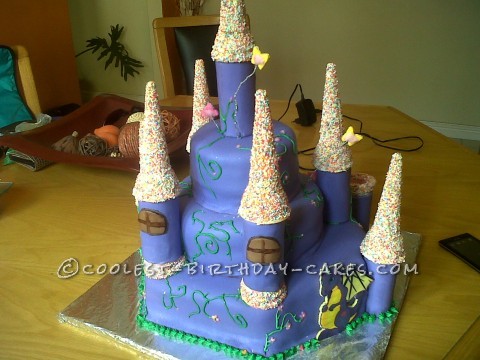
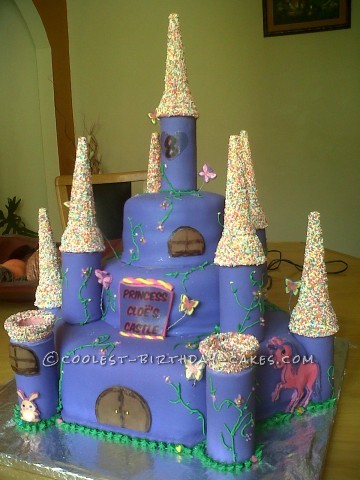
For this cake I used a simple vanilla sponge cake and filled with caramel and chocolate (this was awesome, it tasted like those chocolate eclair sweets). I made the bottom tier a hexagon which allowed the towers to fix perfectly with the top two tiers round.
When covering the cake, I used plastic icing which I bought at my local confectionery store. This icing is similar to a fondant and just gives more of a professional look. When using this type of icing, a textures rolling pin or other similar tools can be used to give different effects to the cake. Just remember not to over knead because this can cause a dry effect and cause cracking when applied. Also, do not roll it out to thin. The thicker it is, the easier it is to work with and the smoother the cake will appear. Allow each tier to set and harden slightly before stacking the tiers. Another thing I love about using this icing is that when it is rolled out, using the palm of your hand gently rubbing the icing causes a beautiful light shine.
For the towers of the cake I used cardboard tubes of a toilet roll. This got a few laughs from the family but it worked beautifully! For the top of the towers, I brushed ice-cream cones in soft icing sugar and rolled it in 100s and 1000s. I also filled the towers with smarties and jelly tots which was a nice surprise.
The butterflies and other pictures, I printed on edible paper and placed on a thin sheet of plastic icing, cut it out and placed where desired. The butterflies I attached with thin wire found in any hardware store. The vines I piped on using a simple round piping tool. Piping some grass using a star tool also gives a very nice added effect.
Remember, if you love what you doing, it will always be beautiful.
Enjoy…
Princess Castle Cake
Castle cake submitted by Ayanna J.
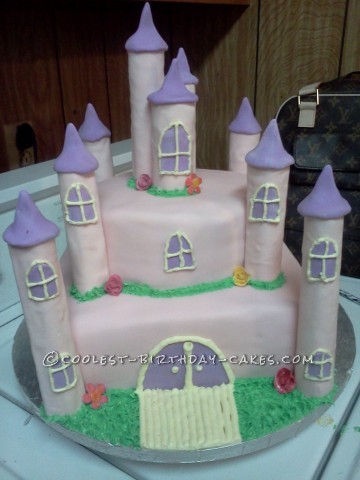
I’ve always wanted to make a cake like this princess castle cake, and I’ve always known this would be the ultimate cake for my little sister, BUT…I was too scared to attempt it. My sister who is 25, still thinks she’s a princess and loves pink, I mean she seriously loves pink, lol. So when I decided to finally to this cake for her 25th birthday, I knew I was in for a thrill.
To make matters worse I am a perfectionist…who always strives for perfection only to overdue it and mess it up. So for this cake I planned everything, I had it all drawn out and all my supplies ready to go. The funny thing is this cake actually went rather smoothly! I had SO much fun making this cake, I loved being able to see it come together as I finished each part.
The response to this cake was amazing, everyone loved it, and it made me feel great. I underestimated myself! I’m so glad I made this castle cake and I know it isn’t perfect, so I cannot wait to make more because you know what they say…Practice makes perfect!

Castle Cake for a Princess
Castle cake submitted by Shaz B.
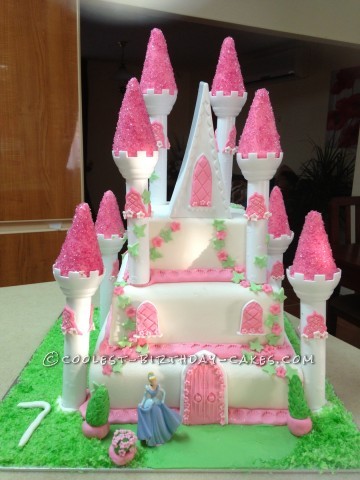
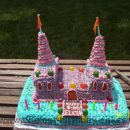
I covered the 3 layers of cake then started preparing the steeples which were covered in pink icing and dipped in pink sugar. After placing the cakes on top of each other, I worked covering the borders. The windows and doors went in next before doing the climbing vines and assembling the steeples.
The grass is green coconut which covered the castle grounds. No point having greenery if there is not going to be flowers and trees ! A heart shaped door mat complimented the entrance where Cinderella waits outside for her Prince. Finally some glitter on the entire cake to make it dazzle and wow the kids and grown up kids( adults).
Princess Castle Birthday Cake
Castle cake submitted by Julia
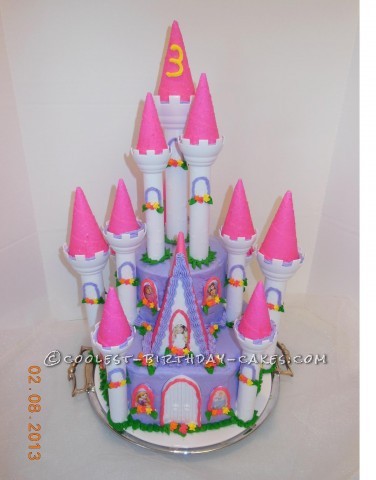
I made this princess castle birthday cake for our 3 year old Allison’s birthday party. It consists of a 6 inch double layer fudge marble cake filled with chocolate fudge butter cream filling and a 10 inch fudge marble cake filled with chocolate fudge filling and then iced with purple butter cream frosting. I purchased the Wilton Castle Cake set and Disney Princess stickers for the windows and doors.
I iced the turrets pink using cut out cookie icing so it was smooth and then sprinkled them with pink sugar to make them sparkle. The rest of the flowers and details were done with rose, purple, orange and green butter cream decorating frosting and star, leave tips. I also put white netting around the bottom to look like a cloud. The big window above the front door also has a photo of Allison that printed and covered with contact paper.
Enchanted 3rd Birthday Castle Cake
Castle cake submitted by Iain T.
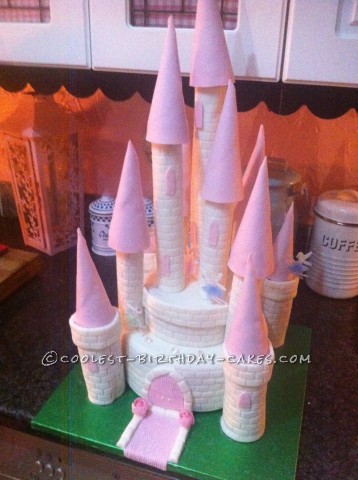
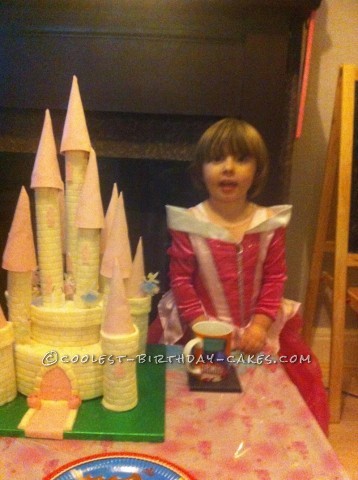
It was my daughter’s 3rd birthday on 1st December so I thought I’d make her a cake. She’s been obsessed with princesses for the past few months so I didn’t really have a choice. I looked at other cakes online for a few days and tried to steal the best ideas for my daughter’s enchanted 3rd birthday castle cake .
I wanted it to look good so I brought all the best ingredients and had to buy most of the equipment too. Final cost was about £100. The cake was quite big and I have an extremely clumsy wife so I made it at my mum’s house (thank you mum).
It is made of two round cakes, simple sponge recipe, the bottom was cream soda flavored sponge with vanilla butter cream and the top was lemon sponge with lemon butter cream The top towers are made from the tubes you get in the middle of wrapping paper and iced with some iced ice cream cones on top. The bottom towers are iced Swiss rolls.
I finished it off with some edible glitter brushed all over, some cute fairies stuck on cocktail sticks and some edible diamonds. It took me about 5 days to make a few hours each day finishing it off with an all-nighter! I did plan on putting flowers and ivy all over it but my back was hurting and I didn’t want to ruin it!
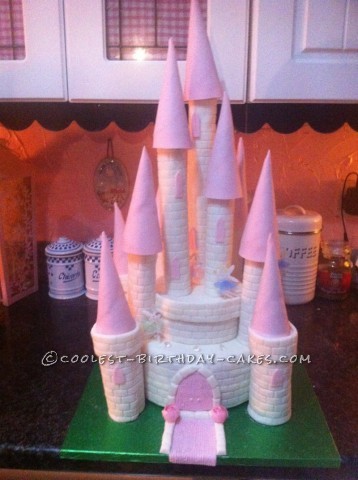
Hogwarts Ice Cream Cone Castle Cake
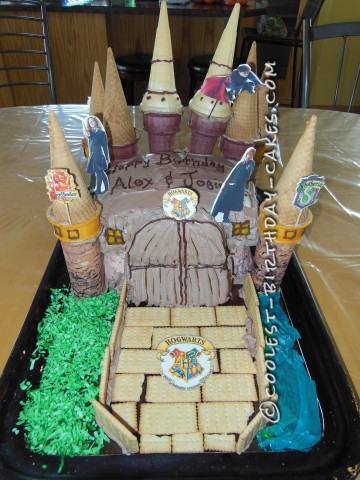
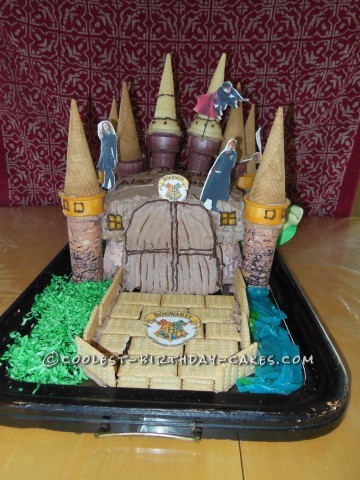
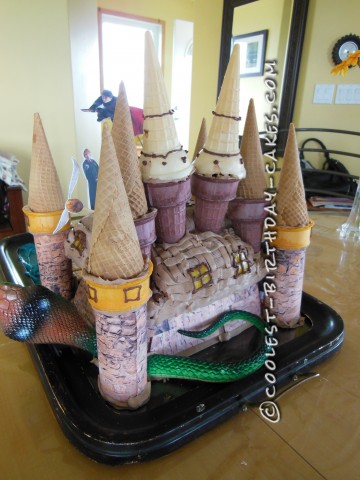
This Hogwarts Ice Cream cone cake was made for my twins’ 9th birthday. I was inspired by cakes on this site, but once I got going, it became an original creation. This Hogwarts cake required very little skill, just props and an internet connection.
As you can see, much of the cake it not cake at all — it’s different varieties of ice cream cones. I bought sugar waffle cones, chocolate cones, flat bottom cones and narrow pointy cones. I also used many props. The towers are toilet paper tubes covered in a brick pattern I found on-line. Just searched for “brick wall” photo and copied it onto a Microsoft word doc and printed up. I also used that pattern to line the bottom layer of the castle — it’s a square Pyrex covered in the brick pattern.
On top of the Pyrex went the cake. It’s a 9 x 11 sheet cake in two layers. But the back end I trimmed and then stacked up those ends to make the giant door. When I “glued” the cones onto it, you can’t tell it’s a bit shorter in the back.
I printed up photos of the characters and the school crests — the girls helped cut them out and glue them to toothpicks. Then it was fruit roll-ups for the sea and windows, dyed coconut for the forest grasses, and a plastic snake (cut in pieces) to become the scary Basilisk who lives in the plumbing.
Hogwarts Castle received many ooohhhhs and ahhhhhs at the party, and was gobbled up in one sitting. A scoop of ice cream and a cone for each child. I was mother magician to my Harry Potter fans.
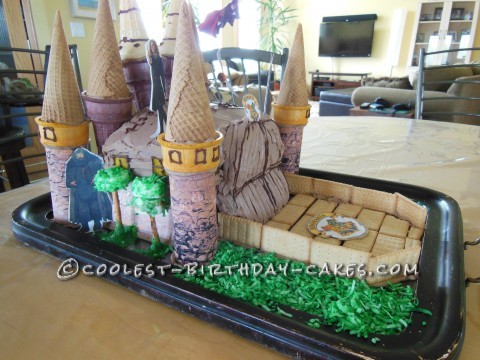
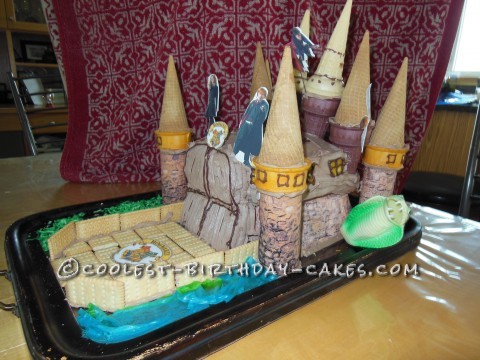
Princess Castle Birthday Cake
Castle cake submitted by Dana L.
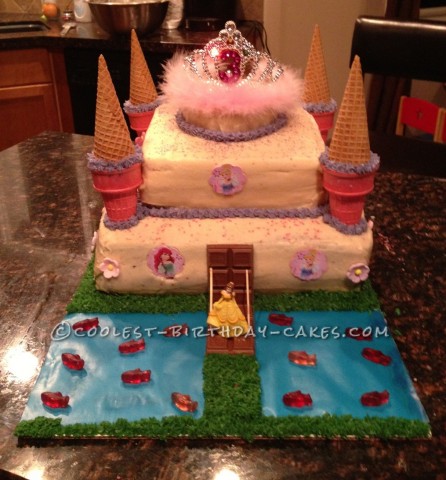
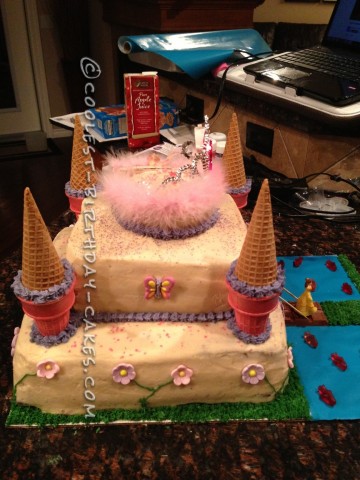
My daughter wanted a princess castle birthday cake so I decided to try and do a castle cake. I baked 3 12×12 chocolate cakes and 3 8×8 vanilla cakes and a small round vanilla cake and froze them over night which helps make them moister. Once the cakes were almost thawed I torted them to ensure they were level and then filled them (a layer of icing between each cake). I stacked the 3 12×12 cakes and then crumb coated and iced them and then used four wooden dowels to keep cake level. Then I torted, filled and stacked the 3 8×8 inch cakes and the small round cake and crumb coated and iced them as well. I placed a dowel through the center of the cakes once they were all stacked to help keep them stable.
Right after icing the cakes I sprinkled them with pink and purple cake sparkles. I used purple icing to do icing rosettes along the cake seams. Then I placed colored ice cream cones on the cakes for the towers, putting icing along the inside edge as glue and then placed a sugar cone upside down inside each ice cream cone. I had planned on coating the cones with melted white chocolate but ran out of time.
Next I used edible flowers and butterflies to decorate the cake and used green icing to pipe the vines. I had the tray on a cake board and used green icing to do the grass and blue wrapping paper for the water. I used a chocolate bar for the castle door and drawbridge and toothpicks for the bridge chain. For the fish in the water I used organic Sharkies. The tiara on top of the cake actually lights up and flashes around the number 3. The princess pictures came with cupcake decorations and I just bent the bottom cardboard that was meant to go into the cupcake and pushed it into the cake as a window.
This was the first big cake I’ve made that hasn’t been decorated with icing rosettes and I had a lot of fun doing it. It did help a lot to have the icing and cake ready a few days in advance so the night before the party I just had to focus on the decorating.
Pretty Pink Castle Cake
Castle cake submitted by Mariana l.
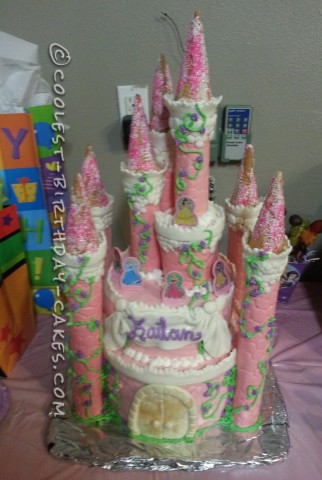
This cake was for my nice Kaileen…it was a challenge to make it because it is my first castle cake but I think it is good. She wanted a big castle. She cried almost for a week to make me make it. Finally I decided to make it and she was so happy with the result. I made it with ice cream cones and rice krispies towers!!
For even more Castle cake ideas check out our main Castle cakes section…

this is an awesome cake do u remember how long it took u? any tips???
this is an awesome cake do u remember how long it took u? any tips???