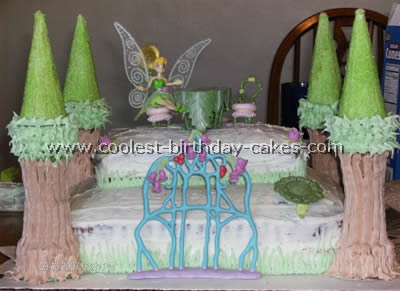
I made this Tinkerbell cake for my boyfriend’s niece’s 4th birthday party. She really likes Tinkerbell and princesses so I decided to make a Tinkerbell cake! Since Tinkerbell is sort of a woodsy pixie I thought it would be cool to make the towers into trees. I added grass around the top part and bottom. I got the idea for the castle from this website so thanks a bunch!
It was just two 9×13 cakes and one loaf cake. The towers are cake cones and sugar cones on the top which I rolled in colored sugar sprinkles. At the party they decided to use the towers to put the ice cream in. The cake topper and decorations was a toy that I had purchased. So when the cake was done she had a new toy!
More Tinkerbell Cakes
Cake by Shannon K., Virginia Beach, VA
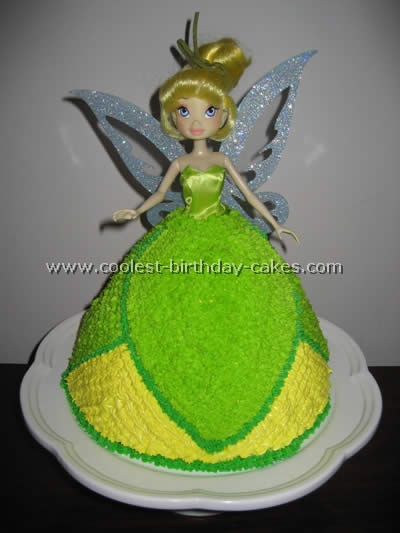
My daughter Lauren chose fairy cakes and a fairy theme for her 3rd Birthday. I found this Tinkerbell doll at the Disney Store and it was the perfect size for the Wilton Classic Wonder Mold pan. I followed the baking directions that Wilton gave; however you really do need two 2-layer box cake box mixes.
I used the Wilton Cake Release spray generously on the pan and it worked beautifully! I baked at 350 for way more than an hour…I kept adding 5-10 minutes until the knife came out clean. I found it very helpful to bake the cake the night before and then decorate it the next day.
You will need to even-off the bottom of the “dress” by cutting off excess cake. I wrapped Tinkerbell in saran wrap from the waist down before placing her in the hole I cut out for her in the cake. I used Wilton’s Buttercream Icing Recipe yielding three cups…and I just barely made it! I first did a crumb coat of yellow. I then outlined the leaves of the skirt and around the bottom of the dress in a darker green and filled in the skirt with a lighter green to match Tinkerbell’s bodice. Then I finished off with the yellow. I used Open Star Tips #17 & #18.
This was the first time I used this mold and decorated with a Star Tip, and it was easier than I thought! Tinkerbell was a huge hit and the cake even tasted great!
Tinkerbell cake by Stephanie L., Walnut Creek, CA
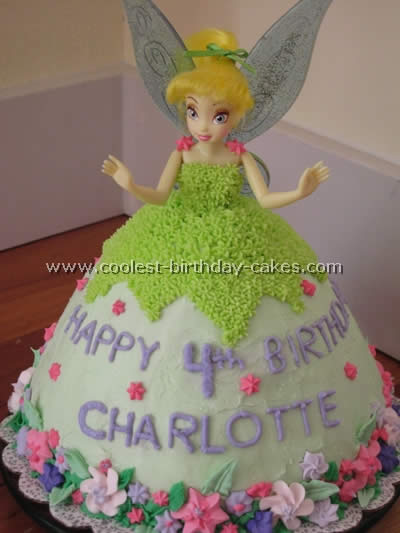
I used the Wilton Wonder Mold to make the Tinkerbell cake. I made the flowers with royal icing using various drop flower tips. The rest is butter cream. Tips: #16: dress #67: leaf border #3 writing. The doll is a Disney Tinkerbell doll from Target.
Cake by Karen R., Sterling, VA
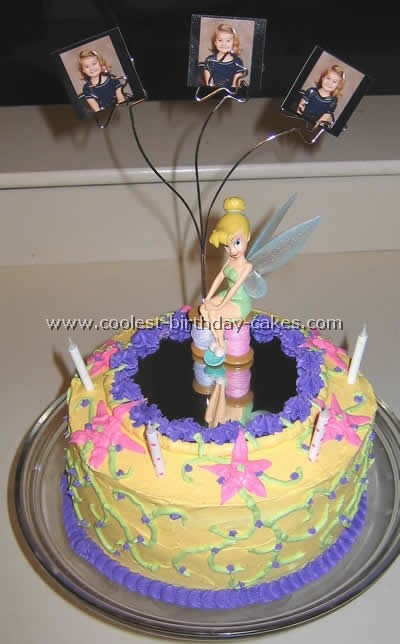
This Tinkerbell cake is a simple two layer round birthday cake but the neat part was the cake topper. I wanted something that my daughter could keep that wasn’t plastic so I found this photo holder on EBay. It had a small base which made it was easy to tip over so I put a small round mirror on the top of the cake and frosted around it to cover the edges.
The photo holder sat perfectly on the mirror. I put my daughter’s photo in the holder and that personalized it since I had no room for her name. Of course when you go to take the mirror off all of the icing that was on the top sticks to the mirror and not the cake but I sliced it in the kitchen and brought it back out on plates. I added a bit of the extra frosting to some of the pieces and the kids never knew the difference.
Tinkerbell cake by Christipher P., McAllen, TX
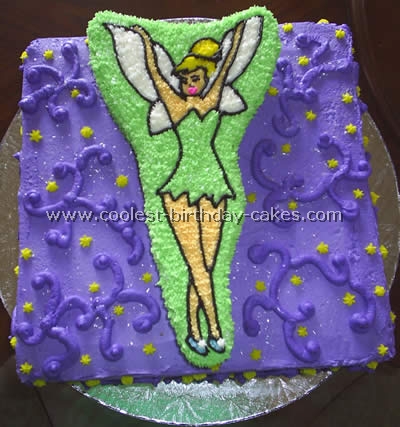
My cousin was having a Tinkerball party for her daughter’s 4th birthday. Seeing as she was Tink for Halloween, she was going to wear the costume at the party. In designing the Tinkerbell cake I wanted Tink to pop out at you so this is what I did.
First I went online and found the perfect Tinkerbell model and from a small print out I hand drew her onto a sheet of legal paper. I then outlined it with a sharpie and made a copy of it. I baked three 12in square pans, each 2″ high. I stacked two layers of cake with strawberry filling in between as my base of cake and frosted it with a gorgeous lavender shade of butter cream.
On the third layer I used my drawing I cut out of Tinkerbell and placed it on top of the cake. With a sharp serrated knife I cut the shape of Tink out of the third layer. Next I gave her a light but thorough crumb coating and allowed it to crust over. Tink had so much detail work that I didn’t want to chance and mess her up so what I did was I essentially mutilated her and cut off different parts of the body from the drawing and traced them with a toothpick to get the proportions right.
Then with black icing I went over the markings and outlined her. From there it was simple. I piped her with a star tip (use a small-med size star tip due to the small spaces) After I filled her in completely I piped all around her with lime green frosting and finished her off with clear cake sparkles to give her fairy dust.
After placing her on the Tinkerbell cake I got the remaining lavender frosting and piped a bead boarder and decorated the base of the cake with scroll work and yellow stars; adding more fairy dust all over.
All in all it took me over 14 hrs from start to finish, nine of those 14 was spent decorating it; but it was all worth it when I arrived at the party everyone was impressed, shocked and in awe. People from neighboring tables came over and asked where we had gotten the cake and then asked for my number.
Tinkerbell cake by Kristina D., Rochester, MN
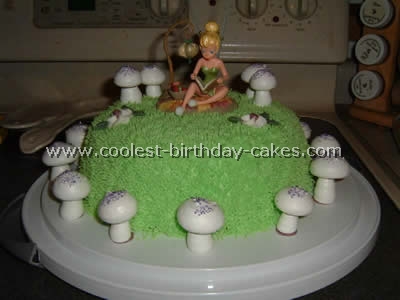
My daughter wanted a Tinkerbell cake for her 4th birthday. I found the figure at Hallmark; the mushrooms are meringue cookies that I piped; I used a hair tip for the grass. I baked the cake in a Pyrex casserole dish to get the “hill”. She loved it. :).
Tinkerbell cake by Cynthia B., Livingston, CA
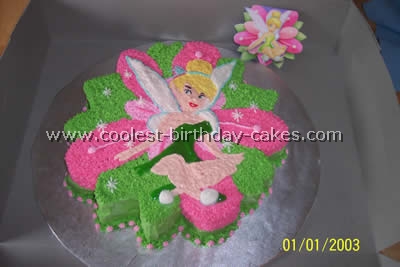
For this Tinkerbell cake I made a copy of the invitation on a larger scale (you can usually have this done at a Kinko’s or such if you don’t have a scanner, printer, or copier), then traced it onto a larger piece of parchment paper.
I cut along the outline of the image on the parchment paper, set it on the cake, and trimmed the cake.
When done, I had the flower shape. I again traced the lines on the parchment paper with piping gel this time then transferred it onto the cake and colored it in. Since there was no room for writing, I made the sign you see in the background and when we were ready to set the Tinkerbell cake out, I pushed it into the cake as if Tinkerbell was holding it in her hand.
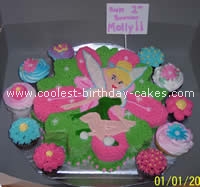
Tinkerbell cake by Sue L., Sydney, Australia
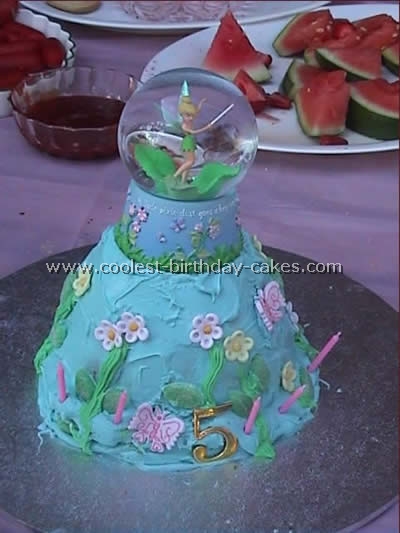
This cake is a plain butter cake baked in a Dolly Varden tin. The Tinkerbell cake was iced to match my daughter’s favorite Tinkerbell snow globe, which was placed on top. She loved it and it was so easy.
Tinkerbell cake by Judi H., Union, IL
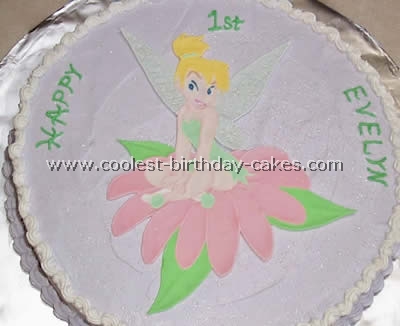
For this Tinkerbell cake, I baked boxed cake mix for a 12-inch round single layer cake. Homemade buttercream frosting and Wilton Color Flow technique was used for decoration.
I used a picture I found on the internet to use as a reference to sketch her on a piece of paper in the size/dimension needed to fit on a 12-inch cake with allowance for writing and cake border.
I taped picture to flat cardboard cake board. I taped a piece of waxed paper, large enough to cover sketch and extending at least 1-inch beyond, on top of Tinkerbell sketch.
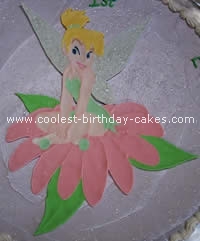
Following Color Flow directions and technique I outlined and filled in areas of Tinkerbell in appropriate colors – hair is golden yellow – dress, slippers pompom and hair band is kelly green (use only a tiny bit for a pale color) – copper or peach for her skin (I outlined in a shade darker then fill-in shade) – white for slippers, eyes and inside mouth – black for eyelashes – deep blue for eyes – light brown for eyebrows – pink for lips – and pale blue (used just a bit of royal blue to achieve this) for wings.
While the wings were still wet I sprinkled them with edible glitter (I did them last). This way the glitter only stuck to wings and I could gently blow the any stray glitter off of other areas. The flower petals I used rose and the leaves leaf green colors. Allow Color Flow decoration to dry at least 48 hours, longer if humid.
Use edge of table or counter to aid in decoration removal from waxed paper. Bring waxed paper to edge of counter, slowly and gently pull waxed paper down and away from decor. Use other hand to carefully hold/support decoration as it becomes free from the wax paper. Once removed place on flat secure area away from humidity and grease.
Frost the cake pastel lavender and sprinkle top of cake with edible glitter. Write message using leak green frosting and tip #2. Make reverse shell cake border with white frosting and # 21 shell base border. When ready to serve, place Color Flow decoration on top of cake.
Grease in buttercream will break down the Color Flow so do not place on cake too early. If you desire it to be displayed for a longer length of time cut plastic wrap or foil to fit under decoration or place decoration on sugar cubes or mini marshmallows.
Tinkerbell cake by Lisa P., North Attleboro, MA
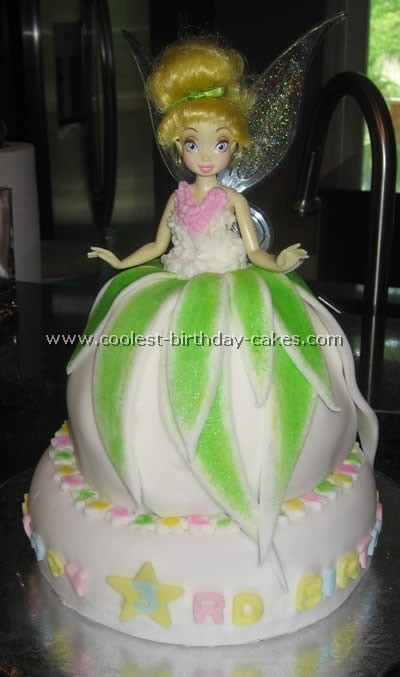
My daughter wanted a “Princess Cake” for her third birthday. She found a Tinkerbell balloon she fell in love with so we went with that. I purchased a Tinkerbell doll from the toy store and inserted that into a cake I made in a Pyrex bowl. I also made a round cake to sit the whole thing on. I covered both in fondant.
For the skirt of the Tinkerbell cake I cut out fondant strips and dusted with colored sugar dust. The letters are also fondant I cut out using small letter cookie cutters.
Tinkerbell cake by Courtney R., Union, MO
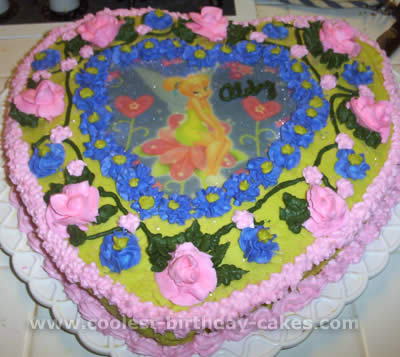
My daughter wanted a Tinkerbell cake for her 4th birthday. I couldn’t find a Tinkerbell shaped pan so I used my big heart shaped pan to bake the cake in.
I bought an image made from sugar from a bakery online. I then made Wilton Buttercream frosting and mixed the colors teal, yellow, and leaf green to come up with her famous green. I used pink and purple for drop flowers and roses and dark moss green for ivy. The designs matched the plates.
Tinkerbell cake by Jaime M., Freehold, NJ
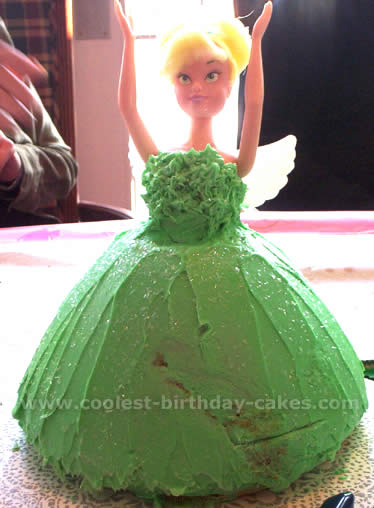
I used a Wilton doll cake pan for this Tinkerbell-shaped cake. The icing is colored and decorated to match Tinkerbell.
Your comment has been sent successfully.