How This Sweet 16 Mardi Gras Theme Birthday Cake Came to Be:
I have been decorating cakes now for a little over a year. I have not taken an order for a cake because when I make a cake I never know exactly how it might turn out. I also want to continue to enjoy my new hobby. However, I had a guest that I have been waiting on at my diner now for a few few years and who has followed my new cake hobby on my FB ask me to make her a cake.
The Order:
I had to feed 50 people and the theme was Mardi Gras. All the guests would be in black or white and the Birthday Girl in pink only. She gave me the freedom to make the cake anyway I wanted to. It had to be white with white frosting or fondant and lithe real chocolate here and there.
Creating the Cake:
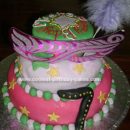
I made a 14 inch fat daddy round cake and wasn’t happy with the height so I made another. This became the bottom. I used a homemade White chocolate buttercream recipe which is to die for and I added my crumb coat. Then 2 more coats, refrigerating after each.
My next level was a 12 inch round only one cake in a fat daddy pan. I did the same frosting here.
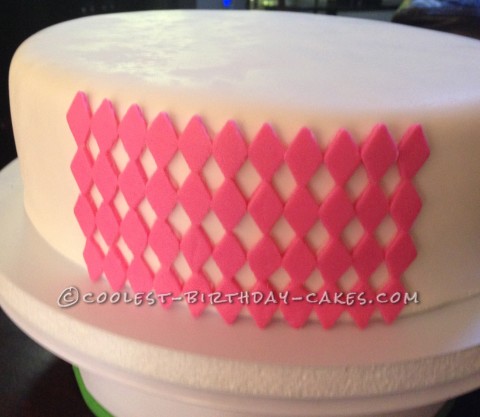
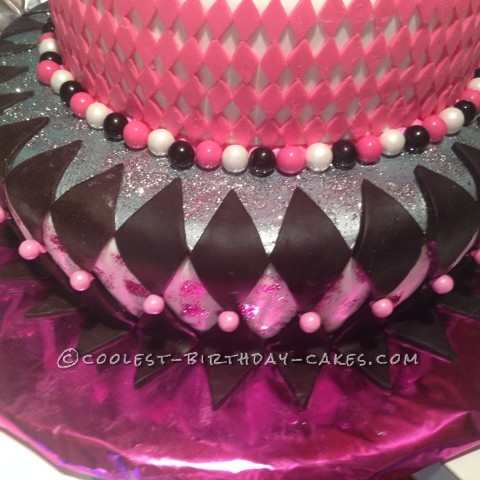
Here is the coolest thing. I used modeling clay chocolate. I had some modeling chocolate left over from another project, so I colored it pink and got to work. I cutout all the pink diamonds for the top cake and I took wax paper and coated it with Crisco to lay out the design and then put it aside (with the modeling clay, it is all chocolate so it tastes wonderful and it doesn’t need to be covered like a fondant would). This enabled me to do some very detailed work.
For the big cake on the bottom I wanted to make the top silver and was stuck on how to do so with out making the sides silver. I thought about it and came up with this:
- I put it in the fridge (after I covered cake with the white fondant) for about 20 minutes. It had some condensation on it (what I hoped for).
- I took plastic wrap and lined up the edges and covered the sides so that the top was exposed to spray only. It worked perfectly.
- I sprayed the top silver then layered silver disco dust on it and let it dry.
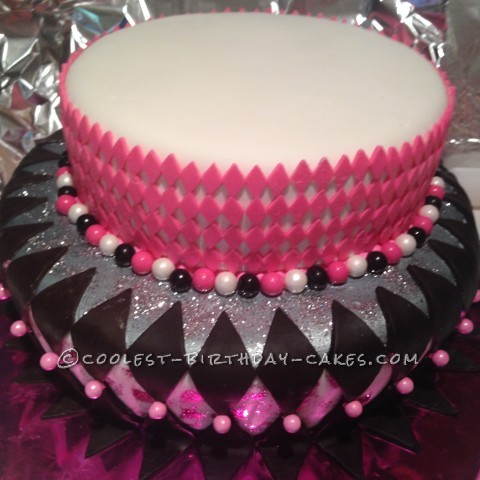
I then used my black chocolate modeling clay made from a really nice dark chocolate. It was so pliable and tasted yummy. I cut the large diamonds out of it and put the design on wax paper using the same method as mentioned earlier.
Next, I went back to the top level and I covered it in white fondant. I transferred the pink diamond pattern onto the top cake one section at a time. It turned out spectacular. I inserted my straws in bottom (for support), placed my cake on top and then I started putting on the big black diamonds. I later came back and put big bubblegum balls around the middle and then little malt balls (pink between black diamonds).
I had purchased a ton of chocolate quarter/coins in matching colors to go around the bottom and a ton of the Mardi Gras beads, but did not want it to look cluttered. At the last minute I came up with the coins around the bottom and I put a topper on the cake. Around the bottom I wrapped all the necklaces so that when pulled the topper off, the necklaces would fall off for guest of honor and her friends to wear.
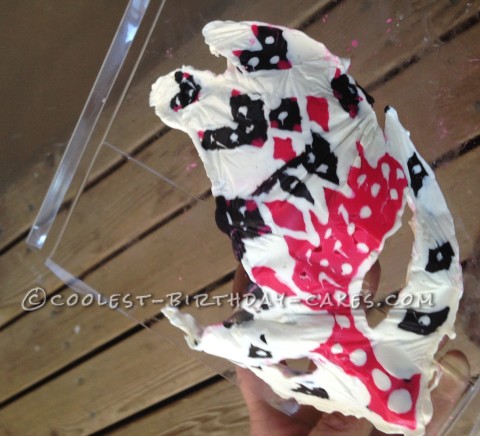
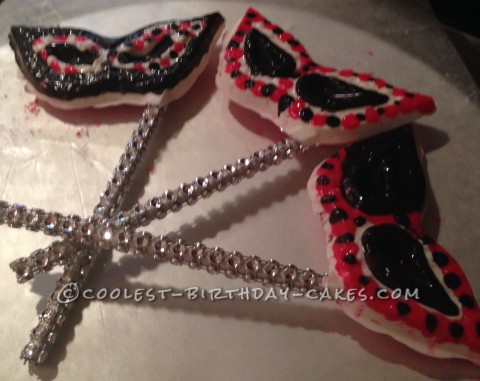
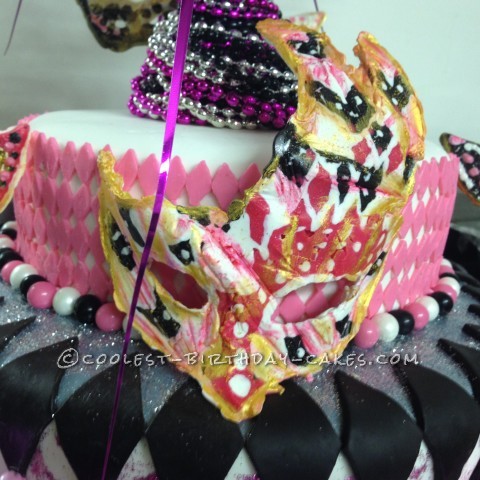
I almost forgot, I made chocolate Mardi gras masks. For them, I took a Mardi Gras mask I bought at the party store and lined it with plastic wrap. Then, I started my decorations by adding pink, black and white, putting them in the fridge between layers and continuing to add layers till the mask was thick enough to be supported by 2 cake pop bling sticks. I also made small chocolate pop masks on these cool silver bling sticks and later put gold dust on them to really bling out. I did the same on my large mask.
The day I had to deliver the cake, it was over 90 degrees in Seattle Metro. I had no air-conditioning in my car and the cake had all this chocolate, so I brought the cake to my Diner at 7am and had her come meet me there to pick it up and drive the rest of the way. I froze the chocolate mask and pops for 30 minutes prior to her picking up the cake. I put those on the cake when she arrived. It worked… no condensation… they went onto the cake perfectly. All the cooks at the Diner took pictures of the cake and stopped when they saw me set up cake, so I had lots of pictures of the presentation before letting my baby leave to go to her new home.
Margaret, my guest that I did this cake for, sent me a text that night telling me that the Birthday Girl cried when she saw my cake. What I did not tell you is the birthday girl’s family is very poor and she has never had anything done for her like this or this elaborate. Her Aunt did this for her and I charged her Aunt my cost with no profit. When I heard that she cried, I knew I gave her the gift of magic and all the work I had done that whole week was worth every second to give this girl a sweet 16 birthday dream cake.
Adding a Surprise Inside the Cake
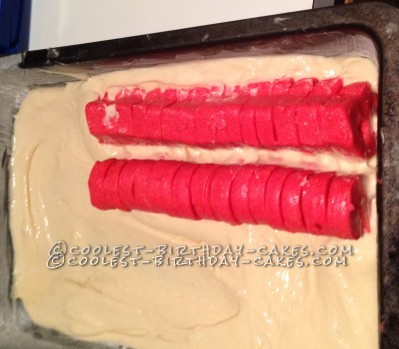
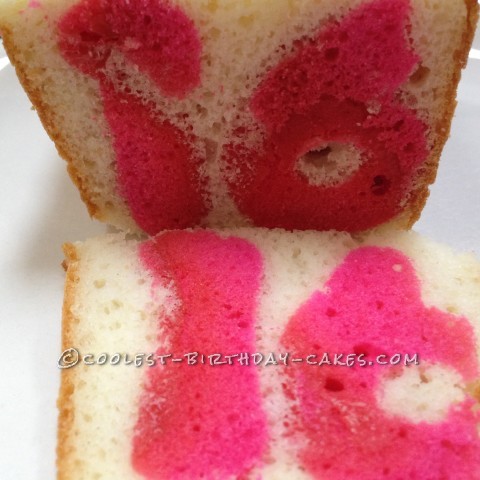
To create the surprise inside the cake I pre-baked a cake. I lined a large cookie sheet with parchment paper and baked a very thin pink cake. I used Americolor gel to create the pink color. I took my cookie cutters and punched out about 40 #1s and 40 #6s from the cake and then I froze them all to give them extra strength to stand up.
Next, I put about 1/2 inch of cake mix into the bottom of a pan and set aside about 1 piping bag worth of batter (easy to let that stand in a cup in the piping bag). Then, I lined up all the #6s back to back stacking them one in front of the other and all the #1s back to back stacking them one in front of the other, making two rows… one of the #1 and one of the #6 parallel to each other.
NOTE: If you are like me and like to use the bottom of your cake as the top of your cake what you need to do is place your numbers upside down and backwards. For this sweet 16 cake making a “91” to create a “16” allowed me to have straight edges and my surprise inside the cake. (see images)
After placing the numbers in the pan I took the extra batter in the piping bag and filled in between the numbers and the edge of the cake to give support on every side of the numbers and keep them from falling over. Then I cascaded the rest of the batter into the pan to the same level my number surprise was at. I baked the cake as I normally would bake a cake, however, I marked where the surprise was with toothpicks because once it is cooked I would not know where it is, especially since I spin my cake 50 billion times to create a straight edge with my white chocolate buttercream. So, X marks the spot of the hidden treasure in the cake. It’s also fun to put hearts, butterflies, various shapes, or even names inside. Let your imagination go wild!
It is fun to create a surprise in your cake. Hope you try it. If you do and have questions, please ask.
