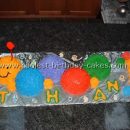
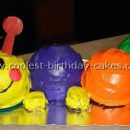
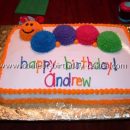
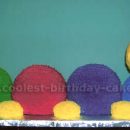
Take a look at these cool homemade Baby Einstein Caterpillar cakes shared with us by cake decorators from around the world. Along with the birthday cakes here, you’ll also find loads DIY birthday cake-making ideas and how-to tips to inspire your next birthday cake project. Enjoy!
And don’t forget… if you end up with a cool cake, have great tips to share or pictures of awesome birthday cakes you’ve made in the past, share them here and be a part of our coolest birthday cake community.
Latest Baby Einstein Caterpillar Cakes
- Coolest Baby Einstein Caterpillar Cake IdeasI followed the instructions of the other cakes on this website, THANKS (Noah and Drake’s cakes specifically). This Baby Einstein … Read more
- Coolest Baby Einstein Caterpillar Cake IdeasMy son has an addiction with the Baby Einstein DVD’s since he was three months old! So of course when … Read more
- Coolest Baby Einstein Cake Ideas for the Baby Einstein CaterpillarThis Baby Einstein cake, a caterpillar, was made for my son’s 1st birthday. It was an easy decision since he … Read more
- Cool Homemade Baby Einstein Caterpillar Cake IdeasI made this Baby Einstein caterpillar cake for my friend’s daughters first birthday, the theme was as you can see … Read more
- Baby Einstein Caterpillar Cake for a 1st BirthdayWhen I decided to have a Baby Einstein party for my son’ s first birthday with the focus being on … Read more
- Coolest Catepillar Birthday CakeOur son’s Baby Einstein Caterpillar Cake turned out AWESOME! I baked it, and my patient, and talented sister – Cristy … Read more
- Easy Homemade Baby Einstein Caterpillar CakeThis Homemade Baby Einstein Caterpillar Cake is the Baby Einstein Caterpillar cake my mum and I made for my son’s … Read more
- Coolest Baby Einstein Caterpillar Cake Photos 1I got a request for a Baby Einstein caterpillar cake. I used the Wilton Sports pan for the cakes and … Read more
- Coolest Caterpillar Baby Einstein Cake Photos 5This is a perfect first birthday cake, a baby Einstein cake. I used the small circle pan that you would … Read more
- Coolest Baby Einstein Caterpillar Cakes 9I used a Wilton 12″x18″x2″ sheet cake pan and used 3 boxes of Butter Recipe Fudge cake to bake baby … Read more
- Cute Homemade Caterpillar CakeI used a Wilton 6 inch round pan for this caterpillar cake. After baking I cut the top off to … Read more
- Cute Homemade 2D Baby Einstein Caterpillar CakeThis Homemade Baby Einstein Caterpillar Cake was my first attempt at making a “home-made” cake. I had inherited a couple … Read more
Featured Cakes
Cake by Lark K., Gainesville, FL
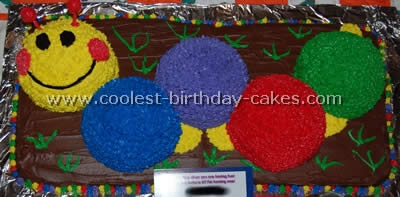
I was inspired by other Baby Einstein caterpillar cakes on this site especially cake #7 by Crystal. We also used Wilton’s sports ball pans. The whole cake was made with four boxes of cake mix.
Box 1: Chocolate-split in half by pouring mix into two 9×13 pans. Box 2: yellow cake- for yellow and blue domes. Box 3: yellow cake- for purple and red domes. Box 4: white cake- 1/2 for green dome and 1/2 in 9×13 pan (then cut into two long pieces and ‘attached’ to the chocolate cake). I liked #7’s design with the dirt below but I wanted the caterpillar to be able to stretch out and not be in a V shape. So I put the two 9×13 cake halves side by side and then attached the two long pieces to the top part and then frosted it all with chocolate frosting to blend the four pieces together.
The bottom was thin but it was just so that the caterpillar had something to sit on. I put him on a piece of plywood covered in foil and then began the task of icing! The icing took the longest and I used about 3/4 of a store bought frosting can on each dome. I mixed the icing colors using Wilton’s gel dyes. I used so much of that stuff but later realized the final color was even brighter than when I mixed it. I was worried the blue wouldn’t look right, too pastel. But all of them came out just fine. So I used four cans of white frosting and one can of chocolate frosting.
I frosted the chocolate bottom first then put the domes on top. I used a #16 star tip and started with blue. After I finished a dome I would add the little stars around the bottom of the cake which really gave it a nice border. Then I did the purple dome and dots, red dome and dots and green dome and dots and also the grass. I saved yellow for last so I could do the face and feet/tail. I didn’t use any cake to make the feet and tail just frosted it in the right shape.
I used two ‘Dum Dum’ lollipops and covered them with red frosting for the antennas. For the eyes and smile I used black frosting from a ready made tube (so hard to work with!) I used a little of the red frosting and mixed it with some white to make the pink cheeks. To make the smile the right way I took a cup and pressed the rim into the yellow frosting to make an easy outline so I could ‘trace’ it with the black frosting. For the cheeks I took one of my daughter’s circle toys and pressed it into the yellow frosting to make little circles to trace. It made it much easier for me.
Hope my cake will also help other when searching for Baby Einstein caterpillar cakes.
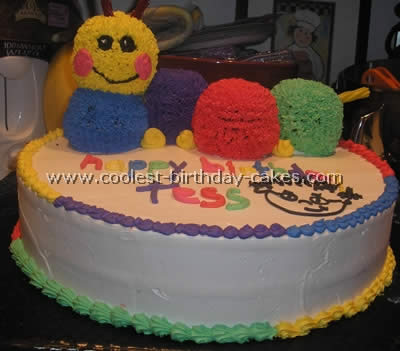
My two year old daughter adores the Baby Einstein videos and Einstein Caterpillar (aka Blinky). After researching other Baby Einstein caterpillar cakes I decided I wanted a three dimensional version of the caterpillar and used a mini sports ball pan to achieve it. The pan has six small semi-spheres so I baked two batches for a total of 12 semi-spheres. For the base of the cake I used a 14″ cake pan because I wanted enough room to sit the caterpillar on top.
After filling and icing the base cake I trimmed the muffin tops off of the semi-spheres and “glued” two together with icing to make a full sphere. I did this five times for five balls. After some trial and error I found the best way to decorate the balls was to hold each ball in hand and decorate with a #16 or #17 star tip. I couldn’t completely finish the spheres this way but it helped as decorating the spheres once they are on the cake is a tricky angle. Each sphere was a different color and once positioned on the cake I secured them with a drinking straw and snipped off the tip of the straw where it laid flush with the sphere (and a dab of icing will cover it up).
For the head I placed the yellow sphere on top of the blue, secured it to the cake with a drinking straw and then drew the face. I used a yellow Twizzler for the tail and red Twizzlers for the antenna. (I later switched the red licorice antennae with two red candles and that looked really cute too.) It’s very difficult to get black icing with your food color so I like to use a prepackaged tube. Also I like to use parchment cones because it makes clean up a breeze. I found the parchment cones invaluable in writing the “happy birthday” sentiment and border because I needed so many colors on hand.
I drew the Baby Einstein character on the cake a few hours before the party because I was afraid the black icing would bleed but I can’t confirm whether or not this would have happened (just a precaution). Also my daughter has very curly hair so I gave the Baby Einstein curly hair too.
Good luck with your own Baby Einstein caterpillar cakes!
Cake by Heather M., Mississauga, Ontario
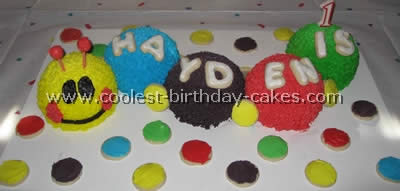
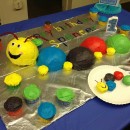
I used the sports ball pan to make the Baby Einstein caterpillar cakes. I made one whole cake for each section but cut off the bottom to make it flat. I made one lemon, one banana (baby friendly), one vanilla and two chocolate sections and five batches of buttercream (but that iced all the cookies as well). I made sugar cookies for the top and to decorate the foam core I used as a base.
Cake by Rochelle N., Durham, NC
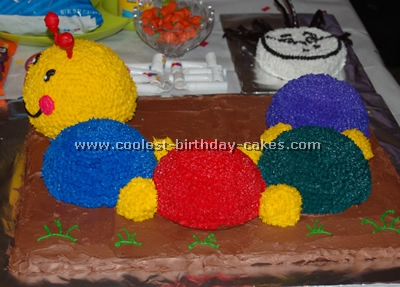
This was for my son’s first birthday. We came up with our cake ideas based solely on the ideas and tips from this website for Baby Einstein caterpillar cakes. We ended up using five boxes of cake mix in various flavors. The ground was two sheet cakes, a box of chocolate each and regular store bought chocolate icing. We used the Wilton balls to make each segment of the caterpillar and put two balls together to make the head. You will need to trim the bottom of the head so that it will lay flat on the ground.
I bought mini muffins for the legs and put them between the segments of the body and popped one on as the tail. All of the segments were decorated with the medium star tip. I purchased 5lbs of icing from our local bakery (we only used 4lbs) and colored accordingly using gel food coloring (doesn’t make it watery and gives a vivid color). The corners of the mouth were made from Necco wafers covered in hot pink icing. The mouth was made from black single strand licorice. The antennas were made from lollipops and covered with red icing.
The Baby Einstein head was done following the exact suggestions found at another place on the site for Baby Einstein caterpillar cakes. This cake was made as a carrot cake and was given to my son for his enjoyment. It took four people working until two in the morning to bake, decorate and assemble all that you see here. I would highly suggest baking the cakes a few days in advance and for certain color your icing in advance. Those two steps will save you from the headache that I received from rushing.
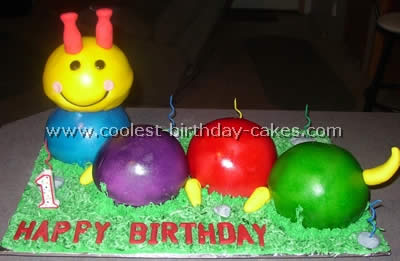
Each ball of the cake was created using the small Wilton’s ball pan. Each ball was covered in fondant and airbrushed to match the colors of the DVD. Dowel rods were screwed to the cake board and the cakes were slid over the rods to keep the balls in place. Grass was created using colored coconut and buttercream icing with the grass tip.
This was created for a little girl’s first birthday that only cared about playing with the cake, not eating it. Thanks to this site for Baby Einstein caterpillar cakes, I got many of my ideas from it.
Cake by Shannon H., Stone Mountain, GA
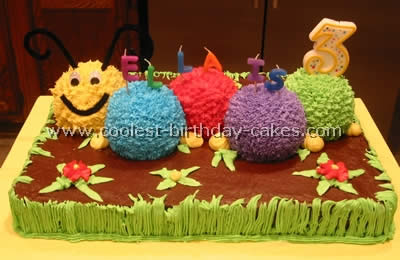
My daughter, after watching an old Baby Einstein video, decided she didn’t want a Spiderman cake after all for her third birthday party; she wanted a caterpillar cake! So I utilized this website to help come up with my Baby Einstein caterpillar cakes and there were some really great ideas.
I started by buying the sports ball cake pan as well as a really huge 11×15 sheet cake pan and went to Michael’s to bone up on my skills before I started! I used a regular yellow cake mix for the caterpillar and two chocolate cake mixes for the sheet cake so it would look like dirt. FYI do not use a ultra moist cake mix for the sheet cake or the surface of the cake will keep pulling up when you ice it – lesson learned here!
I made the color icing from scratch, the same buttercream icing Michael’s teaches you to make because that stuff can stand up to the hot conditions of an Atlanta September! I used a regular chocolate icing from the store for the sheet cake. The icing of the cake and caterpillar sections was the most laborious; I was up a good part of the night before the party mixing the many colors and icing each piece with a #16 tip and a triple star tip. I used a multi opening decorator tip that is actually used for making grass on the edges of the sheet cake and the flowers and leaves were made with a typical leaf and drop flower tip.
I used plastic eyes and pipe cleaners for the face. The board I placed the cake on was covered with a yellow plastic tablecloth (dollar store $1) that I stretched over several cake boards (for strength) and I stapled the tablecloth to the back to keep it taut. It was a huge cake and wound up feeding everyone for days!
It is very time consuming to make Baby Einstein caterpillar cakes, my cake turned out amazing. My daughter’s face when she saw it said it all and she did say “Oh mommy it is so beautiful…” (And of course I cried!)
Have fun making your own Baby Einstein caterpillar cakes!
Cake by Joan R., Mechanicville
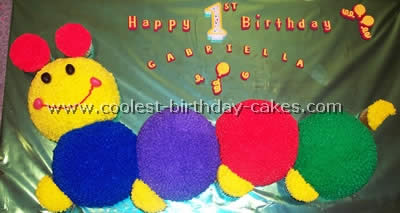
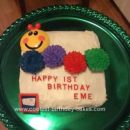
For my daughter’s first birthday party I chose to make Baby Einstein Caterpillar cakes. I got many great ideas and tips for this web site prior to starting my own variation. It was time consuming but well worth all the effort. I didn’t bake the cakes the day before but do recommend it if you have the opportunity. I’ve only done one other cake using decorating tips so I practiced ahead of time making the stars. I am a novice and it took me about 1 ½ hours to cover all the segments in a thin layer of icing first and then all the segments and cupcakes with the stars. If you are experienced it surly will go faster for you.
I used the Wilton mini sports ball pans for the segments. I baked two DH Golden Yellow cakes and one chocolate scratch cake. I used the baking instructions that came with the pans which called for a lower temperature oven than the recipes. I used Bake Joy with flour spray to grease the pans. It worked great. The cakes took a lot longer to bake than the instructions said it would but it did produce a moist fully baked light cake after an extra 20 minutes or so of baking. I divided the batter between the two pans and I think the pans were too full. As the cakes baked they overflowed the pans. This actually worked out great because I could slice the overflow off while the cake was still in the pan cooling and each segment came out the exact same size and height with no crusty bottom. I also baked a batch of yellow regular size cupcakes in pale yellow cupcake liners using half of the batter leftover from one of the Yellow Cake mixes (because there is an odd number of segments).
I used a large green foam-like poster board measuring 30”x20” I got at Wal-Mart in the school supplies section. I covered it with green Cellophane-like wrapping paper. Prior to baking the Baby Einstein Caterpillar cakes I mapped out how the sections were going to come together using the actual pans as guides. Once the cakes were cooled I arranged the segments on the board (they are easy to move around because they are so small) and cut a small section off where each came together. For the antenna I just used two cupcakes. The tail and feet are each a half of a cupcake.
For frosting I made three batches of the Wilton butter-cream icing. The recipe is included with the sports ball baking instructions. Each batch I divided in half (half a batch covers one segment). I used these Wilton concentrated paste colors: Christmas Red, Royal Blue, Kelly Green, Lemon Yellow and Violet. I covered each section and the cupcakes using the Wilton star tip #16. To finish I used two black jelly beans for the eyes, two pink jelly beans for the cheeks and the mouth is red writing gel. The lettering above the cake was done using Cake Mate Cake Decoration letters and balloons and the 1 is her birthday candle. I didn’t attach the letters but a dab of icing on the backs would keep them in place if you are transporting the cake and didn’t want to arrange the letters later.
Just as a note: Each segment yielded eight good size pieces of cake.
Baby Einstein caterpillar cake by Alesha G., Bel Alton, MD
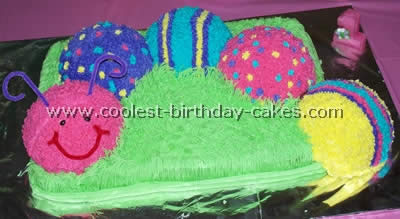
I used the ideas for Baby Einstein caterpillar cakes from this site. I used the Wilton ball pan to make the caterpillar’s body and a very large sheet pan to make the grass part.
I used the green icing to ice the sheet cake first then I arranged the caterpillar. I iced the entire caterpillar first then did the grass. One great tip… It takes a long time to bake all of these little cakes (not a good idea to do it the night before the party). I did it two weeks in advance and froze the cakes. Freezing them made them easier to icing and they ended up super moist! Plus it saved me so much time the night before. All I had to worry about was the icing.
Baby Einstein caterpillar cake by Erin S., Grand Bend, Ontario
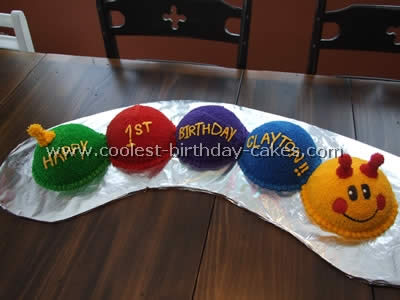
To make my Baby Einstein caterpillar cakes, I used the Wilton Sports Ball pan. I iced each ball separately with butter cream and #16 tip stars. I copied the exact colors and order of color from the Baby Einstein logo.
For the face I iced the eyes and pink cheeks smooth (finger dipped in cornstarch to pat it smooth works great!). The antenna and tail are actually magnets I had at home covered in icing (they just happened to be the right shape!) I iced each ball on a separate paper plate the night before the party and then transferred them to the large tray the day of the party as it wouldn’t fit in my fridge it was so huge! I then finished it up by piping around the bottom with larger pull out stars. It was a huge hit! (And the birthday boy got to use the whole head as his smash cake!)
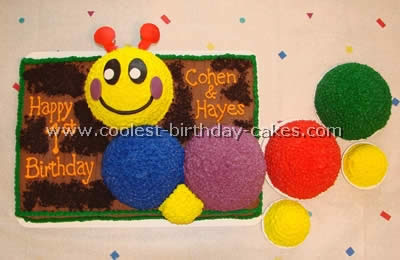
I used a Wilton 12″x18″x2″ sheet cake pan and used 3 boxes of Butter Recipe Fudge cake to bake baby Einstein caterpillar cakes. On the caterpillar I used the Wilton Sports Ball Pan and for each segment of the caterpillar I used a different flavor.
Fondant was used on the eyes, antenna, mouth and cheeks. Homemade butter cream frosting was used on all. The segments were piped with a #18 tip and cocoa was added to icing on the sheet cake with added crushed Oreo cookies. On the antenna the fondant was placed on two lollipops for support. The feet were made with the Wilton small sport ball muffin pan. This cake can feed an army so be sure and invite everyone.
Baby Einstein caterpillar cake by Jennifer R., Egg Harbor, NJ
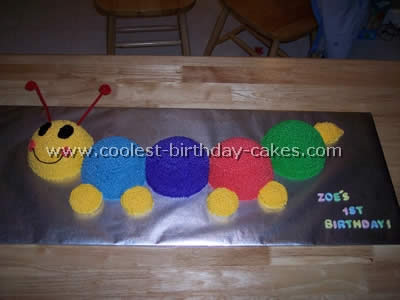
I used Wilton sports ball pans for the body segments and cupcakes for the feet and tail for the baby Einstein caterpillar cakes. I made the 1234 cake batter and Wilton meringue frosting. These recipes were given to me from my Grandmother but I believe they can be found on the Wilton site. I used pipe cleaners for the antennas.
Cake by Monica G., Rosharon, TX
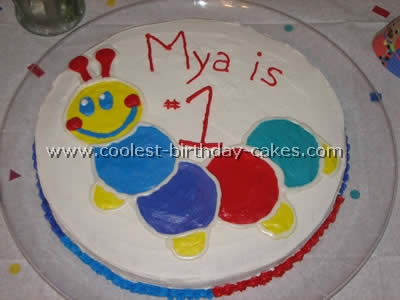
I used a 14″ diameter circular shaped cake pan and 2 cake box mixes for the baby Einstein caterpillar cakes (I used white & chocolate cake mixes for a mixed cake).
All of the icing is butter cream with almond flavoring regular white icing to cover the cake and shaded in different colors for each body of the caterpillar using Wilton food coloring to color the icing (yellow blue red purple & teal). I used about 3 batches of icing to ice the cake and decorate (9 cups). The caterpillar is outlined in white cookie icing out of a bottle.
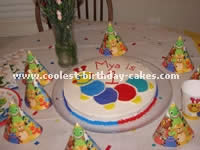
The cake was a hit and everybody loved the icing and caterpillar!
