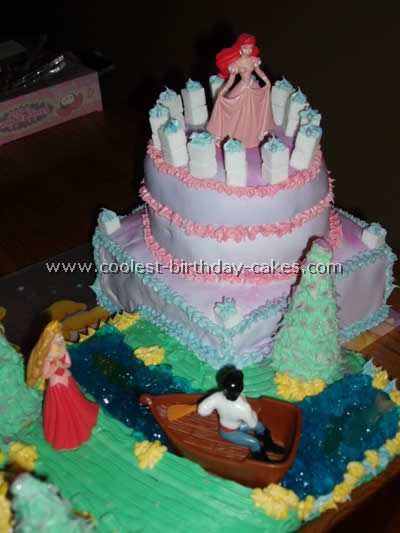
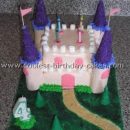
I offered to make a cake for my neighbor. If only I knew what I was getting myself into! As soon as she said “princess party” I started looking for castle birthday cakes. I wanted to incorporate the princess’ as much as I could so I started with a very simple castle cake.
I used homemade marshmallow fondant (only the second time I had actually used it before) and colored it purple (12 oz mini marsh + 2 tbls water + 2lbs powder sugar + 20 sec microwave + 7 to 10 minutes of kneading = marshmallow fondant). I rolled it out and laid it on the cake.
Then I was informed that there would be about 40 people to feed so had to make an adjustment. I added the “forest” moat and trees. Trees were easy, just used upside down sugar cone and green colored frosting. The moat I think is my favorite – I carved out the cake and made it like a ditch and then added blue Jell-O & gummy fish.
Princesses were purchased from the Disney Store and I just happen to find Prince Eric by chance. It was so much fun and I will DEFINETLY do it again!
More Castle Birthday Cakes
Castle birthday cake by Pamela R., Snohomish, WA
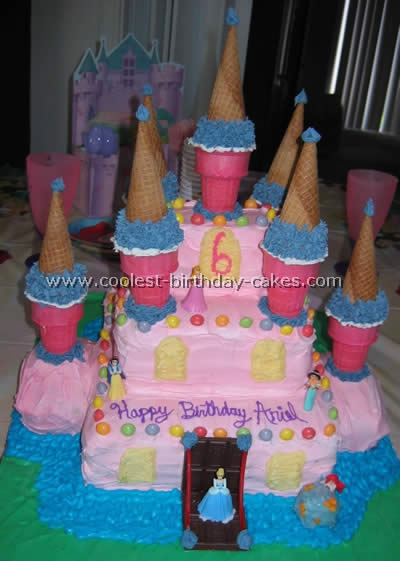
My daughter wanted a castle cake for her birthday. I scoured the internet looking for ideas on castle birthday cakes and finally came up with this cake. I made one big sheet cake which I cut in half and stacked for the main part of the castle. I then used little bread loaf pans for the sides and top of the castle. Ice cream cones (sugar stacked upside down on top of cake cones) made for the spheres.
I frosted the area around the cake to look like a moat and grass. Ariel is resting on a “rock” made of a frosted cone bottom. The drawbridge is a Hershey bar with licorice rope. I decorated the cake with sugar wafer cookies and skittles. I then placed the entire princess figurines around the castle. My daughter and her friends loved this cake!
Castle birthday cake by Kimberly M., Wake Forest, NC
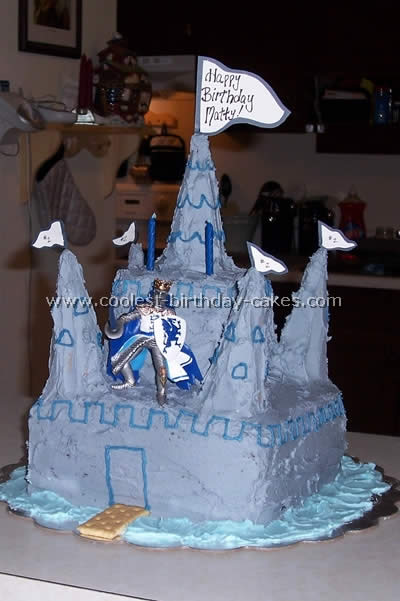
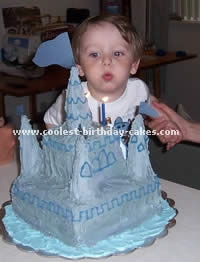
We took a trip to Europe just before my son’s 2nd birthday. We saw quite a few castles while we were there and knights became his new favorite thing (he calls them “Guy-Man” so this will always be his Guy-Man Cake). I searched this site for castle birthday cakes so here is my version.
I made two 8″x8″ cakes using one as the base and then cutting the other for the next layer. I used five sugar cones as towers, frosted everything gray and piped on navy blue details. I used a lighter blue to make water around the bottom like a mote and used a graham cracker for the draw bridge.
Then I put a special “Guy-Man” on top that we got for him in Europe and saved for his birthday (I’ve seen the same kind in Mom ‘n Pop toy stores here in the States – they are awesome toys, the brand is Papo). I made flags out of cardstock and toothpicks for each of the towers. My son absolutely loved it.
Castle birthday cake by Howe S., Ventura, CA
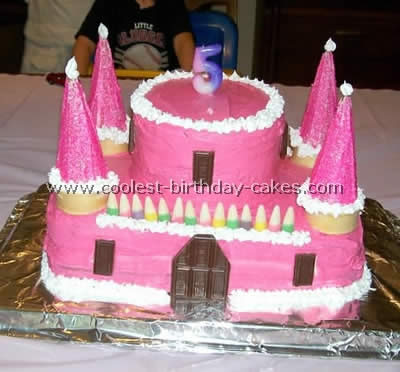
For my daughter’s 5th birthday she decided she wanted to have a princess party. We did a princess theme for her 3rd birthday and I didn’t want to do the exact same thing so I toyed with the idea of making the cake myself. We looked online at all the different castle birthday cakes and she saw the one she wanted.
At first I wasn’t too sure I could do it. I sent a picture to my sister and showed my husband and both said they thought I could. So I decided to try. My first attempt was awful! The top cakes kept sliding while frosting the cakes it pulled apart. I thought there was no way I’d be able to pull this off. I did a search again on castle birthday cakes and found some tips on frosting cakes and tried another cake a week before the party. I scaled this one down.
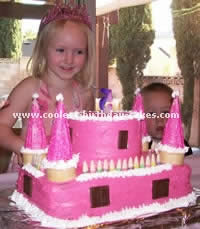
I used one 8×8 pan for the bottom and one 6″ round for the top. One box mix and one tub of frosting was enough for both cakes. I let the cakes cool and mixed the frosting with some red food coloring. It wasn’t the pink we were looking for but it worked. This time the cake came out much better so I felt I really could do the cake my princess wanted.
The night before the party I baked the cakes. I needed three boxes of mix. One for each 9×13 and one for the 6″ rounds which also left us enough batter for six cup cakes.
The day of the party I decorated the cakes. I leveled each cake to keep then from sliding. In addition to leveling them I placed four cake supports in the middle of the 9×13’s then placed the rounds on. I then put three straws into the middle of the rounds just to be sure they didn’t slip. I mixed the three tubs of frosting with some pink tint I bought at Michael’s and frosted the cakes all at once. Once the cakes were frosted I put it in the refrigerator and frosted the sugar cones.
I sprinkled pink sugar crystals on all four. I cut the bottoms of four cake cones off and used the tops for support. I placed a straw on the inside of each cake cone close to the side so the sugar cone would stand straight up. I then used two cans of spray white icing with the tips for trim along the bottom the cones and the top of the round. I placed pastel candy corns on the inside of the white trim on the 9×13.
I used two chocolate bars for the door and windows. I really think all the straws and cake supports helped the cake stay put. If I do this cake again the only change I would make is to cut the three straws that go through the rounds to the 9×13’s shorter so I could frost the top better. All in all this cake was really easy to do. I’m really glad I decided to try before I made the one for the party. The cake was exactly what my daughter wanted and she was happy that mommy made it just for her.
Castle birthday cake by Mia L., West Hazleton, PA
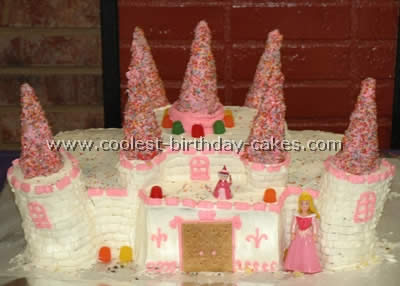
I got ideas for castle birthday cakes from the other parents on this website who had already submitted castle birthday cakes. It was a fantastic help in planning. The ice cream cone towers were such a clever idea so I decided to go with that covering them in pink frosting and then rolling them in sparkly multicolored sprinkles.
The shape of the cake was built from one large rectangular cake pan and then one regular sized one. The smaller of the two was then cut into pieces and placed on top (filling between layers with frosting) the bigger section in the middle and the smaller sections on each side. Each side was then carved around the front to make them rounded. The entire cake was frosted smooth in white and then the front (towers etc.) was decorated to have the look of bricks by using the flat side of a basket weave decorator tip.
I added some touches of pink brick along the roof line and created windows on each tower as well as a graham cracker door. The ice cream cone towers were held in place by wooden skewers. To add a little more color some candies were used in front and because my daughter wanted it to be a “Sleeping Beauty” cake we placed a small sleeping beauty figure fairy godmother and bird in front of the castle which she got to keep and play with.
The cake was vanilla on the first layer and chocolate on the upper layer decorated with an almond flavored frosting I made.
Castle birthday cake by Leah C., Kingston, OH
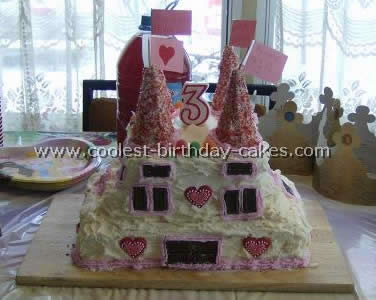
My daughter Mikyia wanted to have a princess party for her birthday. I had seen a castle birthday cake on this site and immediately decided to make one similar. I made one 13×9 cake, one 11×11 cake and two 8×8 cakes. I frosted all the cakes with white icing and staked them on top of each other from the biggest to the smallest.
I added Hershey bars for the doors and windows and put pink icing around the outsides of them to add some color. I took four ice cream cones coated them with frosting and rolled them in red and white sugar crystals I added them to the top of the cake for the towers and add gumdrops for more decoration.
The last thing I did was make flags from toothpicks and construction paper. I wrote Happy Birthday and Princess Kyia is three on them and put them down inside the ends of the cones. Mikyia loved her castle birthday cake and I was glad she was so proud of it!
Castle birthday cake by Kate L., Troy, OH
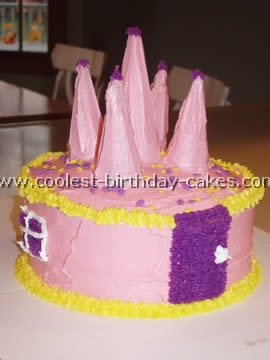
This princess castle cake was made for my daughter Mary on her 3rd birthday. The double-layer cake was made using an 8″ cake pan. It was iced with pink (strawberry) ready-made icing. Upside-down sugar cones were iced and placed on top. Ready-made cans of decorating icing (with attached tips) were used. Purple stars made up the doors and windows and the tips of the cones. Yellow stars were used to border the top and bottom of the cake. White icing was piped for the window panes and the door knob.
I purchased official Disney Princess candy sprinkles and scattered them on top of the cake. The cupcakes were made in Disney Princess liners and decorated with various Disney Princess candy sprinkles and toppers. My daughter was thrilled and said that it was one of the most beautiful castle birthday cakes in the world.
Castle birthday cake by Cheryl K., Cumberland, MD
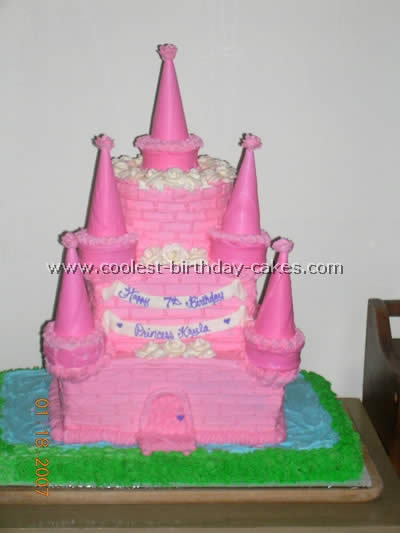
Our daughter was going to turn 7 and she wanted a Princess birthday cake which evolved into a castle cake when we got online to get some ideas on castle birthday cakes.
We have done wedding cakes before but had never tried anything like a castle. We used a half sheet cake as the base. We then stacked a 10″ square 8″ square and a 6″ round. We reinforced the cake with straws so that it would not topple over. We used sugar cones on top of cake cones for the towers. We dipped both the cones in royal icing.
Castle birthday cake by Ivette B., Orlando, FL
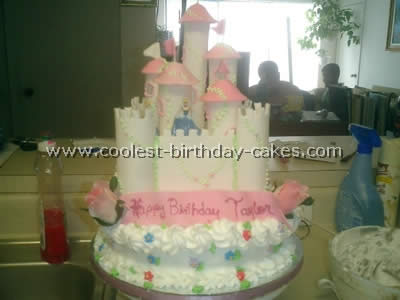
A customer asked me for castle birthday cakes. This one was the first I made.
The shape of the cake was made with fondant, the small flowers with royal icing. It was kind of hard but I made it. The pieces of the castle have to be made days in advance.
Castle birthday cake by Kiele B., Rocky Ford, CO
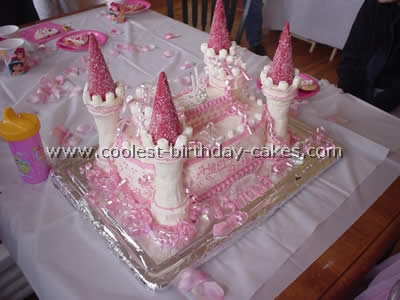
My daughter loves castle birthday cakes, so for her 3rd birthday she insisted on a princess castle cake. Seeing that this is my first real cake that I have ever decorated me was a little scared.
I started by taking 10 regular ice cream cones and dipping them in white chocolate placing 8 of them end to end to make the tall pillars. After they hardened I dipped them again to help smooth it out. Then I dipped mini marshmallows and placed them on top for the “stones”.
For the cone roofs I dipped 4 waffle cones in melted cherry flavored chips then rolled them in glitter sugar. Then I used 2 boxes of white cake mix and 1 box of strawberry cake mix and poured them into 2 9×13 cake pans and 1 loaf pan and swirled the batters together.
After the castle birthday cakes cooled I layered the 2 bigger cakes and used strawberry icing for the filling then trimmed the loaf cake and placed it on top using the strawberry icing as “glue”. I then trimmed the corners to make room for the pillars. I used vanilla icing to cover the cake then placed the pillars at the corners and the 2 smaller ones on the sides of the smaller top.
I placed the cones on the top of the corner pillars. I then used pink decorating frosting for the boarders trim dots and writing. I then placed more mini marshmallows around the edge of the cake and sprinkled some of the glitter sugar around the top. I placed a mini tiara that I found on the top of the cake and topped it all of with some white and pink ribbon. I think I got in a little over my head with this one for it being my first cake… but it was well worth it to see the look on everyone’s face when I brought out this Barbie doll cake.
Castle birthday cake by Becky B., Sunset, TX
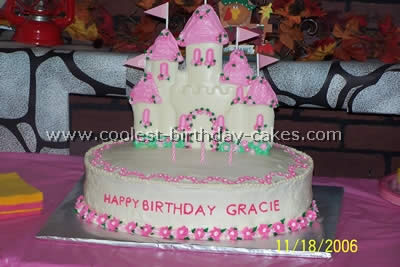
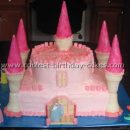
You’ll need : Oval Pan(16 1/2 x12 2/3 x 2), Enchanted castle pan, Colors are light Pink, Dark Pink and light green, Lollipop sticks (4in), 3-dowel rods for cakes, Pink paper, White chocolate, candies, a big cake board made from Foam Core (double it), Foil, White cake Sparkles (optional).
Now to make castle birthday cakes: make 2 cakes, place 6-9 3 1/2 inch dowels into cake for support. Ice the cake. Attach flowers to the bottom and on top of cake. Castle can be made ahead of time and then placed onto the cake.
How to make castle: Make your mold with chocolates when it has harden. Trim off the excess choc from the edges then with the extra icing put your dowel rods on to the back and the lollipop sticks that you made for flags. Put back into freezer to let it harden. Design it with Royal Icing and let it dry till it is hard. All the flowers, bushes, trimming on the castle is made out of Royal Icing. The other is Butter cream.
Royal icing recipe: 3 Table spoons Meringue Powder, 4 cups shifted confectioner’s sugar, 6 table spoons water. Beat all ingredients on low speed for 7-10 min. (10-12 at high speed for portable mixers) until icing forms a peak. Makes 3 cups of icing.
Butter cream Icing: 1/2 cup solid vegetable shortening, 1/2 cup butter, 1 teaspoon clear vanilla extract, 4 cup confectioner’s sugar sifted, 2 Tablespoons milk. Cream butter and shortening in mixer. Add vanilla. Gradually add sugar beat well on med speed. When mixed it will seem dry add milk. Makes 3 cups.
Have fun making your own castle birthday cakes. You can use regular white icing from store if you don’t like butter cream.
Castle birthday cakes by Tomya C., New London, CT
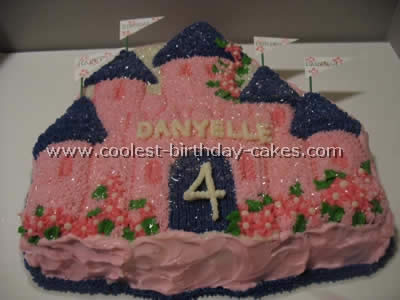
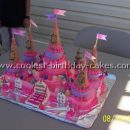
I made this cake for a little girl who was turning 4 and had requested a pink and purple princess cake. To make castle birthday cakes I used the Wilton Enchanted Castle cake pan and 1 1/2 boxes of Pillsbury white cake mix. I have found that although most pans call for 1 2-layer cake mix using just that leaves some cakes a little thin. (I make cupcakes with the leftover batter for the kids.)
I frosted this cake with homemade butter cream frosting and sprinkled clear edible glitter across the entire cake. For the flags I used white cardstock and stamped pink flowers using a Stampin-up rubber stamp and then taped the flags to a toothpick to stick into the castle towers.
