Make your buttercream frosting one day prior to decorating your Dora cake: 1 – cup unsalted butter softened, 6-8 – cups confectioners’ sugar, 1/2 – cup milk, 2 – teaspoons vanilla extract. Place the butter in a large mixing bowl. Add in 4 cups sugar then the milk and vanilla. At a medium speed of an electric mixer beat about 3-5 minutes or until smooth and creamy. Gradually add the remaining sugar, 1 cup at a time beating well (about 2 minutes) after each addition until the icing is thick enough for good spreading consistency (you may not need all of the sugar). If desired add a few drops of food coloring and mix thoroughly. Use and store the icing at room temperature because icing will set if chilled. The icing can be stored in an airtight container for up to 3 days.
**If making a 3-layer cake, use the following proportions: 1 1/2 cups unsalted butter, 8-10 cups confectioner’s sugar, 3/4 cup milk and 1 tablespoon vanilla extract.
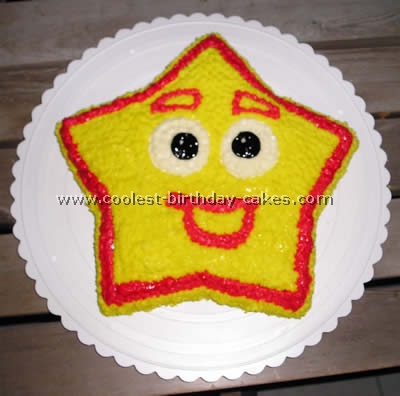
Follow the cake instructions on the Pillsbury Funfetti cake mix box and bake in the Wilton Star shaped cake pan (spray with cooking spray and gently sprinkle with flour before adding cake mix).
Using a frosting bag and a small star tip make the eyes eyebrows and mouth with the various colors that you choose.
Using the same method fill in the rest of the Dora cake using the star tip. You can pick any color that you like we chose the traditional Dora Star as yellow outlined in red.
Store in a cool environment until ready to serve.
More Dora Cake Ideas
Cake by Megan M., Kansas City, MO
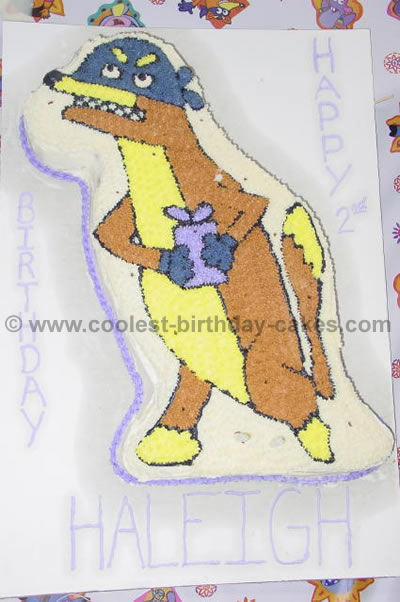
We used a Dinosaur cake pan, but turned it into “Swiper the Fox” from Dora the Explorer. The only character available in a pan is Dora the Explorer, but we wanted someone different (as we have already been to two parties this year with a Dora cake). So, we invented Swiper! It was actually pretty easy. Once Swiper was outlined in black, we just filled in the appropriate colors! My 2-year old loved it and all the party guests thought it was very cool!
