Take a look at these cool homemade Dr Seuss birthday cakes shared with us by cake decorators from around the world. Along with the birthday cakes here, you’ll also find loads DIY birthday cake-making ideas and how-to tips to inspire your next birthday cake project. Enjoy!
And don’t forget… if you end up with a cool cake, have great tips to share or pictures of awesome birthday cakes you’ve made in the past, share them here and be a part of our coolest birthday cake community.
Latest Dr Seuss Birthday Cakes
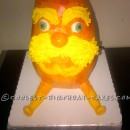
- Coolest Dr Seuss The Lorax Birthday CakeMy granddaughter is obsessed with the Lorax. When she comes to visit me, she goes straight to the computer, looks … Read more
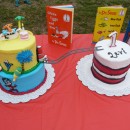
- First Birthday Dr. Seuss Hodge-Podge Cake with Cat in the Hat Smash CakeI really enjoyed making this Dr. Seuss Hodge-Podge cake with Cat in the Hat smash cake for my nephew’s first birthday … Read more
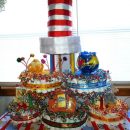
- Cool Homemade Dr. Seuss Diaper CakeMy cousin was having a Dr. Seuss themed baby shower, and since I am known for bringing diaper cakes to … Read more
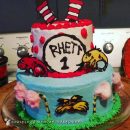
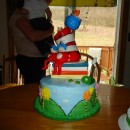
- Cool Cat in the Hat CakeThis is a cake I did for a little boy’s first birthday. Everything is edible (minus the tooth picks). The … Read more
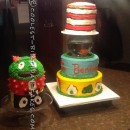
- Coolest Dr. Seuss Cat in Hat CakeI had gotten an email from a customer to do a Dr. Seuss cake. They wanted it to look like … Read more
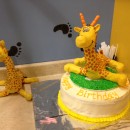
- Coolest Dr. Seuss Giraffe Birthday CakeI made this Dr. Seuss Giraffe birthday cake for my daughter’s 3rd birthday. Her favorite stuffed animal “Papaya” is the giraffe … Read more
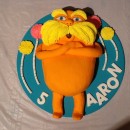
- Awesome Dr. Suess Lorax Birthday CakeMy god daughter fell in love with the Dr. Suess Lorax movie and wanted that cake for her fifth birthday. … Read more
- Coolest Green Eggs and Ham Birthday CakeAfter looking at so many great cakes off this site, I became very ambitious and decided to make a Cat’s … Read more
- Cat in the Hat Cake with a REAL GoldfishI am so glad to have at least a little talent to be able to make cakes for my family. I … Read more
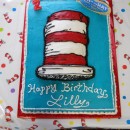
- The Cat in the Hat Knows A Lot About That… Birthday Cake!My daughter Lilly was totally obsessed with the PBS Kids show “The Cat in the Hat Knows A Lot About … Read more
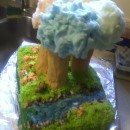
- Delectable Dr. Seuss CakeFor this Dr Seuss cake I used a 10″ round (3 layers) and decorated it with butter cream. For the tree tops, I used tip … Read more
- Awesome Lorax Birthday CakeMy son was about to celebrate his 5 th birthday and for the past 18 months he has been a big fan … Read more
Featured Dr Seuss Birthday Cakes
Dr Seuss birthday cake by Jennifer A., Hartford, WI
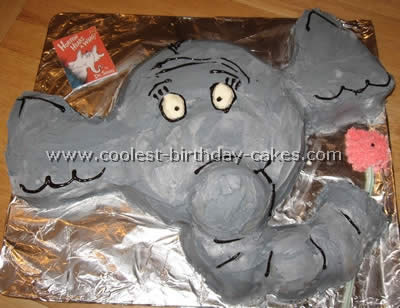
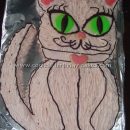
I use the Wilton “Animal Crackers” pan to make the head of the Dr Seuss birthday cake. This pan can be used to make a bear, pig or kitten. This pan uses one cake mix. you could also use a single round pan. The ears were created by my 8 year old. I baked 1/2 of another cake mix in an 11X7″ pan, each ear was designed out of this. The trunk is cupcakes which I made with the other 1/2 of the second cake mix.
Decorating the Cake
I cut the top off of one cupcake for the beginning of the trunk and the rest of the trunk is cupcakes cut in half. I put them together to form a “lumpy” looking trunk. We made a batch of buttercream frosting, tinted the majority of it gray using Wilton black gel. I tinted a small amount pink for the flower and left some white for the eyes. I used black decorator gel for the outlines and the “Speck” on Horton’s flower. Finally, the flower stem is a drinking straw.
Fun Homemade Birthday Cake
Dr Seuss birthday cake by Alicia P., Los Angeles, CA
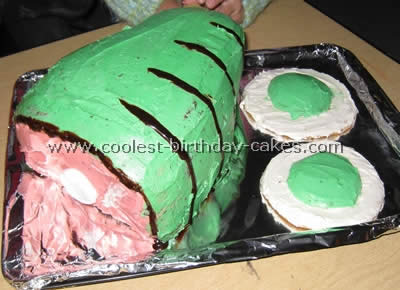
Thank you very much for this site. I made this Dr Seuss birthday cake. This is only my second cake; I have no experience at all. Hopefully it’s okay. My first was a volcano. The part I found hard was to cover the cake with the butter cream, it ended up full of crumbs on top. It was not warm or hot.
I tinted a little of bit of cookie dough and baked it but decided to put butter cream as the egg yolk, it looked greener. I only used one cake. What I cut from the ends or the sides I used on top. This was for a daycare, they celebrated Dr. Seuss’s birthday and I decided to make this.
Coolest Dr Seuss Hat Cake
Dr Seuss birthday cake by Amy G., Forest Hill, MD
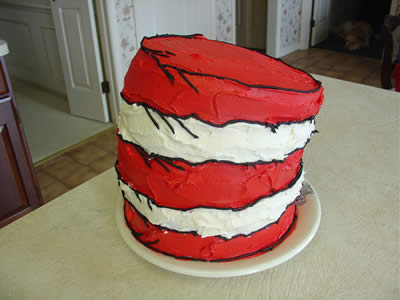
The Dr Seuss birthday cake was our main focal point as you walked in the door and centerpiece of the food table. I made the Cat in the Hat’s hat. It was five layers. Layers 1, 3 and 5 were iced in red with pink cake inside and layers 2 and 4 were done in white. I purposely sloped it to make it look like it was leaning. In between the stripes I piped a thin line of black icing with a little bit extra to look like Seuss’ shading technique.
Planning out the Cake
I used a large round platter as the “brim” of the hat and just iced that in white too. I baked the cakes a few days in advance, wrapped them well and froze them. Then I did the icing the day before the party and loosely wrapped the whole thing with waxed paper. Some of you are thinking “That sounds intense!” So let me tell you, I am not a cake decorator normally but I found this to be a very forgiving style for a novice. Seuss’ scraggly style of drawing means that your icing does not have to be perfectly smooth.
If you are adventurous enough to try this Dr Seuss birthday cake you should put dowels in the bottom three layers and then place a cake circle on top of layer 3. Layers 4 and 5 can be cut at an angle before you stack them on. (I learned that part from my brother who is a professional baker.)
Fun Dr Seuss Birthday Cakes
Dr Seuss birthday cake by Chris U., Arab, AL
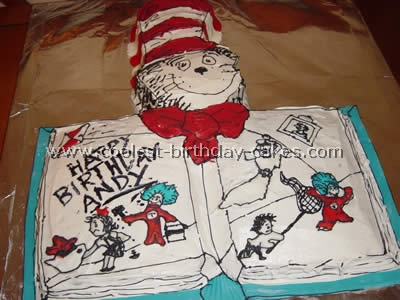
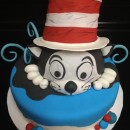
The creation of this came after the request of my five year old nephew. He wanted Cat in the Hat for his Dr Seuss birthday. After looking through the famous Dr Seuss book and searching online I decided to make it look like the book with the cat overlooking.
The cake was a golden yellow sponge with a white whipped icing overlay. The characters were made from royal icing. Finally, the cat himself was piped and the outline of the book was fondant. Needless to say he loved the cake!
Whimsical One Fish, Two Fish Cake
Dr Seuss birthday cake by April M., Tampa, FL
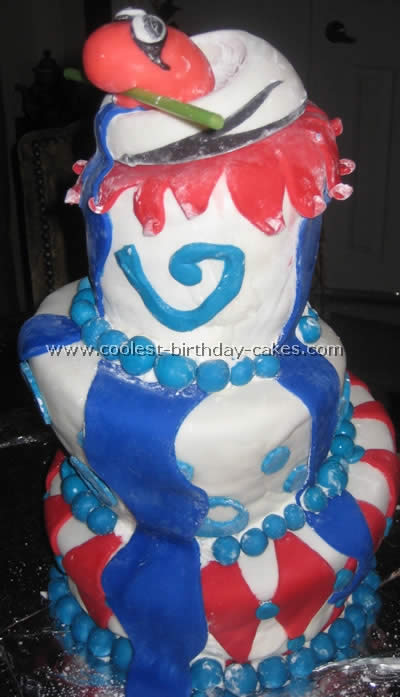
This Dr Seuss birthday cake was a lot of fun to create…and easy too! Trust me if I can do it so can you. The party theme was One Fish two fish so the cake had to reflect the whimsy and imagination of Dr. Seuss.
Baking the Cakes
I used three cake pans, 6″, 8″ and 10″ though if you had graduating pans in the 4″, 5″, 7″ and 9″ it would save quite a bit of time but the cake can be done with whatever you’ve got on hand. The cake from the bottom up is made of layers measuring (8″, 9″ and 10″), bottom tier (6″, 7″, 8″) middle tier and (4″, 5″, 6″) top tier. The largest layers on each tier go on the top and the smallest is on the bottom.
Each layer is a baked leveled torte and chilled in the refrigerator to firm up (nine layers in all).NOTE: torting is when you take a layer of cake and slice it in half to then smooth a layer of icing on it and put it back together. You will “torte” the smaller two layers of each tier the traditional way however the largest tier will be cut on an angle from the top of one side to the bottom of the other.
Making a Topsy Turvy Cake
This tier will be reassembled with the highest part of each layer on top of one another so that is makes a wedge shape. After chilled the tiers are built (you’ll have three separate tiers each with three layers when done) remember the tiers are built with the largest layer on top. Add buttercream icing in between layers to hold them together and with a serrated or sharp knife trim and sculpt the stacked layers to resemble the upside down cone.(your tier will have a slanted top and a tapered base if you’ve done everything right so far. Trimming doesn’t have to be perfect and it’s actually pretty easy. The top layer and the bottom layer are your guides…just blend them together. Repeat this step with all three tiers (or even just two tiers would be a nice size cake).
Decorating
When you’re satisfied with the shapes place them all back into the fridge to firm up again. When you’re ready to take the next step, smooth on a layer of buttercream over each tier. The chilled cake will make icing the tiers a bit easier.
Next start with your largest tier and make a circular cut out on the top of it that measures the same size as the bottom of the tier that is to sit on top of it. In this case I made a cut out that was 6″ in diameter because the base of my second tier was 6″ wide. Just insert a knife vertically into the top of the large tier and cut a circle (use a plate or pan or anything you have as a template). Remove the circle that you’ve just cut out and you’ll see that this creates a level “hole” for the second tier to sit upon. Smooth some icing in the new hole and repeat this same step with the middle tier. The top tier doesn’t need to be cut. I used rolled fondant icing at this step and covered each layer individually.
Fondant Fun
*Obviously I need some practice with fondant but it was fun and a lot like play dough. I even created the topper out of fondant a week before the party so that it had time to harden. Your Dr Seuss birthday cake is now ready to be stacked but I wouldn’t suggest you stack until you’re ready to decorate and serve.
I finished the night before the party and assembled by inserting an obscene number of wooden dowles into the cake after stacking, you could add plastic or cardboard circular layers in between tiers for greater stability and professionalism but I didn’t and it held for my little party. I mixed food coloring with the fondant to create the decorations, blue pearl-sized balls for base of each layer, diamond shaped cutouts for the sides of the base layer, cookie cut-out shapes for middle layer and so on…cookie cutters are GREAT! You can even cut out the shapes ahead of time so they harden up.
Attaching Fondant Shapes
To attach fondant shapes to cake simply use your finger and “dab” just a bit of water on the back and stick to cake…not too much water though just a tiny bit. The cake itself was a pound cake made with the simplest ingredients. A firm cake was needed to hold the weight of the tiers and fondant but I haven’t tried it with a box recipe. Smaller layers take less, large layers take longer. Make sure your pans are well greased and floured. I can’t take credit for the buttercream icing…I purchased it by the pound at my grocery store. The fondant was boxed by Wilton. You can be as creative as you want with this Dr Seuss birthday cake and the more it leans the better. It’s not a perfect cake but that’s the beauty. You’ll need approximately four batches of batter to complete a three tier cake.
This was my first topsy-turvy cake so now I’m ready to make my next one…this Saturday I’m having a Nightmare Before Christmas Party for my 13 year old step daughter…Should be fun.
Amazing Dr Seuss Birthday Cakes
Dr Seuss birthday cake by Kaleen M., Millington, MI
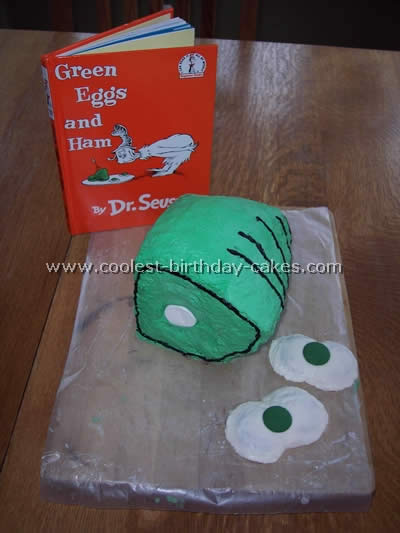
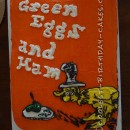
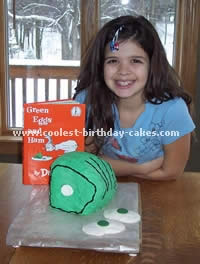
For this Green Eggs and Ham Dr Seuss birthday cake, I followed the instructions of the cake listed on this site. With the exception of using Girl Scout cookies for the eggs because I had those on hand. So I cut the edges off and placed two cookies together then frosted them and added the green candy.
Be sure to a save the pieces you trim to add on for the shaping of the ham and your all set. Everyone in my family went crazy over it. I think it will be a big hit at my daughter’s 4th grade bake sale.
Incredible Green Eggs and Ham Cake
Dr Seuss birthday cake by MaryKay C., Kiev, Ukraine
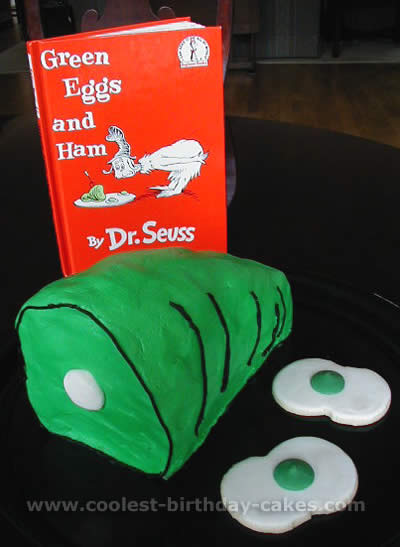
This Dr Seuss birthday cake idea for the green eggs and ham cake came from Family Fun magazine.
The cake (one mix) is baked in two bread loaf pans. Here are the variations I recommend: Tint your yellow cake mix green and add 4 tablespoons of green sprinkles to the batter before baking. This adds to the iffy green factor. Also, freeze the two baked cakes before using a serrated knife to trim them.
Carving the Cake
Level the bottom layer by slicing off the hump with a serrated knife. Then apply frosting a top of it. Place the other cake layer on top of the frosted bottom layer. Slice off a bit off the front of both layers, to form the part where the marshmallow “bone” goes. And then trim the slope of the ham.
Use the trimmed pieces to add the small hump at the end (in other words, don’t waste the trimmed-off pieces. Use them as I did at the end of the ham. Also to add height to the top/front of the ham). Then slather on green butter cream icing (important to put the icing on thick to avoid crumbs).
Decorating the Cake
After the frosting sets, smooth it out by pressing a Viva (non patterned) paper towel on top and smoothing it out with your hands. The magazine recommended marzipan strips tinted black for the outline, but I used black icing piped with a number 3 tip.
For the “eggs” (my idea), I cut out butter cookies using a Santa Claus head cookie cutter that I trimmed slightly. Cookies were then baked and iced with white royal icing. In order to make a “yoke”, I added a green candy melt to the top when the royal icing was still slightly wet.
In conclusion, this Dr Seuss birthday cake makes a great class treat on/around March 2 (Dr. Seuss’ birthday) – or for any day in celebration of the 4th best selling hardback children’s book of all time!
