Take a look at these cool homemade Bus and School Bus cakes shared with us by cake decorators from around the world. Along with the birthday cakes here, you’ll also find loads DIY birthday cake-making ideas and how-to tips to inspire your next birthday cake project. Enjoy!
And don’t forget… if you end up with a cool cake, have great tips to share or pictures of awesome birthday cakes you’ve made in the past, share them here and be a part of our coolest birthday cake community.
Latest Bus Cakes
- Coolest Bus Cake Celebrating An Unexpected Double Birthday!Preparations: To decorate a cake, my steps are always the same. I get a box cake and add a pudding … Read more
- Coolest School Bus CakeI made this School Bus Cake for a party we had to celebrate my son and his friends starting kindergarten … Read more
- Coolest School Bus CakeThe biggest challenge for me was calculating the measurements of the school bus cake. I started out by baking three … Read more
- Coolest School Bus CakeI made this School Bus Cake for an end of school/retirement party for a group of bus drivers. I used … Read more
- Coolest Bus CakeI was approached by a friend of mine to make his 5th Anniversary Cake for his business. He told me … Read more
- Coolest Wheels on the Bus CakeThis wheels on the bus cake was made for my 2 year old girl who loves the nursery rhyme “Wheels … Read more
- Coolest School Bus Cake Photos and Tips 0My friends and I rented a 30-person limo bus to celebrate a few birthdays and I was challenged to create … Read more
- Coolest School Bus Cake Photos and Tips 1My kids loved this school bus cake! My children are allergic to nuts and because of this we cannot buy … Read more
- Coolest School Bus Cake Photos and Tips 2This school bus cake was made for my daughters class on the first day of school. First I baked a … Read more
- Coolest School Bus Cake Photos and Tips 3These “cookies” are made from graham crackers – one square, with one rectangular (quarter of entire graham cracker) for front … Read more
- Coolest School Bus Cake Photos and Tips 4My nephew, Mitchell, loves school buses, so for his 2nd Birthday we decided to do a “school bus theme” for … Read more
- Coolest Magic Schoolbus CakeA Magic Schoolbus Cake for my 4 year old who is a huge fan of “The Magic Schoolbus” TV show. … Read more
Featured Bus and School Bus Cakes
School Bus cake by Amanda B., Guelph, ON
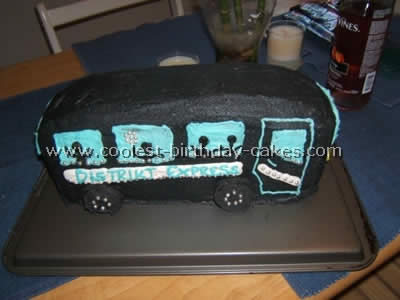
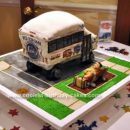
My friends and I rented a 30-person limo bus to celebrate a few birthdays and I was challenged to create a cake replica! I actually copied a school bus cake that I found on this site, just changed it to look like a limo bus.
To make this I baked two cakes in a 9 x 13″ pan. I cut each cake in half length-wise and layered them with buttercream icing (so it was four levels high). Any kind of cake and filling will work but I made one chocolate and one vanilla cake and crushed up Oreo cookies in white icing for a cookies n’ cr?me filling. I then covered the whole cake in black buttercream icing. (I made chocolate icing so I wouldn’t have to use as much black food coloring!)
I then drew on windows, doors, headlights, trim and license plates with white, blue, red and yellow icing in a piping bag. For wheels I covered Oreo cookies with the black icing and stuck them on. I also used tiny silver candy balls as accents.
School Bus cake by Corinne M., Red Deer,Alberta, Canada
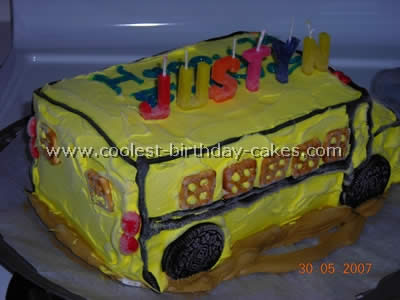
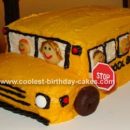
My kids loved this school bus cake! My children are allergic to nuts and because of this we cannot buy ready-made cakes from the store or any ice cream cakes from places like Dairy Queen because of their allergy. This made it a nice change from the regular cake mixes with icing and is kind of fun for summer!
What you will need: 18 vanilla or Neapolitan ice cream sandwiches (the rectangular kind), two tubs thawed (in refrigerator) of whipped topping, one package (four serving size) of chocolate pudding powder, eight Oreo cookies, 1/2 cup of fudge sundae topping warmed. For decoration: Two small tubes of black decorating jell for the outlining, small bag of square pretzels to make the windows, jelly beans for the lights and blue decorating jell for the lettering on top of the bus. I got the letters for the top of the cake at the Dollar Store. For the wheels I used four Oreo cookies.
I used Chapman’s ice cream sandwiches because my children are allergic to nuts. Everything on this cake was nut free. You pour the warmed fudge topping into a bowl and then stir in one cup of the whipped topping with a whisk until it is well blended. Then add the pudding powder. If it becomes too thick just add about 1/4 cup of milk to thin it out a bit. It should not be runny but you should be able to spread it quite easily. Chop the Oreo cookies into chunks and add to the pudding mix. Arrange five of the ice cream sandwiches side by side on a 24×12″ cookie sheet or solid board covered in parchment paper. Top these sandwiches with a layer of the pudding mixture. Then put five more sandwiches on top. Repeat the layer of pudding then only put four sandwiches on top; this makes the front of the bus. Put one more layer of pudding and your final four sandwiches.
Put the school bus cake into the freezer for about 3-4 hours to make sure it is solid. In the meantime color one tub of the whipped topping with yellow food coloring. I used Wilton jell food coloring as the color is more vibrant and you don’t have to use a lot. Also it does not have a taste to it. Then frost entire cake with the yellow food coloring except for the windshield. I just used white whipped topping here.
Place in the freezer for about another 30 to 45 minutes. After the frosting is frozen you need to decorate the rest fairly fast as the whipped topping tends to melt fairly fast. As I decorated I found that if the whipped topping started to melt I would just pop the cake into the freezer again for a bit. It was kind of a “process” but I think it was well worth it. I added just some chocolate whipped topping at the bottom of the school bus cake to make it look like dirt. Enjoy your own school bus cake!
School Bus cake by Heather K., Santee, CA
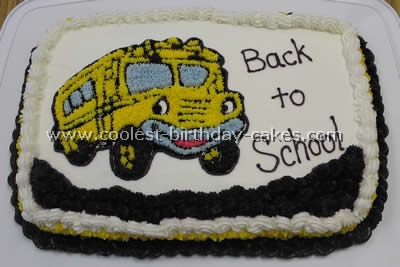
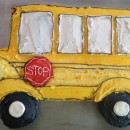
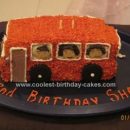
This school bus cake was made for my daughter’s class on the first day of school. First I baked a 9×13 chocolate cake from a store-bought mix. Then I iced it in thin consistency white buttercream icing (recipe below).
The next most important step to this school bus cake – and many themed cakes – is a gel transfer process taught in Wilton cake decorating courses. Coloring books and online coloring pages are an excellent source of templates for almost any pattern you can dream of using this method!
Tape a piece of parchment paper over your template. I used the school bus coloring page shown in the photos. Using a decorating bag filled with piping gel (you may tint it) and a #2 tip trace the outline onto the parchment.
When your outline is complete determine the desired placement and turn your template over onto the surface of your cake (piping gel side down). It is important to note you will get the REVERSE of the original template you started with. Use a slightly damp decorator brush or small artists’ paintbrush to trace the outline through the parchment. This will transfer the gel onto the cake surface. Carefully peel the parchment back off the surface of the cake and discard it.
Your outline is now on the school bus cake and can be traced and filled in with medium consistency colored buttercream icing. A variety of tips may be used to achieve your desired result. To get the glossy surface for the tires and the road I added piping gel to my black tinted icing. After the gel transfer and fill-in is complete continue with your lettering and border(s). This was a fun pattern very popular with the kids and only took about 1/2 hour to decorate!
BUTTERCREAM ICING RECIPE (yields 3 cups) 1 lb. sifted confectioners sugar (4 cups = 1 lb.), 1 cup Crisco or similar solid vegetable shortening, 1 Tbsp. Wilton meringue powder, 2 Tbsp. water, 1 tsp. clear flavoring (i.e. Wilton clear vanilla), and a pinch of salt. Combine sugar and meringue powder and set aside. Cream shortening flavorings and water. Gradually add dry sifted ingredients to creamed mixture. Mix thoroughly on medium speed. Blend an additional minute until creamy. To make medium consistency icing, add 1 Tbsp. of water to a full recipe. To make thin consistency icing, add 2 Tbsp. of water to a full recipe.
School Bus cake by MaryKay C., Kiev, Ukraine
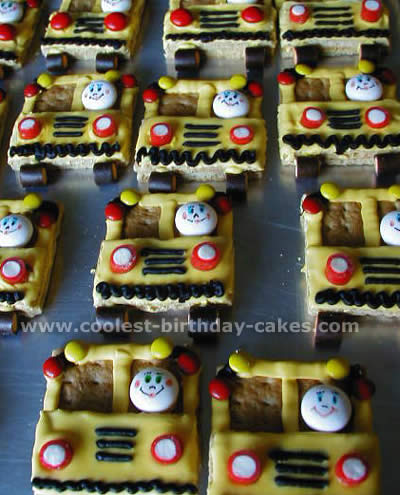
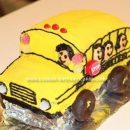
These “cookies” are made from graham crackers – one square, with one rectangular (quarter of entire graham cracker) for front – stuck together with royal icing. Use royal icing tinted yellow and black decorator icing.
The face is a Mento candy (not very diverse, but there may be other types of round candies in varying shades that could also work well). I used Food Doodler markers to draw on faces and mini M&Ms for flashing lights. Other candies available locally (from Germany) for the headlights and wheels – but you could use regular red M&Ms for headlights and junior mints for wheels.
I got this idea off the internet, but I don’t remember where. I think the internet version called for putting the cookies on top of a cupcake. I ended up making cupcakes iced plain grey with slash marks (like the center line on a road). Then let the kids “drive” their cookie bus on the cupcake road – just stick it on top. Not as messy as it sounds, since they basically ate them straight away!
School Bus cake by Lori C., Rome, GA
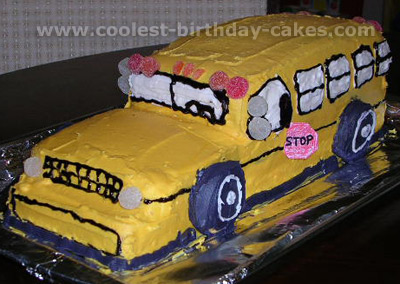
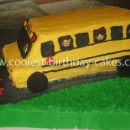
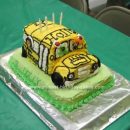
My nephew, Mitchell, loves school buses, so for his 2nd Birthday we decided to do a “school bus theme” for his party and I made a school bus cake. I’ve always loved making and decorating my own cakes, but just recently I started to get more creative with it.
So, I decided I would attempt to make a school bus cake. I found a picture of a bus online and used it as a guideline.
Then I made an extra 2-tiered chocolate cake with vanilla icing (just to be sure we had plenty of cake).
I also had some left over from the pieces I had to cut off to make the bus, so I just put icing on it too!
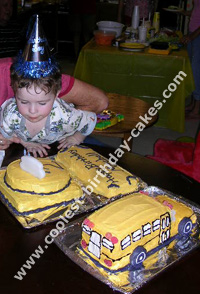
Here’s how I made the school bus cake: I used 2 boxes of white cake mix (Wal-Mart brand) mixed as directed. I put them in a 9″X13″ pan, a 9″ square pan and a loaf pan (all metal). Baked them as directed. Once they were completely cooled, I cut the 9X13 cake down the middle (lengthwise) the same width as the loaf cake. Then I cut the square cake in half and then one of those halves in half.
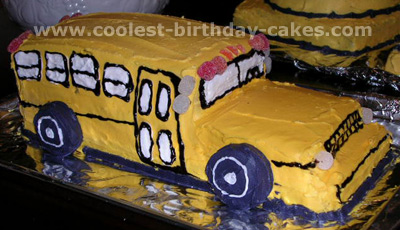
I colored my Wilton icing with Wilton Golden Yellow food coloring. I put icing on the long cake layer first, then added the loaf and put icing, then the half of the square cake, and put icing over all of this. Then I added one of the halves of the square kids cake to the front to make the “hood” of the bus and put icing on it.
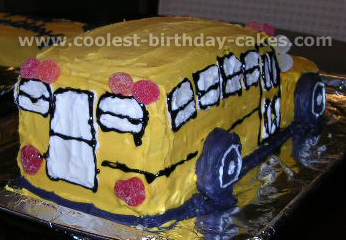
I then used the plain white icing to make all the bus windows, and used black gel icing to pipe around them. I used gumdrops for the lights (stuck into the kids cake using toothpicks). I colored some icing with Wilton black food coloring and put it on Oreo cookies for the tires, and also used it for the lettering.
It wasn’t perfect by any means, but needless to say, this school bus cake was a hit at the party!!! My nephew loved it!!!
Your comment has been sent successfully.