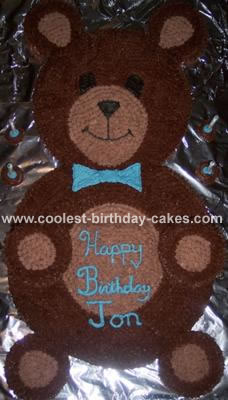
I live on a very strict budget (who doesn’t now-a-days). My son Jon who just turned 4 told me that he wanted a bear cake for his birthday and I looked for bear molds but none were less than 15 dollars and I wanted to get him gifts and only spend 5-7 dollars on cake. So I told him that I wasn’t sure if I’d be able to do a bear cake. He looked at me and goes “Mom I know you can do it for me.” SO I sat down and drew out what I thought it should look like and with very little confidence bought for 7 dollars…2 cake mixes and 3 tubs of frosting (3 chocolate and 1 vanilla dont get the whipped kind it doesn’t hold a shape!) and a box of disposable icing bags (already had a star tip and a small round tip).
So I mixed one of the boxes and made 2 8″ round cakes and set one for the head and one for the body. The next batch I made on more round cake and 6 cupcakes. When they cooled off I cut the middle out of the round cake so I was left with a hollow circle (maybe 1/4-1/2″ wide). I cut that into 4 sections and positioned them around the body 8″ round cake. Obviously this doesn’t come completely together, this is where creativity is a must. I cut what was left of the third round cake into small pieces and managed to make them the right height and width to complete the body.
Next, I cut the tops off of the cupcakes so that they were level and positioned them as ears, paws, and feet. The ears and feet were easy enough to level to body and head height. The paws I had to make level on the body so they weren’t tippy so I used pieces from the cupcake tops to level them and glued them with icing. So what I have now is a bear shape.
I took a spoonful (a big spoon probably 2 tablespoons full) of chocolate frosting and added red and blue food coloring until I had a very dark greenish black (it dries black). Using a knife I outlined on the bear where I wanted the mouth, noes and eyes and also where all the light brown frosting would be. I used the round tip and piped the eyes, nose and mouth (it used very little frosting). Next I made the light brown frosting with 2 spoons of chocolate and 3 of vanilla frosting and just mixed them together. I used my star tip and went over all the light brown areas on the cake, it wasn’t time consuming and it was easy.
I rinsed the tip and switched to just chocolate frosting for the rest of the bear. This is where it became tricky because where I had placed the 3rd cake around the body looked a little weird because it looked like a valley so to fix this problem I made a thick line of icing where the pieces met the 8″ round cake and did the stars over that and it came out quite good.
The paws that were on the body of the teddy bear cake did require a little extra frosting where they were a little hollow on the top (where they meet the fat part of the tummy). I made little rosettes beside the bear with the star tip (4 because the fourth b-day). I then used the remainder of the vanilla frosting and added blue food coloring and made a tie (hadn’t planned on it but it looks cute) and wrote the message. I also made little blue circles in the center of the rosettes and then put the candles in there.
All in all this took one hour to bake everything, half an hour to fill icing bags and bake the colors, and probably 2 hours to frost (keep in mind that I have a one year old to entertain during this process).

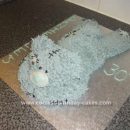
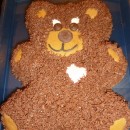
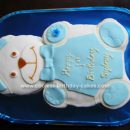
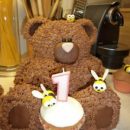
I have just made this cake and it turned out perfect and was really was easy to make, thankyou for such easy to follow instructions!
This idea is WONDERFUL and Perfect for those like myself on a strict budget!! Thank you!! My daughter and I loved making this for her daddy!!!!