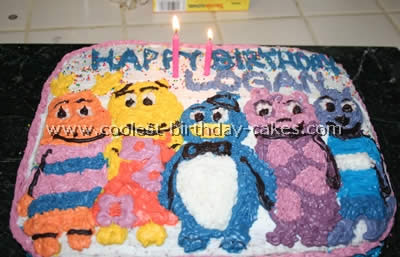
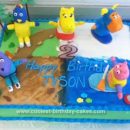
This is my Backyardigans cake. I outlined all the characters from a picture of them and used the cake pens. Then filled them in with all the different colored icing I made.
More Backyardigans Cakes
Backyardigans cake by Katie S., Pinewood, Ontario, Canada
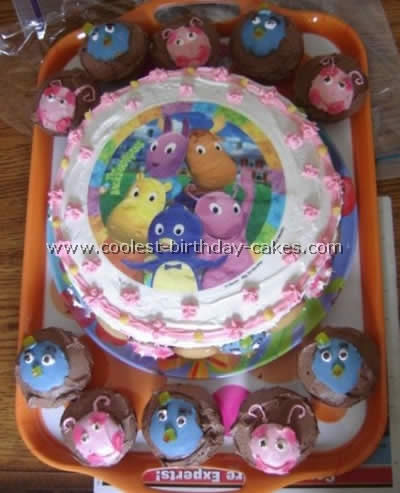
My two year old daughter loves the Backyardigans so what better than to make her a Backyardigans cake for her birthday. I made this cake using two round 9 inch cakes stacked on top of each other with frosting. Frost the entire cake with white frosting and purchased as edible cake picture to place on top. It doesn’t get much easier than that.
The cookies on top of the cupcakes however took a little more work. I used Nilla Wafers for the character faces. For character faces: add food coloring to about 1/2 cup of white frosting to make Pablo’s purple/blue color and do the same to make Uniqua’s pink color. Microwave the frosting until runny (this only takes about 10-12 seconds). Pour the frosting over cookies (about 18 of each color) and place on a wire rack to cool before decorating (about 30 minutes).
To Decorate Pablo: Use dots of white frosting topped with a small dot of chocolate frosting for the eyes. Pipe on eyebrows with chocolate frosting. Cut out the beak and tongue using yellow and red jube jube candies. Use a trimmed yellow Jube Jube for the hat. Stick these on using frosting. Let dry completely.
To Decorate Uniqua: Use dots of white frosting topped with a small dot of chocolate frosting for the eyes. Pipe on a mouth using dark pink frosting. For Uniqua’s spots I used pink decorating gel. Place one cookie on the top of prepared and frosted cupcakes (use about six of each). Use the remaining decorated cookies to circle the bottom of the cake (stick these on with a gob of icing). I alternated between plain and decorated wafers all the way around the cake to finish off your decorations.
And just one last thing for your Backyardigans cake – using the same dark pink frosting that you used for Uniqua’s mouth – pipe her antenna onto the cupcakes and cake. Enjoy!
Backyardigans cake by Jackie W., Portland, ME
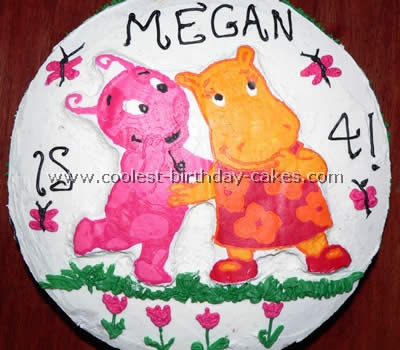
My daughter was turning four and loved the Backyardigans. All she kept asking for was a Backyardigans cake and wouldn’t you know it that was one of the only shows that I couldn’t find any cake decorating ideas for. At the time there were NO Backyardigan cakes on this site so I was stumped! After much research I found info on a technique called Frozen Buttercream Transfer which was a bit time consuming but all worth her reaction when she saw the cake and immediately shouted “Tasha and Uniqua!” in the most excited voice I’ve ever heard.
You can research the details of this technique on cake making forums and websites but the general idea is that you print out a picture that you want to put on the cake. You then tape the picture down to a cutting board or other flat surface that will fit in your freezer (a larger chest freezer is definitely an added bonus for this one). You tape a piece of wax paper over the picture then use Wilton black or chocolate decorating icing/piping to trace all the lines of your picture. I actually chose to use the colors of each character for outlining so there wasn’t a solid black line around them but it’s your choice based on the effect you’re looking for. (NOTE: You will be making a mirror image of your picture so if you want it to appear on the cake like the original picture then you have to change your printer settings to ‘print the mirror image’ of your picture.) Then you use a decorating bag to fill in the detail with your chosen colors of buttercream icing. I used a clear cutting board so I could periodically pick it up and look underneath to make sure the colors were filling in completely. You can also use a toothpick to spread the icing into tight detailed areas.
After that icing has set a bit cover the whole thing (this will actually be the back of your design kind of confusing until you’ve done it….)with the color of icing that you plan to use as your base cake icing color. Then cover the whole thing with Saran Wrap and put in the freezer. I froze mine for 24 hours. When you take it out to use the next day have your cake frosted then take the Saran Wrap off the back, untape the wax paper and frosting design from your cutting board then gently turn the design over onto your cake. It will be firm and stand out at first but then it will soften and rest evenly on your cake. Smooth the edges down and add other detail like the flowers I used. The cake is just two 10 inch round cakes with white buttercream between the layers. It took a bit longer for this type of design but all guests were very impressed with the cake and my daughter’s excitement made it worth every minute of the 3-4 hour process.
Backyardigans cake by Pamela H., Beverly, MA
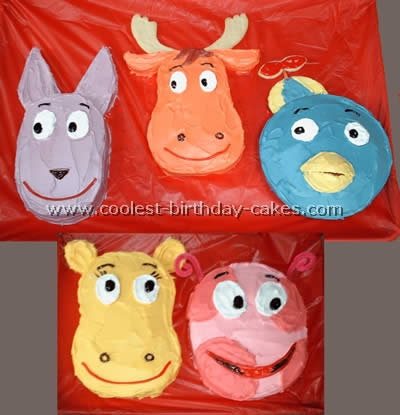
I used standard round cake pans for my Backyardigans cake. I cut the cake up to fit the shapes of their faces. I used sugar cookie dough (in the roll) to form the accents. Like the beak hat top and antlers. The antennas are pink pipe cleaners.
Backyardigans cake by Beatriz B., Santiago, Chile
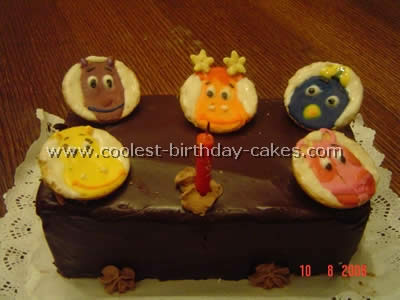
I made this Backyardigans cake for my son’s 1st birthday party. I started with a rectangular yellow cake filled it with chocolate butter cream and frosted it with chocolate ganache made butter cream swirls on top to put the cookies I had decorated with icing earlier.
I colored the icing according to each character, Uniqua pink with fucsia spots, Tasha in yellow, Austin in purple and Pablo blue and for Tyron I used cereal stars to make the horns. I placed each character cookie on top. My little son loved it; he even tried to eat up Uniqua while I was decorating her that’s why it’s cracked! Kids loved the cake and eating a cookie that had the Backyardigans character they loved most!,
