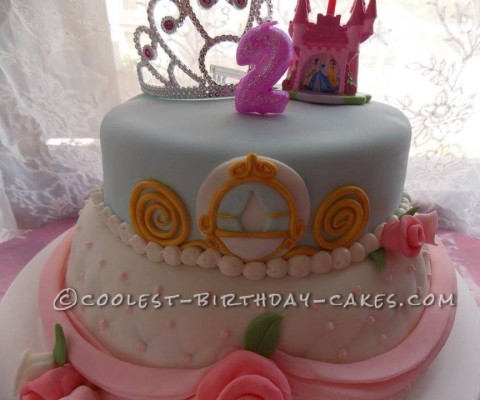
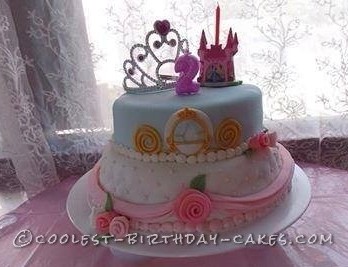
When my daughter, Scarlet Rose, turned 2, I wanted to have a party fit for a princess. That was the inspiration behind this princess cake. I wanted to incorporate some Disney Princess accents with elegant draping and adorable rolled fondant roses.
How to Make the Cake
- I covered the top layer in light blue fondant to match Cinderella’s dress.
- I then layered hand-cut pieces of fondant to create Cinderella’a carriage and dusted the accents with gold luster dust.
- Next, I added a white buttercream pearl border.
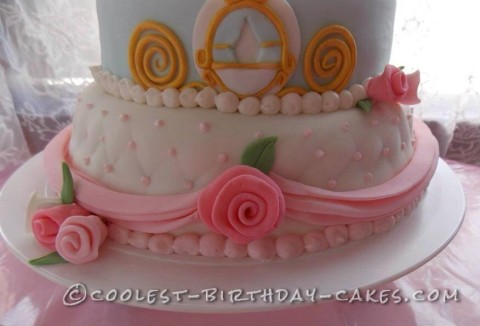
- I covered the bottom layer in white fondant and then used a ruler to add quilting indents around the side of the cake. I accentuated the quilting with small pink beads of frosting at the intersections.
- I added a pink buttercream pearl border to this layer before adding the finishing touches.
- I draped pink fondant on each side of the cake and then added a large pink rose in the center to bring it all together. I also added a few additional, smaller roses to either side of the cake. Each one of these simple roses took seconds to make.
How to Make the Roses
- The roses are made by rolling out fondant and cutting it in to strips between 3/4″ and 1 1/2″ depending on how big the finished rose should be.
- The fondant is then rolled up and pinched at the bottom to hold it together.
- The layers can be slightly pulled apart to make each rose completely unique.
- The leaves are made by cutting small tear drop shaped pieces of green fondant and then pinching the pointed end and pulling lightly to give it more of a rose leaf shape.
- Any thin utensil, such as a knife, can be used to add a crease down the center of the leaf.
- To further detail the leaf, a knife can be used to add small creases down the sides to look like veins.
This was a fairly stress-free cake until it was party time. The birthday girl couldn’t keep her fingers off of it! She loved it so much that she ate half of the border before we even cut into it!



Your comment has been sent successfully.