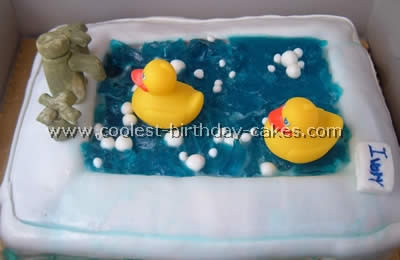
Here are some great cake baking tips for a rubber ducky cake. When I became pregnant with my second child I knew no matter what the sex was I wanted a ducky themed baby shower and I wanted to make the cake. I baked two cakes in a half sheet pan and filled and covered the cake with chocolate butter cream. (The cakes were also a homemade chocolate devil’s food cake recipe which I lost when we moved). Before I frosted them I carved a part of the top layer out to make a “pool” for the jello. It is best to freeze first and then carve. I also used a spoon that way you can make the edges the right size and control how much is taken out.
Never having used fondant before I was very nervous so I bought three boxes, read the directions and rolled it out as flat as I could. I put one piece over the entire cake but some of the sides were left naked so I had to roll out and cut pieces to fit the sides. My cake baking tips are to roll out two pieces as large as you can and join them together pinching the seam and using a fingertip dipped in water to seal. In the meantime I made two boxes of blue jello according to the jiggler recipe and put it in the fridge to set. I smoothed out the fondant as best I could and any cracks that formed as the fondant dried. I smoothed out with a finger tip dipped in water. I bought the Wiltons fondant and lord it tasted terrible by the way.
I made soap, a washcloth and a faucet with taps out of fondant and probably about a hundred bubbles in varying sizes. I carved details with a toothpick in the soap and painted them with acrylic paint. After they dried I stuck toothpicks in them and was careful for them to not touch the cake too much. After I did all this the jello has set enough for me to pour into the recessed area of the cake. I randomly placed all the bubbles in jello and arranged the soap and washcloth.
I didn’t place the duckies until I arrived at the shower location. It looked awesome but in retrospects not the best type of cake to have at an outdoor shower in late April. You can imagine it melted. I spent probably four hours trying to get it right and will probably never make that kind of cake again but it looked so good it was worth it! Just use my cake baking tips when you make your cake and you should have no problems.
More Rubber Ducky Cake Baking Tips
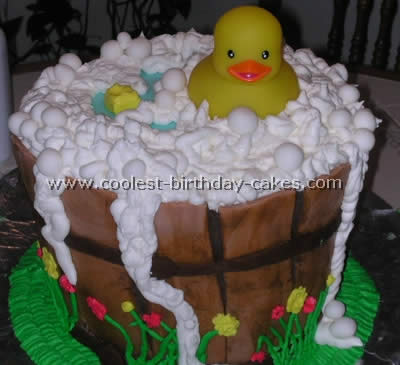
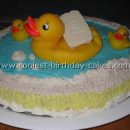
I prepared this cake for my sister’s baby shower. I was just trying to make something that would be different and that would make her baby shower something to be always remembered. My cake baking tips are to use two round 8″ pans and one 9″ round pan for the top. I had to sculpt the cake so that it took the shape of a bucket. I used buttercream icing to make the bubbles and also rolled up some fondant.
Cake by Brittany S., Hoquiam, WA
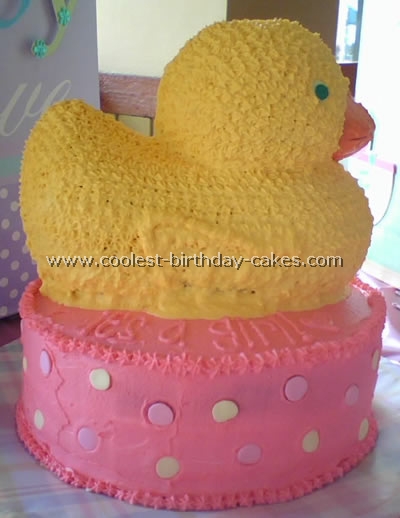
I made this 3d duck cake for my sister-in-law’s baby shower. I got my cake baking tips from this site. For the base I just made a two layer 9″ cake. I used a 3d cake pan to make the duck. I frosted the bottom cake smooth and added jumbo confetti sprinkles by Wiltons. The duck I used a star tip and frosted with buttercream frosting. This was the first cake I’ve made!
Cake by Amanda B., Abingdon, VA
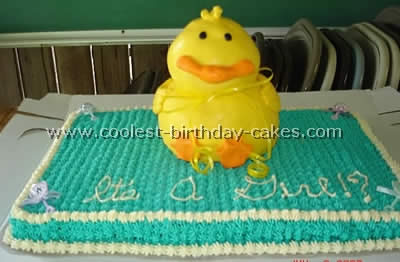
This cake was for my pastor and his wife’s baby shower. The theme was rubber duckies. I got my cake baking tips of a similar duck in a decorating book that I had and just elaborated on it. There was a ton of people to feed so the bottom was two half sheet cakes with a little icing to hold them together in the middle. The cake was four boxes of white cake mix, two in each cake.
I used a start tip and buttercream icing and piped the blue all over the sheet cakes for water. Then I added the white star border to add an extra touch to the cake. I purchased a four piece mini rattle kit for each of the corners. Then there was the fun part – the duck! This was made using two cakes. The first was baked in a glass mixing bowl and the other was just a smaller round ceramic bowl. These cakes were boxed pound cake. It is stiffer and holds up better. The body I left alone but the head cake I had to trim a little off the edges to give it a more rounded shape.
I colored a can of vanilla store bought icing very bright yellow and a little extra bright orange and black. I kept mixing in powered sugar until it made a nice pliable fondant. I covered the body first and smoothed it and then the head. I formed the beak and the feet from the orange, the eyes from the black and the wings were three rolls of yellow placed in the shape of wings then I added the little tuffs of hair to the top. This was a huge hit with the parent’s to be and the guests.
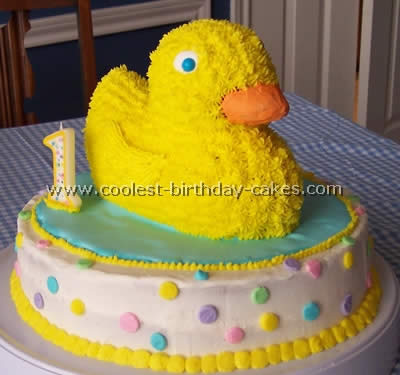
I made this cake using a borrowed Wilton 12 inch round and a Wilton Rubber Ducky pan I bought at Michael’s for under $10. This cake was for my daughter’s first birthday Rubber Ducky party. I followed the cake baking tips on the pan for both cakes.
I first spilt the 12” round layer with dental floss and iced between the layers. reassembled the round and iced it white with buttercream icing. I do not like the taste of fondant so I used royal icing to make the blue water on the white cake. While the royal icing was still soft I stuck two cut off drinking straws through the cake and icing to act as a support for the duck.
Once thoroughly cooled I cut some on the cake that formed a ridge where the pans met off the duck, placed it on the round cake and iced over my cake seams with yellow tinted royal icing. Once this icing hardened I iced the duck with a #23 tip as the pan directions said. I used orange tinted royal icing for the duck bill and blue candy for the eyes. I piped pastel dots on the cake and a yellow dot border using tinted buttercream. When the dots hardened a bit I flattened them with my finger dipped in corn starch. I also piped over the dots on the candle (from Wal-Mart’s baking aisle) with the tinted icing to make the candle match the cake. I secured the candle to the cake with blue and yellow butter cream icing. I also gently stuck a toothpick in the base of the wax candle to help it stay put and stand up straight.
All total I used three cake mixes, three batches of four cups of powdered sugar icing and one recipe of four cups of powdered sugar royal icing. I had lots of icing left over that my kids and I used to ice round sugar cookies made from the pre made store bought roll. Even though I followed the cake baking tips, the duck cake was not perfect as one side didn’t rise to the top. I was able to build that side up with icing and it was really cute. I got tons of compliments and it fit in with our party perfectly! Best of all my baby girl loved her “quack quack” cake!
Cake by Melissa L., Quantico, VA
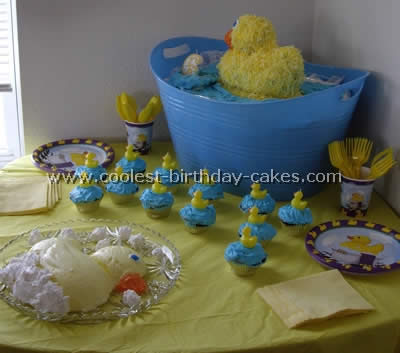
I made the cake using the Wilton 3Dcake pan. My daughter wanted a Noah’s ark stuffing party with ducks as the theme for her 6th birthday so we ordered the rubber duck birthday kit from birthday express and made the coconut cake from the directions on the box. This was my first time making a 3-d cake like this but it was very simple.
Here are my cake baking tips: I used the Pillsbury marble cake mix and the can of whipped frosting that I hipped with yellow food coloring and refrigerated for a bit. The coconut I just mixed a few drops of yellow food coloring in some water and tossed it in a zip lock bag and shook till it was all coated. I also made the lemon mousse duck according to the package directions and it was delish. The only thing with the mousse is when you mix the lemon Jell-O in the blender with the cool whip it still had a slightly lumpy look to it. It was not completely smooth.
Cake by Claudine L., Bowie, MD
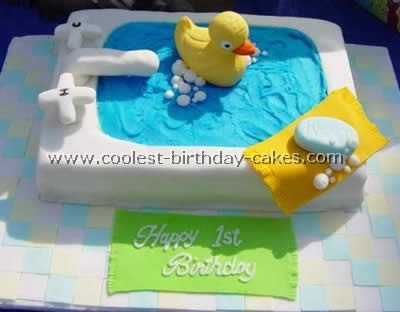
Here is my cake baking tips for this bathtub cake. I made the tiles out of colored fondant. I used two 9 X 13 cakes for the tub. I iced the cake with buttercream icing and then covered it with fondant. I cut out a 3/4 inch hole for the “water”.
I made the duck out of melted chocolate and the soap towel and rug out of gum paste. I used skewers to attach the faucet and handles (they turn by the way).
Everything on the cake is edible.
Cake by Kristin P., Taunton, MA
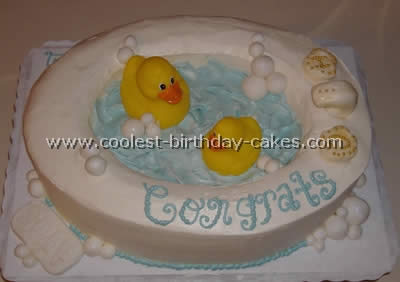
Here is my cake baking tips on this cake. Gather all your equipment necessary to bake and decorate you cake. Pre heat your oven to the proper temperature (usually 350′). Prepare Cake batter as directed by any cake recipe. I used a traditional butter cake recipe and fill an oval cake pan half way full with batter. Bake until a toothpick comes out clean when inserted into the cake.
While the cake is baking gather and prepare the ingredients to make your icing. Or you can purchase already prepared icing. I chose to make homemade vanilla buttercream.
After the cake is baked and set aside with time to cool create a hollow oval section in the center of the cake with a knife and spoon. (This will be the tub basin.). Roll handles, bubbles, a soap bar and a faucet out of Rolled fondant and set aside to dry. You can either decorate the handles with icing or gold dragees to differentiate between hot and cold. And use lettered cookie cutters to get a “SOAP” impression on the bar.
With most icing set aside, color the remaining of your icing blue for the water border and writing. Frost the entire cake white, pipe the border and writing caption with the blue icing and with the remainder fill the hollowed center and use a spoon to create “waves”. Place the handles and faucet into the cake and randomly place the bubbles around. Place your store bought rubber duckies into the water as if they were swimming.
Lastly enjoy your beautiful cake that looks as good as it tastes!! Hope my cake baking tips were of help.
Cake by Stacey O., Thunder Bay, Ontario
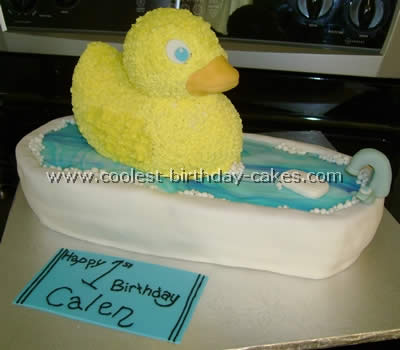
My cake baking tips for this cake is very easy. The bathtub part of the cake is made of two round cakes cut into the shape of the bathtub and covered in fondant. The duck is the Wilton duck shaped 3-d pan.
Cake by Ashley B., Port Arthur, TX
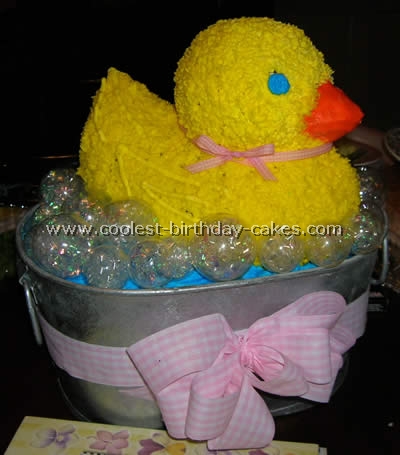
My mother-in-law made this for my baby shower. Here is her cake baking tips: She used the Wilton Duck cake pan and simply frosted it. For the stand we got an aluminum tub (from the hardware store). She put Styrofoam on the bottom to raise it up then cut cake cardboard to fit in the tub. She put blue icing in the top and set the cake on top.
Now…for the bubbles I had this idea and I’m very proud! I took empty Christmas ornament balls (from the craft store) and put cellophane strips in there with a pencil. Just stick the opening of the ball down so you can’t see it!
