Take a look at these cool homemade Lizard cakes shared with us by cake decorators from around the world. Along with the birthday cake photos here, you’ll also find loads DIY birthday cake-making ideas and how-to tips to inspire your next birthday cake project. Enjoy!
And don’t forget… if you end up with a cool cake, have great tips to share or pictures of awesome birthday cakes you’ve made in the past, share them here and be a part of our coolest birthday cake community.
Latest Lizard Cakes
- 3-Foot-Long Lizard CakeWhen my son asked for a bearded dragon for his 6th birthday, that kicked off the theme for his birthday … Read more
- Coolest Little Lizard Birthday CakeI was asked by a friend to bake a lizard birthday cake for his son’s birthday. I am a novice … Read more
- Coolest Larry the Lizard Birthday CakeI made this Larry the lizard birthday cake for a friend’s son’s sixth birthday. She hired a reptile professional to … Read more
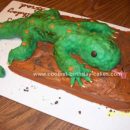
- Coolest Lizard Birthday Cake Photos and How-To Tips 1Coolest Lizard Birthday Cake Photos and How-To Tips 1
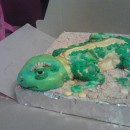
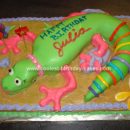
- Coolest Lizard Birthday Cake Photos and How-To Tips 2I used my horseshoe shaped pan for the body of the gecko and my daughter suggested using a cupcake heart … Read more
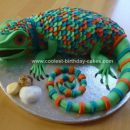
- Coolest Lizard Birthday Cake Photos and How-To Tips 3Coolest Lizard Birthday Cake Photos and How-To Tips 3
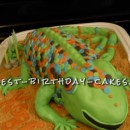
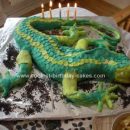
- Coolest Lizard Birthday Cake Photos and How-To Tips 4I froze the cakes to make cutting easier. Next we drew an actual size template of a lizard on sheets … Read more
- Awesome Homemade Lizard Birthday CakeWe made this Homemade Lizard Birthday Cake almost a week ago today for my daughter’s 6th birthday. I really had … Read more
- Coolest Lizard Chamelian CakeMy daughter had a ‘Creepy Crawly’ party. Someone came from Really Wild Enterprises and bought Spiders, Giant Land snails, etc, … Read more
- Cool Homemade 3D Lizard Birthday CakeThis Lizard Birthday Cake was a birthday cake for my brother who loves reptiles. I made rice cereal treats and … Read more
- Cool Homemade Lizard Birthday Cake DesignThere are not many lizard cakes out there, so I gleaned what ideas I could from this site and came … Read more
- Coolest Lizard CakeI made this lizard cake for a friend’s little boy’s 5th birthday. He is very into lizard’s at the moment … Read more
More Lizard Cakes
Lizard cake by Kathleen S., Prince Rupert, BC, Canada
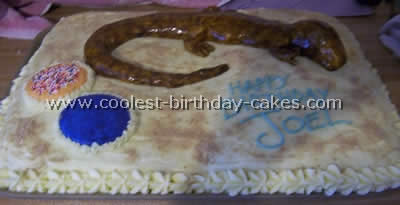
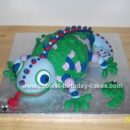
My cousin wanted a lizard as a pet for his birthday so I decided to make him a lizard cake instead. I molded the actual lizard by hand out of candy (one package cream cheese and 1kg of icing sugar, flavoring and color). Then I painted it with some thinned out paste icing colors. I stuck two amber colored rhinestones in the head for eyes. Next I took two rectangle cakes, one white and one chocolate, iced them together side by side and covered each with a pale yellow icing, sprinkled it with graham cracker crumbs to look like “sand”. Carefully placed the lizard on top (his tail broke but I squished him together on the cake, no one noticed).
I took two digestive cookies, covered them with a thin layer of candy then painted one blue for water and the other I stuck rainbow round sprinkles onto for lizard “food”. I took a box and cut out the sides of it and then covered it with tin foil to make like a cage or an aquarium for the cake. That was Joel’s birthday lizard. It was a great hit at the party, we took many birthday cake photos and the kids devoured it.
Lizard cake by Christy G., Fort Pierce, FL
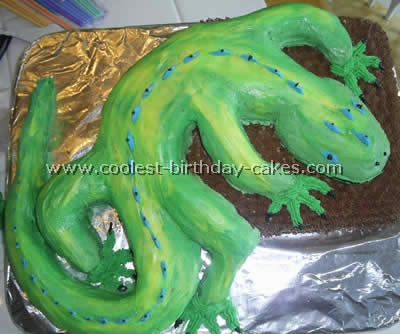
I got the idea online from someone who made a similar cake and shared their birthday cake photos, so I copied their idea!
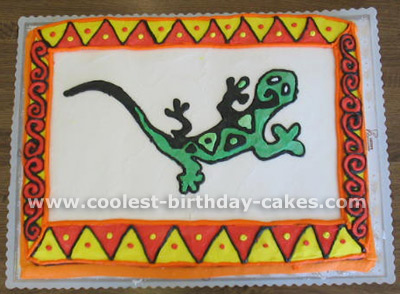
The lizard was cut from a round cake and placed on top of a square cake. My husband was able to make the frosting so smooth by using a small “new” wet paint brush. He dipped it in a little water and smoothed out the frosting!
Kimberly F., Regina, Saskatchewan, Canada
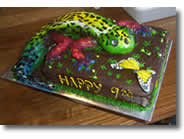
I made this Gecko Lizard cake for my friend’s son Tristan. She had looked everywhere to try and get a cake with a gecko lizard on it, but to no avail. As a last attempt, she asked me if I could make one for her. I searched the internet to see if there were any birthday cake photos I could use as a guideline and I was unable to find any so I printed off pictures of geckos and used those as my guide.
My horseshoe shaped pan I used for the body of the gecko and my daughter suggested using a cupcake heart for the head which turned out to be the perfect shape. I ended up only using 1/2 of the horseshoe, cutting that in half and putting it back together in the shape of a 1/2 “U”.
I did have to carve down the tail to make it gradually become smaller. Part of the tail is made out of cake and the smaller section is made from rolled fondant.
The legs and feet I shaped from rolled fondant also.
I “glued” everything together with buttercream icing. Then I crumb coated the entire gecko with buttercream using a piping bag and gently spreading it where necessary.
As you can see by the birthday cake photos, I have the gecko sitting on a 10X10 square cake because I did not think the gecko alone would be enough to feed 12 9-year old boys.
I used rolled fondant for the eyes and covered them with black buttercream to make them look like they are protruding (I always use chocolate buttercream to make black, it takes less black paste color).
Next, I decorated the gecko using a photograph of a tropical gecko. I piped on the colors and used a paint brush dipped in hot water to help me with the hard to reach areas and to smooth out the buttercream.
I decorated the gecko first and then the square cake. Then I added a wafer-paper butterfly and the lettering and my cake was finished.
I was delighted by everyone’s reaction to the cake and now someone else looking for lizard birthday cake photos will be able to save time and find them here.
Joyce B., Oklahoma City, OK
Original Lizard Birthday Cake Photos
Laura M., Spring Creek, NV
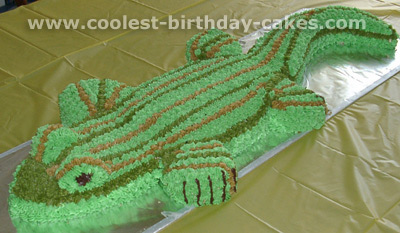
My son wanted a lizard cake for his 6th birthday that looked like his pet lizard named Speedy. I baked three 9 x 13-inch cakes. I used one cake for the body of the lizard, one cake for the tail, and one cake for the head, feet, and eyes.
Then I froze the cakes because it makes cutting easier. Next we drew an actual size template of a lizard on sheets of paper taped together. We cut out the template, laid it on the frozen cakes, and cut out the lizard shape.
Next, I pieced the lizard together; trimming the pieces until I got the look I wanted. The eyes are made by cutting small semi circles of cake and placing them on the head.
I then refroze the cake pieces so that I could easily frost the cut sides of the cake (to prevent excessive crumbs in the frosting).
I used homemade butter cream frosting (the Wilton recipe) and tinted it in three lizard-like colors. The frosting is made in advance and stored in an airtight container in the refrigerator. Once I had the frosting ready, I took the cakes out of the freezer, pieced together my lizard figure, and began frosting using the butter cream frosting.
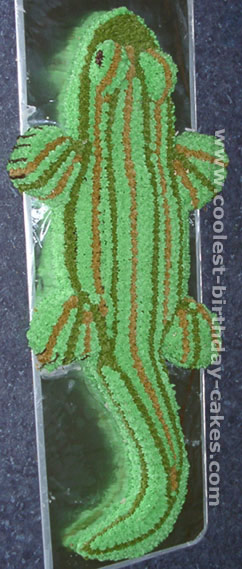
Attaching the Eyes, Head, Legs and Tail
The lizard legs, eyes, head, and tail are attached to the body using frosting as “glue”. Using a piping bag and a star tip, I piped stars in striped patterns to mimic Speedy the lizard. Don’t be afraid of piping and butter cream frosting. It’s easy and hard to mess up. You can make the stars bigger to cover more area and get done quicker by simply squeezing out more frosting.
This cake was a huge hit. The kids couldn’t decide which part of the lizard to eat first. It’s always best to take some birthday cake photos once you’ve put so much effort in making a cake!!
Your comment has been sent successfully.