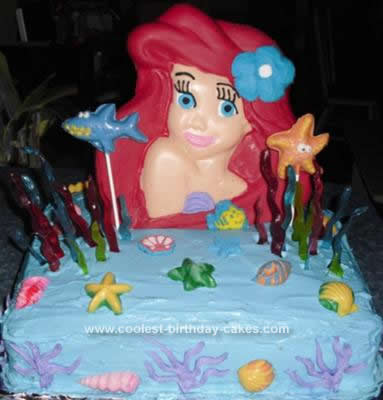
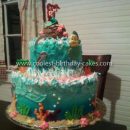
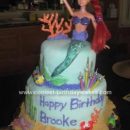
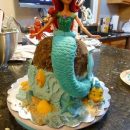
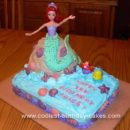
The Little Mermaid is my favorite movie of ALL time so it was I was overly thrilled that my family and friends wanted an Ariel Birthday Cake. This cake was for my cousin’s birthday a couple of months ago. I took the idea of making an Ariel Candy Plaque from the Wilton Year Books. I already had the Ariel Cake Pan so I knew that making Ariel out of candy would be a ringer with the kids.
Making the Cake:
The cake was made using a 14 x 14 x 2 Square pan. I used the pan twice so I could get the cake 4 inches tall and also so that I could have two flavors. The type of cake really doesn’t matter but I DO NOT RECOMMEND ANGEL FOOD OR WHITE CAKE. I knew I needed to have a cake that would be sturdy enough to hold up the heavy Candy Plaque. Tip: Allow a FULL day for the cake to cool before trying to do ANYTHING.
Icing:
The icing is a family recipe but it does contain Cool Whip which is really light and fluffy. I tinted it blue using the Wilton Color Gels. I used Royal Icing to create the purple seaweed. Royal Icing dries hard which worked perfect for very easy assembly. I just prepaid all the seaweed by using the royal icing immediately after I prepared it. I put the royal icing in a decorating bag and used a star tip to create the seaweed. I made sure to decorate onto wax paper so the seaweed would easily separate from the paper once dry.
The sea weed was one of the most difficult parts. I used Jolly Ranchers that I heated up one by one in the microwave. Once I heated the candy I stretched and molded the seaweed by hand. Tip: Work fast because the jolly rancher cools fast and your finger tips get slightly tender.
Candy:
I used Candy Melts and candy molds to create the under the sea friends and shells. It’s very simple. Heat the candy in a microwave safe bowl then spoon or tip the candy into the molds. Put in the fridge to harden then pop them out.
Ariel was more tedious than difficult. I sprayed my Ariel pan with cooking spray to that she did not stick and began to tip her eyes and lips. Basically everything you do needs to cool before attempting anything else to avoid the candy blending together. Once everything is complete and its had at least an hour to cool, pop out Ariel. I used an ENTIRE bag of Red Candy melts to add to the back and add sticks. The sticks will allow Ariel to stand. I put several sticks flesh with Ariel so she could stand plus sticks at a 45 degree angle so that it could support the wait.
I assembled most of the cake and took the Ariel plaque to the event. I live an hour and half from the party so I did not want any chance of Ariel falling over during the travel. Ariel can stand on her own for several hours on a table but I would not recommend trying to move it assembled. My cousin loved the cake and that is what brought a smile to my heart.

Wow! Great job!! Thanks for the great suggestions!! The candy plaque can be made with virtually any cake pan. I never would have thought of it! Thanks!
I think I posted my last comment in the wrong place. Whoops! LOL! I was wondering if you colored white candy for the eyes, clothes, flower etc.? What did you use for the skin?
Some really great ideas here! Did you tint white candy with blue for the eyes, clothes, flower and eyebrows/lashes?
Yes, I took white candy and colored it. Make sure that the coloring you use is strictly for candy. Icing color will ruin the candy. Good Luck Ladies!