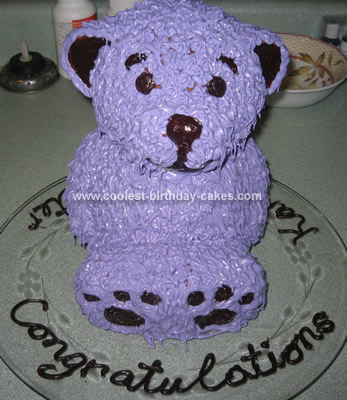
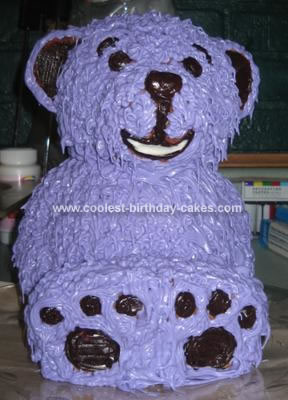
I made a Baby Shower Bear Cake for my friend’s baby shower, she knew she was having a girl so I chose to make a purple bear.
This cake was made with a Williams-Sonoma Build-a-Bear cake mold (This cake bakes as right and left sides). I used the Williams-Sonoma recipe for a lemon bundt cake that came with a different three dimensional pan. Using a bundt cake is imperative if you want your cake to have the density to hold itself up. I would caution anyone using one of these pans to make extra batter. The recipe I had did not fill the pans, which resulted in a bear that was not fully formed and the halves could not successfully be joined.
This is my second attempt at this cake (we ate the first unsuccessful one). I would suggest you double your bundt cake recipe and make cupcakes with any excess batter.
I learned how to assemble the cake on the Williams-Sonoma website, they have since removed the instruction video. Once the cake was baked I let it fully cool on a rack. I put the right side of the bear back in the pan and iced the exposed cake, then I laid the second half (left side) on top. I placed the entire cake and pan in the fridge overnight to allow the icing to harden and act as a glue to hold the sides together.
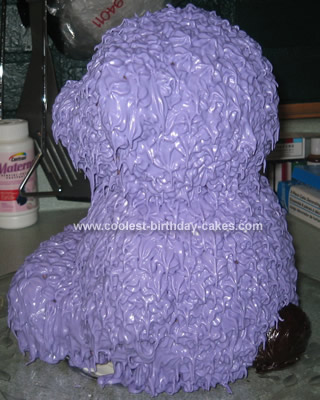
The next morning I removed the cake from the pan and sat the bear on a puddle of icing on a plate. I placed the cake and plate in the fridge to allow the icing to harden, I used chocolate fudge icing (store bought) to ice the eyes, ears, nose and pads on the feet. I used a size #4 tip on my icing bag. I used vanilla icing (store bought) mixed with purple colouring paste to cover the bear. I used the star tip #16 with my icing bag.
As I worked on the bear I found that some of the icing was melting as I went, so I iced the bear in several sessions throughout the day to allow each section to harden before I moved on.
I found this website very helpful as I looked for decorating ideas. The original mold was sold with fondant icing and patterns for dressing the bear. I didn’t have the kit so I decided to create my own decorations and with the help of your contributors I was more than happy with the results.
Your comment has been sent successfully.