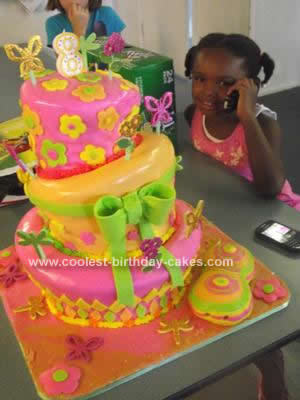
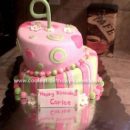
This Bright Topsy Turvy Birthday Cake was made for my niece who turned 8 recently. This was my second Topsy Turvy cake and really was not to difficult. The bottom layer is 2 12 inch rounds and 1 10 inch round. The middle is 2 10 inch rounds and 1 8 inch round and the top is 2 8 inch rounds and 1 6 inch rounds. All layers are then frosted between and stacked leaving the very top layer.
The middle layers of each tier is trimmed at an angle to blend with the bottom tier then the top layer is cut at an angle from top to bottom, the top being the most narrow cut and the bottom being thicker then the cut is turned 180 degrees. After doing this the entire tier is frosted and chilled in the fridge for a few hours.
After chilling the cake I then took 8 and 6 inch cake rounds, put each right in the middle of the bottom and middle layers and cut the cake to form a indentation in the cake so that when it is stacked it will sit evenly. Again the cut out parts are re-frosted and chilled then all layers are covered in fondant which I make myself and decorated with cut outs such as flowers, stars and diamonds in various colors.
The little butterflies that are around the cake are just some sponge sparkly things we found and attached to straws to make it even more colorful and fun.


I love this cake! I tried to make a Topsy turvy cake but when I put the icing on it the weight of the icing pulled the cake apart. I did not cover it in fondant. Do you think that the fondant helps hold the cake together or did you use a sponge cake? I just used a regular box cake mix. Any advice would be helpful. Maybe with more practice – I can get one to come out like yours!
This cake was just cake mix as well I think the fondant helps also if you google ” directions on how to make a topsy turvy cake” it may give you some tips that can help you it definitely helped with the 2 I have made……And thanks for the compliment this is a new hobby for me and it is nice to hear positive feedback.