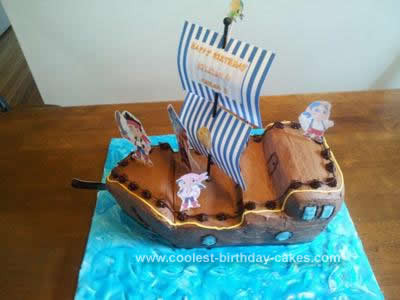
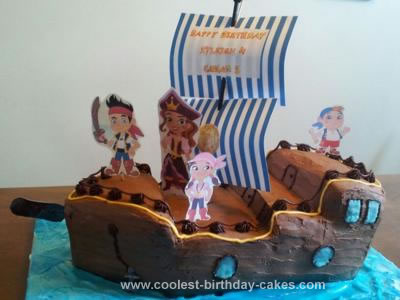
This is a ‘Bucky’ Cake I made for my son and daughter who are mad into ‘Jake and the Neverland Pirates’ show. It was an easy cake to make and trust me, I am no expert. This is about the fifth cake I have ever made, so if I can do it, so can you. I Googled a bit online first to check out the other cakes and their designs, then went ahead and printed out ‘Bucky’.
I used two boxes of Betty Crocker cake mix, chocolate fudge. I know, I know, I cheated, but I can’t for the life of me bake a cake from scratch. I have to practice more, I know. I will in the future but for now, I’m cheating. For this cake, I think I would choose a regular chocolate cake mix, because using the chocolate fudge and the icing proved a little too sweet, even for this sweet tooth.
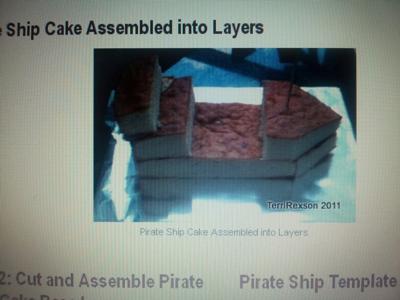
I used a hexagon shape tin as I didn’t have a long rectangular cake tin. If you have the rectangular cake tin, use that one instead, it’s lot easier when sculpting your cake. I baked the two cakes according to the instructions on the packet. A little tip, when spraying your baking tin, dust a little flour on top of the spray, this makes it easier to remove the cake later.
I baked my cakes for 30 minutes at 350 degrees. Then let cool for 5 minutes in the tin. When removing, I placed wax paper on top of the cake and then placed the wire rack on top of the paper and flipped the cake onto the rack. The wax paper prevents the wire rack from cracking the cake or making marks on the cake. Then when completely cool I wrapped the cakes in wax paper, cling film and tin foil and popped into the freezer. When freezing your cake, you’ll want to make sure to wrap it up well.
I had my kids party on Sunday so I baked the cakes on Thursday evening. On Saturday afternoon, I iced the cakes. The cakes take about two hours to defrost. The reason I freeze them at all is because it’s easier to sculpt when the cakes are firmer. Take out the cakes to defrost about one hour before you need to sculpt them.
I made the butter cream frosting first. Here is that recipe, it makes about 2 cups. I tripled the following ingredients as I needed more and I added the cocoa as I wanted a chocolate icing.
…..BUTTERCREAM RECIPE……
(double or triple to suit size of cake)
1 stick of softened butter.
1 tablespoon of milk. ( I found I needed more than that)
12 oz of Confectioners Sugar, sifted.
If you would like to add a flavor to the butter cream, I add one of these two. Vanilla or chocolate.
Vanilla – add I tsp Vanilla Extract
Chocolate – 1 1/2 tablespoons of unsweetened cocoa (mix with a little milk and make a paste, then add to ingredients.
Add the butter and milk and mix well, add any flavors, then sift the icing sugar into the bowl a little at a time and mix well.
Add milk to get desired consistency. Then store in airtight container till you are ready to use.
………TIME TO SCULPT YOUR CAKE…….
I used a large square cake base. I placed one cake layer on the base, and put on the medium consistency butter cream then placed the second cake on top, to make a sandwich. I used a bread knife with a serrated edge, I find that works for me the best, then a small sharp knife for the smaller edges. I had a few pictures to go from so I just eyed it until it looked like a pirate ship.
……..TIME TO ICE YOUR CAKE……….
I like to crumb coat first so I use a very soft butter cream mix ( I take some from the main batch and add milk), the softer it is, the easier it is to coat the cake. I put on a very light coat, if you go too heavy, it won’t get firm. I put it in the fridge for an hour.
Once the crumb cake is firm, I ice the rest of the cake, then put it back into the fridge to get firm again.
…….TIME TO ADD DETAIL TO YOUR CAKE……..
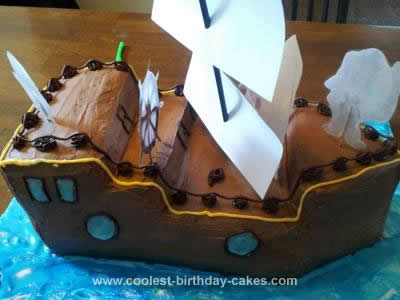
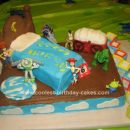
I mixed up some confectioner sugar, water and food coloring to make my blue and yellow color. I added cocoa to the icing mix to make my ladders and frames for my windows and rope and railing. I added a lot to get the dark brown color. I used this icing instead of the butter cream as I found that the icing would get a lot harder. I used tip number 2 to make the window and door frames, ladder, rope and anchor. I used a number 21 tip for the railing bases. Obviously, you can use whatever shape you wish, I thought these worked well for me. I printed out and laminated the characters from the show and slid toothpicks between the laminate so that I could stand them up on the cake.
I used a small flag stick for the mast and printed out the sails from a website I came across. I clued the Gold dubloom onto the front of the sail as I did with the banner with my kids names. I punched 4 small holes symmetrical to one another and slid the pole through. I bent the paper a little to get that rounded look. I printed out the anchor, steering wheel and cannon and also laminated them and put tooth picks through them.
For the cake base icing, I used confectioners sugar and water and layered it on the base around the ship, then used a blue spray food coloring on the top. When the mixture got a little stiffer I ruffled up the icing which created the white wash. For the windows, I used the icing with a touch of the blue aerosol to match the sea and then for the candles I bought black ones to resemble cannons.
My kids loved it, every bit of it. I found it a little sweet, so go easy on the sugar and you should be alright.
Any suggestions or advice is greatly received and good luck to you who have not done this before. Take your time and map out what you want to do beforehand. Look up you tube and this website for ideas and tips. I love love love the internet. I have learned a lot from websites like this, that’s why I have posted my cake. I hope this helps someone. Good luck!


Thus is a brilliant idea, my kids have just discover jake and the neverland pirates, they would live this cake. It’s a stroke of genius printing out the characters & laminating them. Great cake. Bet it was delicious.
Wow fab cake Olive, can’t believe you havn’t baked much in the past. you should go professional.
this is a real cool cake!! or should I say aye mate kewl cake….. I would love a piece of it…..hmmmm good!
Coconuts! What a great, tasty cake Pirate Princess!!! Great Job! Kids loved it.
Thanks guys. I did have fun making this cake.