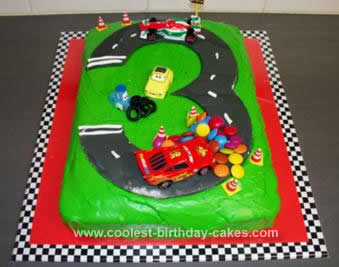
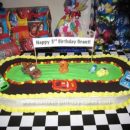
I made this Cars 2 Race Track Birthday Cake using 3 x basic chocolate cake mix, poured into a 23cm x 33cm tin. I had to guess the baking time, and relied on using a skewer in the centre of the cake to gauge when it was cooked, which was about 45 minutes. I had always intended to cut the top off the cake to flatten out the surface, so I wasn’t worried about uneven rising. After leaving it to cool in the cake tin, I cut the top off with a bread knife, so I could follow the edge of the tin for an even and neat cut. I turned it out into a cooling rack and left it to cool. I stored it in the fridge, wrapped loosely in cling wrap until the next day when I decorated it.
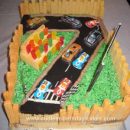
To make the No. 3 Race Track, I used readymade white fondant icing and dyed it as close to black as I could, using a mix of red, yellow and blue food colouring mixed in equal quantities, eg; 3 drops red, 3 drops yellow, 3 drops blue. I finally got to the required colour with about 60 drops of each colour, counting up and mixing it into the icing at each 15 drops. It took forever!!! Once the fondant icing was the right colour, I rolled it out into baking paper dusted with icing sugar. I had traced the “3” onto the paper first. Once rolled out I then covered the top side of the icing with another sheet of baking paper. I flipped the icing over so I could see the “3” that I had traced onto the paper, and I then cut out the “3” using a crafting scalpel. Once I had the “3” cut out I removed the baking paper and dusted and buffed it with some icing sugar on the tip of my finger, to get it smooth. I used some left over white fondant to make the line markings on the road (but I applied the lines to the icing after the “3”was lifted onto the cake). I kept it covered in the fridge until I was ready to lift it onto the cake.
To make the green icing, I used packet mix icing sugar and followed the instructions on the packet. I dyed it green using Wilton’s Leaf Green Concentrate, and applied it to the cake while on a wire cooling rack, obviously applying it to the cake when the cake was cool!
I used a standard silver cake board. I had decorated the surface by making a chequered flag pattern on my computer (Microsoft Excel) and used a sheet of red cardboard from the office supplies shop. I covered it with clear plastic contact, like the stuff you’d cover a school book with.
Assembly time. First you need to lift the green iced cake onto the board and clean up the edges. I kind of slid the cake onto the board more than lift it, as I didn’t want it breaking at the last minute! Next was the “3” and you only really get once chance at doing this so I carefully flipped it into position, as the 3 in a reverse image and I could just turn the cake around if it was flipped the wrong side up! Once on, I started to decorate the “3” with the white lines and then the cars. I used real tyres for Luigi and Guido, I had notice the week before that my son had accidentally pulled the wheels off one of his trucks and, hey presto, I have tyres! Casa Della Tyres! All the rest is pretty self-explanatory.
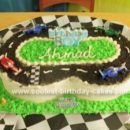
The design of this cake was my own, and I had spent a while on Google images searching for Race Track Cakes and found various images on the Coolest Cakes website to gain idea’s from. With my son’s input I came up with this idea, which according to my friends was fantastic! I hope you enjoy it too!
Fantastic idea for the board – have been thinking of what to do for this part of my nephews birthday cake – thanks
please sell me this cake!
My son loves this! He wants one like it with a number 5 for his birthday :)