Wilton butter cream icing is what I used for this Homemade Castletale Cake. Here is the recipe:
1/2 cup solid vegetable shortening
1/2 cup (1 stick) butter or margarine softened
1 teaspoon clear vanilla extract
4 cups sifted confectioners’ sugar (approximately 1 lb.)
2 tablespoons milk
This makes approximately 3 cups.
In large bowl, cream shortening and butter with mixer. Add vanilla. Slowly add sugar, one cup at a time, beating well on medium speed. Scrape sides and bottom of bowl often. When all sugar has been mixed in, icing will appear dry. Add milk and beat at medium speed until light and fluffy. Keep refrigerated or stored in an air tight container.
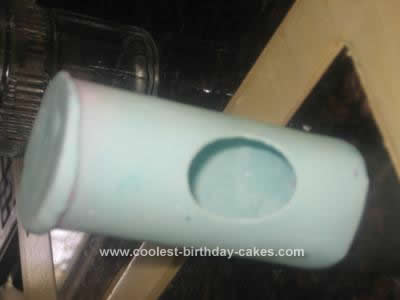
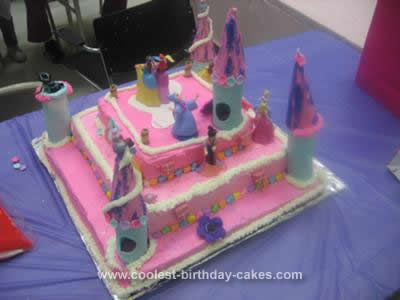
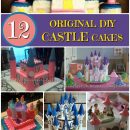
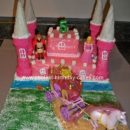
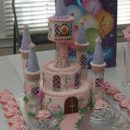
A client asked for a princess type of cake and immediately I think, I’ve got to make a castle! This was my first attempt at it and I believe it turned out well. I started out with the largest square cake pan I owned, ( 16*16*2 ). The hardest part about this cake would be the measurement. You have to make a precise hypothisis to see it the tower will fit in between the bottom and middle layer. It was rather expensive to create because the fondant towers needed to look detailed. The first thing I did to make the cylinder was I used the Wilton fondant cutter ( found in Fondant and Gumpaste Kit ) and set the cutters far away as possible so it reached about a ¾ in. length. I wrapped it around the brown paper towel roll and let it dry for about 2 days.
The next step was to cut out a blue circular disk of fondant and use some gum glue application to make it stick to the cylinder. Flip the cylinder down so the disk is on a surface, it helps with the drying process. By this point the cylinder should have been removed off of the roll. It’s easier to slide off if the roll is lightly coated with flour and cornstarch before applying fondant. If you want a cloudy blue look, all you need to do is take 1 ball of medium-light turquoise fondant and a ball of white and mix until there is little white seen. I used three fondant balls on top, to capture the elegant look I lightly sprayed water on it then coated it with pink pearl dust.
If you use the pink food spray then use the pink pearl dust it works best. One other thing use as the reader should know is that all tower sizes can vary. If you want to make a shorter one just use a tissue roll (Probably best to clean it with a wipe than rinsing it with water because it will be withered and wimpy, we need it to be strong). To create the window I used an oval fondant cutter and centered it and pressed until I could tell the shape had made an imprint. A better effect is created if on the first night it’s dried on the roll. The second night take it off of the roll and let it dry by itself.
To make the cake itself, I used Crisco and lightly coated the square shaped pan and then took out a sheet of parchment paper. I used an edible black marker and traced around the pan. I cut around the line and put it inside the pan and smoothed it down over the Crisco. I redid step one and then dusted it flour then poured my batter. When you take the cake out of the oven lay it on a trustable surface to cool for five to seven minutes. When it’s ready, flip it on a tray and place it in the freezer for and hour and thirty minutes uncovered (this keeps the crumbs insulated), take the cake out and immediately start frosting!
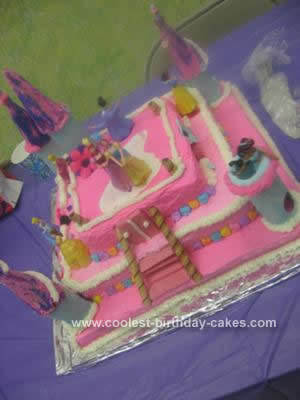
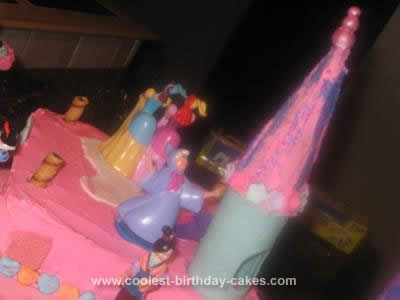
Notice that the bottom is a darker hot pink, the medium a rose-ish color and the top a mix of both. On the middle layer the windows were created by strawberry wafers. The border in between the layers are heart shaped candies. And to make the drawbridge part in the front I used chocolate pralines.
An additional comment is to get the pointy top of the tower you need to frost icing on the fondant circle top once dry and then frost an icecream cone in pink icing. The next thing you do is roll it around in sugar chrystals (sprinkles).


Great cake…looks delish!