My son’s first Easter was a big deal to me. Like all his first events I wanted it to be special and felt it gave me time to learn what to do and what not to do for when he was older and able to remember my treats/crafts.
Firstly, however creative I feel I am, I don’t do well with patterns and recipes. Instead I gather tons of ideas, information and guidance and then ‘create’ my own version modified from my inspiration. I refuse to use marzipan or fondant as my grandmother never did and her cakes were always amazing.
Starting with the idea of the Easter Bunny cake:
While searching online for an Easter cake I found a guide online (forgive me I can’t remember where) but Google will probably find it.
Shaping the cake:
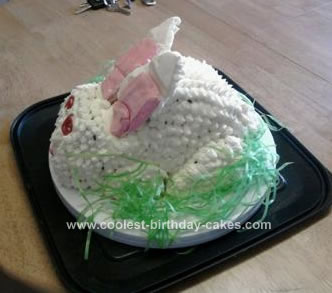
It starts with 1- 9inch round cake (I used 2 cakes because it didn’t rise well) and
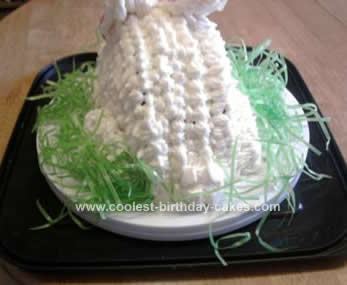
cut in half. Stick together the two halves with frosting. Cut a small V-section out of the ‘neck’ area of the cake. I placed the individual wedges against the body at the sides of the bunny as legs/arms curled up (the original design/recipe, if I remember correctly used it as a tail).
The ears, face and tail:
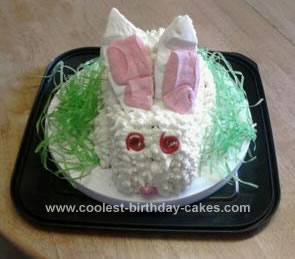
The face is simply a piece of pink marshmallow for a nose and stringy candy for eyes. They didn’t seem twilight zone swirly at the time. The tail is a white marshmallow cut in an X with kitchen scissors. Once cut and pinched the back to ‘open’ the tail and clipped it. I placed it in the fridge with the ears. The ears are also marshmallows, I’m a bit disappointed they didn’t come out as well as I’d hoped. However, you may be able to come up with a good way to make it work. I used a rolling pin and flattened several dozen (for good measure) large white and large pink marshmallows. Once they finally stayed somewhat flat, I joined the pink and white ones together with icing.
I refrigerated them. Due to my schedule it turned out to be overnight. Once I took them out of the fridge I tried to cut the shape of ears out of my stiff marshmallows (I believe the original idea used construction paper as ears). Placing the ears in the V-shaped cut in the ‘neck’ gave them a bit of propping and they were ‘secured’ with icing. As well as covering the bottom off them with icing.
Recipe:
Sorry to say I’ve no idea as I didn’t think I’d need it again. My son was not even 1 at the time (Easter 2011) so I specifically made it gluten free, sugar free, dairy free, egg free – basically saying baby safe. So everything was homemade and I opted to use a decorating tip for icing rather than coconut.
Portions:
When the cake was served it was 7 people; 3 adults, 2 six year olds, a 3 year old and my son less than one. Serving each what seemed appropriate for their age, we only ate half the cake in that sitting.
Reaction:
Baby Bunny was so well loved no one wanted to cut him. Everyone loved the idea and presentation, even the grass was mistaken for edible since everything else was. My grass was a wax based basket grass from the $1/£1 store and not edible. Though it tasted different due to the dietary changes it was still sweet and wonderful and seconds were desired by the kids.



i love the look of this cake x not being any good at baking i really wouldn have a clue where to start well done x
So adorable! The thought and effort that went into making this a special occasion are evident in this “Momlove” bunny cake! What a special mom, and such a special recipient!
This is great!
That is so adorable – looks yummy, too!
This cake looks so delicious and adorable all at the same time! Love the detailed descriptions for making the cake too.
Looks like you have learned well from ya grandma, deary! AWESOME Job!
We have made this little fellow for years for Easter. There were 7 grandchildren in my husbands’ family. His Mother made it every Easter. It is a Betty Crocker Cake. I have instructions and they still have them on website. We are carrying on the tradition since Grandma is not here anymore. She dyed coconut green, sprinkled jelly beans around for Easter eggs.