My sons have their birthdays in the same month and we all share a love for Harry Potter, so we decided to have a joint birthday party with a Harry Potter theme. I asked my oldest what he wanted the cake to be, and when he told me Hogwart’s Castle I didn’t know if I could pull it off. I came to this website, Coolest Birthday Cakes, to get a Hogwarts Birthday Cake Design, and then we planned and tweaked things for a couple of weeks.
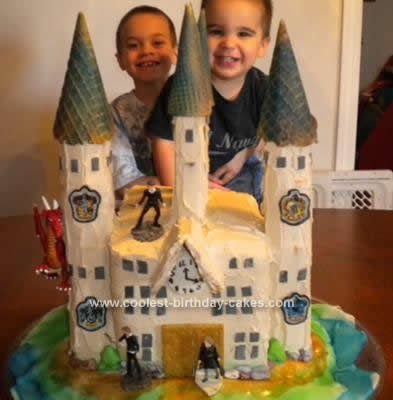
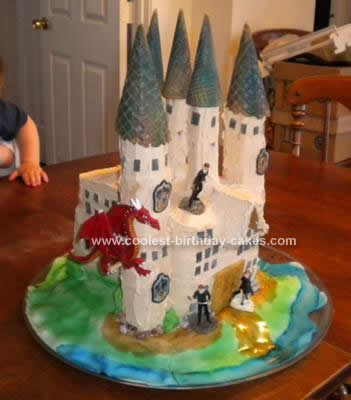
For this cake I baked two 9×13 cakes the night before, and refrigerated them overnight. The cake took me the whole next day to make, about 10 hrs. The cake is on a round plastic serving tray. I made 2 batches of rice crispie treats and pressed them on the plate, trying to make a rocky surface. I rolled out white store-bought fondant and covered the rice crispie treat. Then I cut my 9×13 cakes in half (so I then had 4 pieces of cake), and stacked them up with icing in between. This is what forms the square part of the castle.
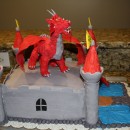
I used store-bought jelly rolls for the 2 large side towers, and Swiss cake rolls for the 3 smaller towers on top. I used cake dowels through the jelly and Swiss rolls to hold them together and into the cake. One of the dowels stuck out too far from the side of the tower, but it ended up making the perfect spot to perch our dragon on.
I iced the whole thing with butter cream icing, which I tinted with a little bit of brown icing color to get a tanish color. It took me three batches of butter cream icing to cover the whole cake. The smaller towers have sugar cones on top, and the bigger towers have waffle cones on top – all were sprayed with blue and purple color mist food spray. The Hogwarts house crests that are stuck in the towers are plastic rings that I found online. I gave the rest away to the kids as party favors. The clock (which should be done in Roman Numerals, I am so mad I made that mistake!), is fondant colored with black edible food marker. The windows are fondant too – I colored the white fondant with a little black icing color, rolled it out, and used a pizza cutter to cut rows and then rectangles. The little shrubs that are in front and around the side are also fondant – just tinted green and formed into shrub like shapes. The rocks around the castle are chocolate candy rocks that I had left over from another cake, also found online. For the landscape, I tinted little bits of vanilla extract with brown, green, and blue, and then painted on the white fondant to try and resemble a path, grass, and water.
I was getting tired at the end, so the doors are just graham crackers, and so is the archway above the clock. The Harry, Ron, and Hermoine figures were also found online. I got the dragon at the craft store. Overall, this cake came out way better than I could have hoped for. All of the kids loved it and had a lot of fun eating the cones, rocks, and shrubs off of it. The cake was great too!


It is a beautiful castle! Just perfect! Thank you for telling us early in your description how much time it took. I want to have a nice cake for my daughter’s HP themed birthday, but I do not have 10 hours to work on the cake! You did a fabulous job!
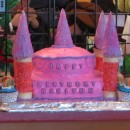
I imagine that you could do this in way less than 10 hours. I made the princess castle cake very much like this and heavily decorated in about 3 hours (not including baking and cooling). It was 24x18x30 and everything was edible. I used rice krispies to make the towers and ice cream cones for the roofs. I used sugar cookies for the draw bridge and windows and blue jello for the moat. Don’t let the time keep you away. And, an airbrush is not necessary…Happy CAKING!
I think your cake is spectacular. My little girl wants a Harry Potter party. Your description and ideas are really helpful. Thanks.
Awesome cake! You did a superb job :) Where did you get the dragon? Where you find long jelly rolls (for taller towers?). Thanks.
This cake is beautiful & such an inspiration!!!
I am also making a Harry Potter themed birthday cake for my boys’ birthdays. Your cake gave me so many wonderful ideas!! I think you outdid yourself on this cake! I love it!!
Happy Baking :o)