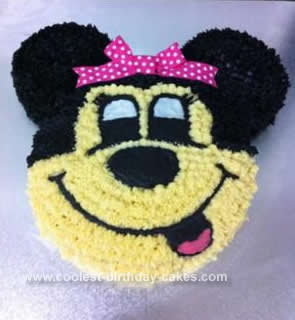
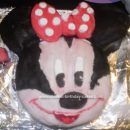
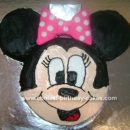
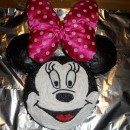
I took inspiration from this site and spent many hours researching and planning, as this Homemade Minnie Mouse Cake was my first ever cake- and for my daughters 1st birthday.
CAKE:
I used a 10 inch pan (3 inches deep) and baked 3 cakes. I used Betty Crocker cake mixes and the pan needed two boxes to fill- so 6 cake mixes in all. The ears I made devil chocolate and the face was vanilla cake. It took around 1 hour & 15 mins to bake each cake at 150 degrees.
To cut the ears I found a few round items around the house and traced the outline on baking paper, and used the size I was happy with. I needed 1 cake per ear. There was a lot of cake left over, after cutting (but my husband wasn’t complaining).
After the cakes cooled I used my round baking paper as a stencil to cut out the chocolate ears- I just went slowly and used a serrated knife. I did need to trim both the vanilla cake and the ears to have as flat a surface as possible, try not to go overboard as once frosted it’s hard to tell if the surface is uneven.
FROSTING:
The whole cake was covered in homemade buttercream frosting:
2 1/4 cups of icing sugar
185 g Butter
1 Tablespoon of vanilla essence
1 Tablespoon of milk
For the skin colour of Minnie’s face, I bought peach dye and literally only needed to dip a toothpick into the dye and then into the frosting once. For the black piped frosting I added a tablespoon of cocoa powder to the buttercream frosting to darken it, and then added black dye (in gel form).
For Minnie’s features (eyes, nose and tongue), I bought Wilton decorator’s icing in a tube (in black, pink & white) to make it easier to draw Minnie’s features. I did buy a professional piping bag and Wilton tips but ended up just using a plastic bag piping kit from the supermarket.
I covered the entire cake in buttercream frosting,quite a thick layer so I could then use a toothpick to draw Minnie’s features. (I practiced on baking paper until I was able to draw Minnie). I then used the Wilton icing to go over what I had traced. This did take some time- as I’m a bit of a perfectionist.
Once all her features had been done I began piping (using a star tip). If you find the icing starts to get a bit runny, just pop the bag in the fridge for a few minutes.
For Minnie’s bow, I bought a thick polyester ribbon and tied the bow myself. Once the cake was fully piped I just placed the bow on the icing and it stuck perfectly. I bought a proper cake board (which you can use over & over) and this just finished it off.
It took me approximately 8 hours all up, but I was overwhelmed with compliments on the day and was really proud how it turned out so it made it well worth it.



Your comment has been sent successfully.