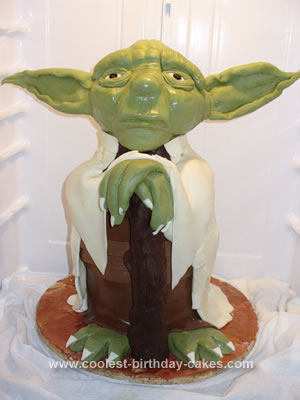
Master Yoda, is a 3ft high standing cake. He is covered in modeling chocolate, his ears and walking stick are also modeling chocolate but you can use fondant.
Tools needed for this project. Ball tool, Dresden tool, umbrella tool.
I started by making six, 8inch round cakes, stacked and fill. Then be sure to chill the cakes in the fridge over night or in the freezer for two-three hours. This cake needs to be doweled heavily. I would suggest using Wilton’s plastic dowels. We will get back to the dowels later.
On with his head, Yoda’s head was constructed out of RKT(rice krispie treats), recipe online. Once I made the treats I mixed them with melted chocolate,(doing this make the treats more stable and they will not separate and fall apart when they get room temperature). Form the treats into a ball, pack them tightly when doing so, put the ball into the freezer for approx. an hour. This will give it time to harden. Option: if you do not want to use RKT, you can use a Styrofoam ball instead, just cover the Styrofoam with a little Crisco or solid vegetable shortening, make an indent where the eyes would go, then add small fondant pieces for the cheek, nose and lips, then cover with fondant or modeling chocolate, of course always color your fondant first. Use the sculpting tools to create the wrinkles and folds in Yoda’s appearance. You can get reference pics of Yoda online.
For Yoda’s ear, I suggest you only use modeling chocolate (recipe can be found online) simply because modeling chocolate is light and can be blended in leaving no creases, but once you follow the recipe for the chocolate to create the ear, use a piece of wax or parchment paper under it. Form the ear, use a wooden skewer (found in the food section at any market or Walmart, same skewer used for barbecue), poke a hole at the bottom of the ear where it would attach to the head, and put the ear in the freezer for approx 20min. Take the skewer and place on the side of the form head, placement is where Yoda’s ear would go.
Once the modeling chocolate for has hardened, put a little water on the skewer and push the ears into place. Put some Crisco (solid vegetable shortening) on your fingers and smooth the ear around the head. Now for the dowels: mark where you want Yoda’s head to attach to his body, insert the dowels, approx four, they must be close together so they will support the weight from Yoda’s head, insert into cold cake only!
Once this done, make a small round of RKT, place on top of the dowels and cover the top in green modeling chocolate/fondant. This is Yoda’s neck. Once done, place the head on top. Secure the head with wooden skewers. I placed four in the top of Yoda and bang them down all the way through the cakes. This will secure his head in place. Create his feet, place them in front of the cakes then I wrapped a light brown fondant around the cakes for his clothing. Added a white kinda shabby cloak made of fondant and made a walking stick of Styrofoam covered in dark modeling chocolate.
MAY THE FORCE BE WITH YOU!
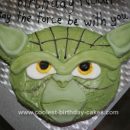
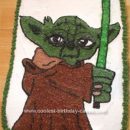
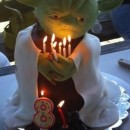
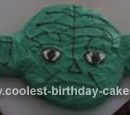
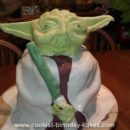
This cake looks so real!!! This takes talent, a natural that you can’t learn in a classroom.
The yoga cake is awesome. You are so talented. Could you tell me about how big is the rice krispie head? I want to try to make this for my grandson.
Yoda’s head was approx. 8inch round form, but you can make it a lot easier on yourself by just purchasing a 6 or 8inch Styrofoam ball from Michaels or ACMOORE Craft stores and cover it with the modeling/fondant, this way it is a lot lighter, and cheaper, cause you must mix in the melted chocolate with the rice krispie in order for them to hold their shape. Keep in mind, the size of the head you make depends on the height.
good luck