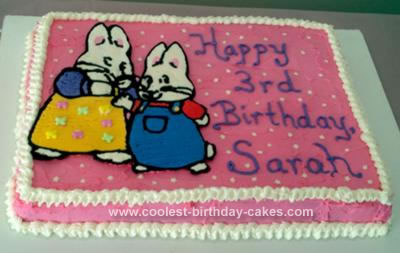
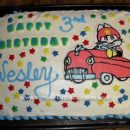
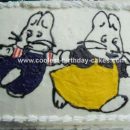
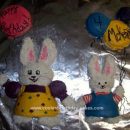
I made this Max and Ruby birthday cake for my niece Sarah’s 3rd birthday. I had promised her that I would make her a cake for her party. Originally she wanted Hello Kitty, and I thought that would be pretty simple. At the last minute, she changed her mind and decided that she wanted a Max and Ruby cake.
After doing a little research, I decided that I would try a butter cream transfer. When I Googled the technique, I found many step by step tutorials as well as You tube videos demonstrating the whole process from start to finish. The thing that appealed to me most was that all the reviews promised that it was easy to do and made a huge impact when it came to the Wow factor. I found a color image on the internet and used that as a reference when planning my colors for the transfer.
Then I made a mirror image by tracing the picture on the opposite side of the paper with a Sharpie. You can do this on a light table or by taping it up in a sunny window so you can see the lines through the paper. You then take your tracing and place a piece of wax paper over it, and tape it down to a flat surface like a cookie sheet, a cutting board, or a piece of Plexiglass. The Plexiglas would be useful so that you can check your design from underneath. I did not have Plexiglas, but in the future, I would invest in a piece because I really like the look of the transfer on the cake and I would like to be able to check it before I place it on the cake.
I baked 2 rainbow chip cake mixes in a 11x15x2 inch sheet pan, then cooled and leveled the cake. I made a butter cream recipe that I also found on the internet that was recommended for the transfer. It was light and fluffy and easy to work with and color. Cream 3 sticks of softened butter with 1 cup of Crisco. Beat in 2 tsp. flavoring (vanilla, lemon, butter, almond). Add 2 lbs. of sifted confectioners sugar, a little at a time. And mix on high speed until fluffy- 5 to 10 mins.
The transfer itself was pretty simple. I used Wilton black decorating frosting (not gel) in a tube for the outlining. Next time I will squeeze it out into a decorating bag and use my own tips instead of the plastic tips that screw onto the tube. The outlining was a little too thick for my taste. In between outlining and mixing different colors, I put the transfer into the freezer so it began to set. When it was all done, I froze it for about an hour while I frosted the rest of the cake.
For my first attempt, I was pretty happy with the result, and my niece absolutely loved her cake as did all the other 3 year old at the party. The adults were pretty impressed as well!


Your comment has been sent successfully.