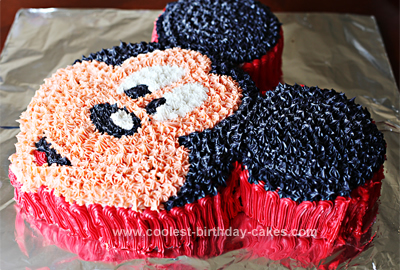
I made this Homemade Mickey Mouse Birthday Cake Design for my son’s 5th birthday party. His big gift for his birthday was a trip to Disneyland so we convinced him to choose a Mickey Mouse theme to go along with his gift, even though he had no idea that he would be on an airplane to Disneyland very soon.
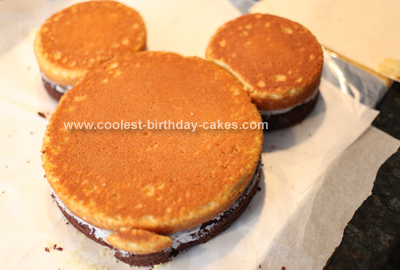
I used a ten inch round cake pan and (2) six inch round cake pans to make Mickey. I cut a small portion of the six inch round cakes off so it would fit flush with the ten inch round. The portion I cut off was perfect to use for Mickey’s chin. The curve is backwards for the chin, but with a little creme filling and frosting it stayed on just fine.
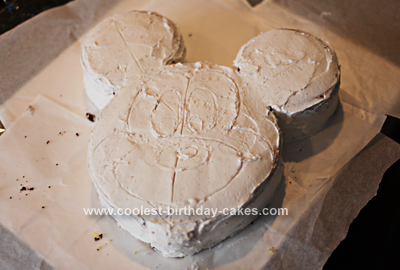
This is a double layer cake, one chocolate layer and one white layer with cookies and creme filling. I used butter-cream frosting to “dirty ice” the entire cake first. I then used a toothpick to sketch Mickey’s face onto the butter-cream.
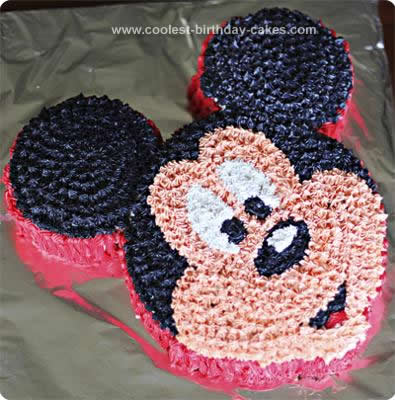
I then used different decorating tips (mostly a star tip) to complete the rest of the decorating. I started by outlining my drawing lines and filled in from the outsides in. This was the easiest time I have had with decorating tips because of the frosting. In the past I had used the pre-made tubes and my hand would be aching by the end. This time I used butter-cream frosting and the plastic Wilton bags. The frosting consistency was so much better and made decorating a breeze.
The hardest part was the food coloring. It is difficult to get red to be a true red, and black to be true black. I read afterward that for black, you should start with chocolate frosting and then add black food coloring. I also read and experienced that after the frosting sits for awhile the colors do brighten up. I used two different food coloring brands for the red, which seemed to help get the true red color and for the black. I just used the entire jar of Wilton Black.
Your comment has been sent successfully.