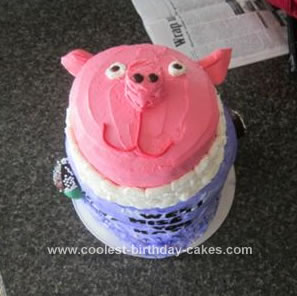
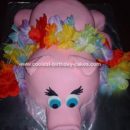
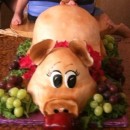
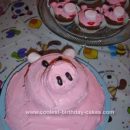
I made this Pig Face Cake as a goodbye cake for my boss because she was moving away. I made it pretty big because there was going to be a lot of people at her party, but you can disregard the bottom tier of the cake and just make the pig. My boss is very into show hogs and her family-owned hog farm, so I wanted to make her a pig face to top it off.
I used my own vanilla cake recipe and made it two layers tall. I let the cake cool and then I carved the edges off and the tops off so it would be even, round, and smooth, and put a thin layer of butter cream frosting as the filling between the two layers. I then used homemade vanilla frosting and put a thin layer of crumb coating on and I let it sit in the fridge for about 30 minutes. While it was sitting, I got some more homemade vanilla frosting ready and used 10-20 drops of red food coloring and tinted the frosting a nice shade of pink that just said playful “PIG”!
I got the cake back out and put a nice layer of the pink frosting on and I actually used the edge of my offset spatula to make an even finish across the top. Then I got some of the butter cream icing leftover and put it in a piping bag with a round tip and put two dots of white out for the eyes, followed by two brown Mini M&M’s turned “M” side down stuck in the middle of the white dots of icing.
For the nose: Okay, so I had some vanilla cupcakes left over from a few days before, so I cut the center out of one of the cupcakes and cut the top off so it was about the size of a marshmallow. Then I covered it in the pink frosting the best I could and then put a dot of butter cream frosting and a toothpick in the bottom of the cupcake and stuck it in the center of the cake. Then I just took two more brown Mini M&M’s, “M” side down and placed them on the nose.
Then I took the last of the pink frosting and tinted it with 5-10 more drops of red food coloring to make it a darker shade of pink. Then I put it in a piping bag with a small round tip and I piped out a little “cartoony” mouth.
For the ears: I got a big bar of watermelon Laffy Taffy, which is PINK, and then I put it on a plate covered with wax paper and put it in the microwave for about 10 seconds. I sprayed my rolling pink with no-stick spray and I rolled the Laffy Taffy out a big as I could. I then used a sharp knife to cut out the shape of a pig ear. Then I took a toothpick and laid it on the back of the ear and took more of the soft Laffy Taffy and molded it on top of the toothpick to make sure it stayed in the ear. Then I stuck it in the top of the pig head and used some of the darker pink I used for the mouth and put lines in the ears to give it a little something more.
I only did this to hide the gap between cakes, but it ended up looking nice, so on the sides of the pig face, I used my white butter cream frosting and a star tip and I piped four rows of this frosting around the sides of the pig face.
BTW, when I make my piping bags, I mostly use parchment triangles, but for this pig cake, I used the infamous Ziploc bag trick. Take a Ziploc bag, cut and extremely small corner out of the bottom or the bag. Put the tip in the corner and then put the Ziploc bag into a tall drinking glass, folding the zipper part of the bag around the rim of the glass. Then use a rubber spatula to scoop the frosting into the bag. Take the bag out of the glass, and use your hand or the spatula handle to push the frosting toward the tip. DO NOT zip the bag, and put a twist in the top of the bag and squeeze gently to get the frosting to come out of the tip. DO NOT squeeze too hard or the tip will pop right out of the bag. (It is EXTREMELY easy for this to happen. I know from experience, haha)
This was an EASY and adorable cake to make. I encourage you to try it and put your own twist on it! Use a marshmallow dipped in melted pink frosting for the nose, try different candies, who knows? The possibilities are endless!
Good luck & happy caking!


Your comment has been sent successfully.