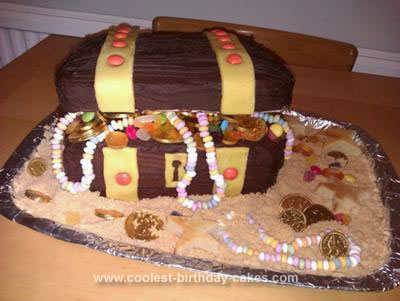
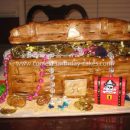
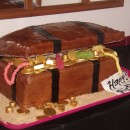
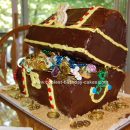
I was inspired by other treasure chest cakes on this website to make this Pirate Treasure Chest birthday cake for my son’s 4th birthday.
I made 3 square butter cakes measuring 10″x 10″. I made them a few days in advance and popped them in the freezer to make life easier, and also because I’d heard that it is easier to cut and frost cakes while they are frozen which turned out to be true as you don’t get cake crumbs mixed up with the frosting.
I took the cakes out of the freezer and hour or two before I started work on them and cut a 2″ strip of one side of each cake to make them all rectangular. I made chocolate butter icing (or frosting for American readers!) and spread it on the top of one of the cakes and placed another cake on top so that the base of the chest was 2 cakes deep. I then took an narrow angled strip off the back of the top cake to help support the lid at a partially open angle. I then frosted the bottom of the chest.
To do the lid I drew round the ‘lid cake’ on a piece of card (an empty cereal box), cut out the shape and wrapped it in tin/aluminum foil. I put this card under the lid to try to give it a bit more rigidity. I then used the cake off cuts to cut some small wedge shaped pieces and placed them on top of the base of the cake to give the lid some support. I placed the lid cake (with it’s card underneath) on top of the wedges, the strip I’d cut off the back helped give it the right angle (I frosted the strip to try to help it stick). You couldn’t see the wedges when the cake was finished. I then frosted the lid. Once the whole thing was frosted I dragged fork prongs across the whole thing to make a wood effect. I didn’t do it in straight lines but with the odd curve and wiggle here and there which was quite effective really.
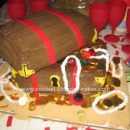
To make the yellow strips and keyhole I used yellow marzipan (almond paste) and stuck orange smarties along to give a bit of color. The sand was made of crushed up Malted Milk biscuits (I had put the cake on a tray covered in tin foil as I was worried the ‘sand’ would fall off a cake board). I then inserted the treasure which was chocolate coins, sweetie necklaces, jelly sweet rings and jelly diamonds and smarties. And I buried some treasure in the sand too as I thought that looked quite cool.
I instructed my husband to cut 4 starfish out of the cake off cuts and we placed those on the sand around the chest to put the 4 birthday candles in.
The cake was a huge success! All my friends were very impressed and my son’s friends loved it. We had 6 children round for a little party and after my son had blown out the candles they were all allowed to take some treasure from the cake which went down very well. I was very pleased with it – and it wasn’t hard to make! Thanks to everyone on this site for all the inspiration!

Fantastic work! Thanks for posting how you made the lid stay open a bit! I have been wanting to make a treasure chest cake but wasn’t quite sure the best way to make it stay open! This is awesome!