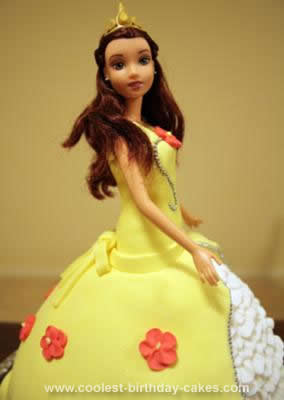
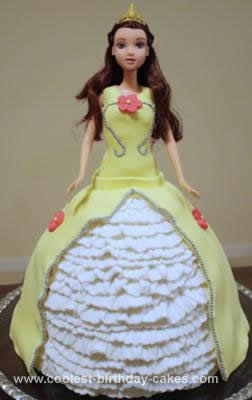
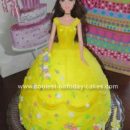
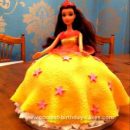
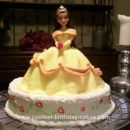
This is Homemade Princess Belle Birthday Cake as requested by my 3 year old daughter for her third birthday. It is only the second cake I have attempted, so please forgive my primitive methods. I baked the cake 3 days beforehand using a Dolly Varden cake tin that I hired. I froze it that night and started work on it later on the next day. It was quite firm and easy to trim.
I assumed my little girl would want to keep the doll, so I used a real Disney Belle doll. The legs did not come off, so I had to build the cake up a little higher by adding a plain round shaped cake underneath. I cut out enough cake in the middle to fit a plastic wrapped Belle inside and then put her to the side again.
I placed the cake on the tray I was going to serve the finished cake on and put 4 strips of baking paper under the edges of the cake to keep the surface clean and protected. They were easy to slide out later.
I used “ready made” fondant icing that just needed to be colored and rolled. By adding the yellow color it required a lot of kneading and was therefore, quite easy to roll, as long as lots of icing sugar was used to avoid sticking.
I made the frills by cutting out circles in white rolled icing using a round fluted pastry cutter and then cutting the middle of the circle out with a smaller cutter. This left a ring. I used a skewer to flatten triangular shapes all around the ring. I was given this idea from a YouTube video called “how to make fondant frills”.
It was trial and error, but after the circle is cut and straightened out a little, the frills looked fabulous and quite convincing. I roughly covered the cake with butter icing and stuck each row of frills on, starting from the bottom and making sure they overlapped each other. With my left over frills I lined them up all around the base of the cake. I assumed I would never get the yellow icing to cover the entire cake (I am prone to disasters), and thought it wouldn’t hurt to have a little frill showing at the bottom of the dress if worst came to worst.
Then I cut up some kitchen paper to see what sort of shape I needed my icing to be to drape over the cake in an effort to leave the frills visible. I rolled the icing out roughly into that shape, and with the rolling pin, (and my husband for moral support) I picked the entire thing up, and placed it over the butter iced cake. It fitted quite well, but I didn’t regret my frilly petticoat idea, as one little bit was exposed.
I cut out a hole for Belle. With left over yellow icing, I rolled a bodice sized piece and gently wrapped it around Belle. I had to make her some straps as well. There were a few imperfections when applying the straps and trying to blend them, but her hair and some decorations covered them.
I placed Belle into the cake and made a yellow “belt” to put around her to hide the join. Next, I decorated her the next night after my daughter was in bed. I used a new pair of tiny tweezers and sat down for about 2 hours, carefully placing tiny silver balls in selected areas. I used watered down white fondant as a “glue” for each ball, although, I’m quite sure you can purchase an edible glue. Next I placed red flowers around the dress using the glue again. I even put a little silver ball on her ring finger and placed some edible silver ball earrings as well.
Finally, I showered the whole dress with a yellow edible glitter. Then I slept for about 12 hours.


Your comment has been sent successfully.