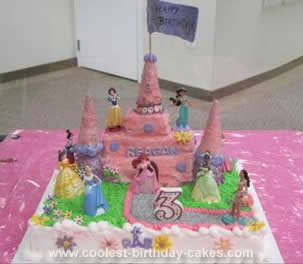
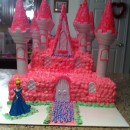
I made this Princess Castle Birthday Cake for my daughter’s 3rd birthday. She loves princesses and wanted them all there.
Fours days before her party, I first made a double batch of rice krispie treats and molded the bottom of the castle in a bread pan with one batch. Next using the second batch I hand sculpted the two other layers trimming a bit. Finally I rolled the rice kripies into cylinders for the turrets. The turrets were sugar cones dipped in pink candy melts and sprinkled with silver sugar. I secured the turrets with wooden skewers sand extra rice kripie mixture in the cone.
I allowed the krispie castle to harden and the next day I covered it will melted pink candy melts. Again allowing it to harden I did one final coat. Next I began decorating the castle with fondant flowers, fondant letters and embellishments. I melted more chocolate and placed two princesses (from Disney store set) on the castle. The fondant flag was cut into shape and rolled around a large bamboo skewer. I allowed it to dry over large markers to make the wave shape. Finally the fondant flag was dried and I used food markers to write happy birthday.
The day before the party I started to decorate the plain sheet cake which was frosted white. I laid the castle on top and marked it off then removed it. I made my design around the marking first using green frosting and a Wilton tip for green grass. Then I laid out a path and added pink outline. I added the silver sugar sprinkles to the path and began placing princesses and more fondant flowers and some chocolate melts flowers.
Finally we transported the cake in 2 parts (cake and castle). I topped the cake with the castle as shown before anyone arrived. It was a huge hit and even though the cake is gone we are still eating the castle.


Your comment has been sent successfully.