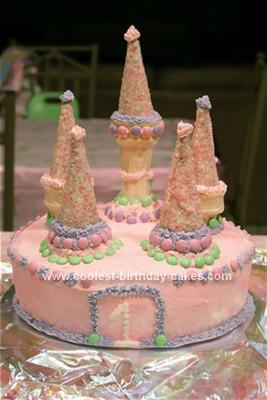
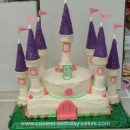
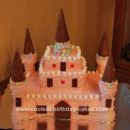
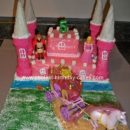
After browsing this website for ideas, I created a pretty princess castle cake for my daughter’s 1st birthday. The day before the party, I baked 3 boxes of Duncan Hines Chocolate double fudge cake mixes and split them between two 12″ round Wilton cake pans. I baked each cake 55 minutes at 350.
After baking, I cooled each cake for half of the day. I used Wilton’s buttercream icing recipe but instead of using 1/2 tsp of vanilla extract, I used 1/4 tsp of peppermint extract and maybe a tiny more later on to add more flavor. This tasted great with the chocolate cake! I made 3 batches of the icing and stored them in bowls on the counter with a wet towel over the bowl. I combined two of the bowls and tinted the icing light pink using Wilton’s concentrated dye. I split the third bowl and left one white, and tinted the other a light purple.
Next, I made the castle towers using ice cream cones. I melted Wilton’s white chocolate pieces in a big glass cup in the microwave, dipped 5 sugar cones in the chocolate and spread it evenly with my fingers, and then rolled it in Wilton’s pink and white sugar crystals. I took two cake cones and stacked them end to end and pushed shrimp cocktail toothpicks inside to hold the two together. I then used a spoon to put the melted chocolate on and spread it with my fingers. I then dipped 4 more cake cones and let all of the cones dry on tin foil. Next, I evened the cakes out using a knife and cut off the domes. I would have frozen the cakes at this point if I had freezer space to make them easier to work with during icing.
I put some iridescent tissue paper over a 14″ inch round cake pan, and then covered with a large piece of parchment paper for protection. I put my bottom cake layer on top of the parchment paper. I squeezed a rim of frosting around the top edge of the bottom layer to create a barrier for my filling. I then spread 2 non-refrigerated pudding cups on the top of the layer (I would use more next time). Then I placed the second layer on top of the pudding layer. I didn’t know a good way to do this…I would love some advice on that! I spread a thin layer of the pink icing using Wilton’s metal spatulas. This is the crumb layer and doesn’t look really pretty (especially when you work with chocolate cake). I let this dry for about 30 minutes. Then I spread a very thick layer of frosting on the cake doing the sides first and then top. I dipped my spatula in a warm bowl of water to help smooth the cake. It wasn’t perfect, but I had to stop at some point. Next, I took Wilton cake sparkles and put in a plastic bag and rolled with a rolling pin until it became sparkle dust. I sprinkled and blew the dust from my hand onto the cake for added shimmer. I let this dry for at least 30 minutes before I decorated it. I ended up trimming little holes in the cake so the cones were more stable. The decoration frosting also helped hold the cones in place. When I finished decorating, I cut the parchment paper with scissors really close to the bottom rim of the cake so you couldn’t see it. I was left with a pretty cake on my iridescent tissue.
I stored the cake on the counter overnight. I cut some sides off an extra large Huggies diaper box and partially covered the cake with that and then used Tin foil to cover the front and create a little tent for the cake. It was way too tall to use any kind of storage container. I didn’t do this so much for freshness, but to protect it from general elements and my cats! Have fun making your cakes!


Jessica did not learn this talent from me and it is a talent. The kids (toddlers and preschool) loved it. One their favorite parts with the kids were the castle towers. They all wanted one. Best of all, not only was the cake gorgeous, it tasted great too. I had to resist a 2nd piece – the mint frosting was a great idea and the kids liked it too.