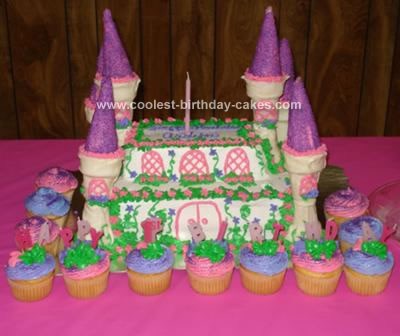
We started with two 9×13 perfectly square cake pans (squared edges, not the standard rounded edge) and a small loaf pan. Then used 2 boxes of Betty Crocker Cake Mix, we used vanilla (the flavor is entirely up to you, but if you want your castle white, it is much easier to have a white castle on white cake). We then stacked the two 9×13 finished cakes on top of each other using a small layer of icing in between as ‘glue’.
I highly suggest using professional icing, your finished product will look smooth and will be a lot more durable. Before adding the loaf pan, you need to take standard ice cream cones and put on each corner of the homemade princess castle cake to have a perfect guide of where to make the cut out for them to fit into (the open end of the ice cream cone goes down, and measure to the corner but only to where you could be cutting about a half circle from the corners of the cake).
The loaf pan cake is assembled on top in the center in the same fashion after cutting the ice cream cone shape (you can do all 4 corners, my mom and I decided to do just 1 on each side and centered it on the sides); however, you may need to trim the top, in order for it to lay flat (repeat the same with the standard ice cream cone for the loaf pan).
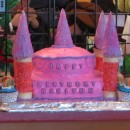
Once your homemade princess castle cake is assembled with the ice cream cone cut outs, it is time to ice the cake, and put icing in your cut out areas too.
To make the towers out of ice cream cones, you take 2 standard cones and dip them in melted white chocolate chips, then stack them (1- open side down and 1- open side up, so that the bottoms of the cones are touching) the chocolate will act as glue. You do this process 6 times (total of 12 standard ice cream cones) I suggest doing extra if you are transporting your cake.
After drying, the towers are then attached to the cake. The waffle ice cream cones are then added next. We just used the same professional icing to decorate these but added cake coloring to get a different color. Once they were iced, they were rolled into colored sugar sprinkles and the added to the top of the towers, open side down.
From there, we just used a standard open hole tip to make vines, doors and windows, and a large leaf tip to make the leaves on the cake and roses on the cupcakes — all of which was done with the professional icing just added cake coloring to give a variety of color.
What I would have done differently: Transporting this cake was not easy. The waffle cones fell off during the move, so we then added colored icing around the brim of the standard cone tower to act as glue once we got to the party location. We added vines and flowers up the towers because the chocolate cracked once it dried. This was more of a blessing because it added more to the cake. We refrigerated the cake overnight at the party’s location which created some more cracking but it was really minor.
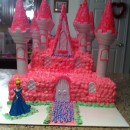
If you are planning a homemade princess castle cake, I highly suggest making your own versus purchasing the Wilton Princess Cake Kit. Yes the Wilton cake is pretty, but with that you need to remove all of the towers before cutting the cake, and at the point it seems like a waste. The cake we made was completely edible and was able to be cut and kept intact. The chocolate covered towers are a big hit with the kids too! It was the most demanded part of the cake.
Good luck with yours!


I love your cake you made. I have looked at so many and your is unique. I love the cupcakes going around it with the Happy Birthday. Great job your towers are beautiful.