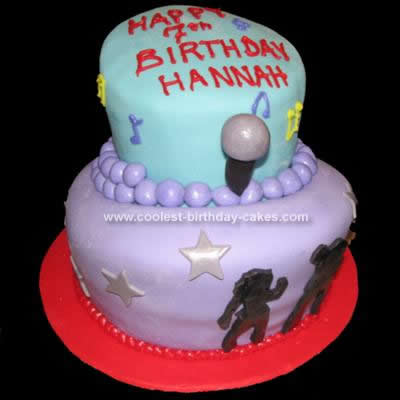
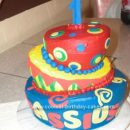
This was my first attempt at a ‘topsy-turvy’ cake and it was for my eldest daughter’s 7th birthday, the theme of which was music and dance (sort of ‘Glee’-inspired). I was under a major time-crunch because I had another cake delivery the same day, so that sort of took precedence.
In any event, I did a lot of research beforehand online; watched and re-watched how-to videos and discovered a few things:
1. First of all, ‘they’ make the whole process seem easier than it is.
2. Topsy-turvy cakes are time-consuming. Just in case you thought they weren’t.
3. The more cake layers you have, the better angle you can get when you shave down your cake. I used three layers for each of my two tiers (which were 9” and 6” cake rounds). The bottom tier was yellow cake with buttercream and the top tier was chocolate with chocolate buttercream. Four layers would have been even better, but ultimately, the pieces I shaved off I used to build up the top of the ‘topsy’. I guess a third tier would have lent a little more ‘topsy’ to the effect but as it was I had more-than-enough cake.
4. To get the ‘turvy’ effect, you need to angle in the sides of the cake. Here’s a tip: do a little at a time because once it’s gone; It. Is. Gone.
5. I used the method whereby you cut out a hole in the top of the bottom tier the size of the top tier. I should clarify that the hole should be the size of the BOTTOM of the top tier, which will be smaller than the size of your cake round if you have tapered in the sides. I forgot this part and had a rather spacious gap around my cake. No matter, I just piled on the fondant beads!
6. Use dowels in your bottom tier to support the weight of the top tier to prevent the fondant from buckling or bubbling. I did use the dowels but my fondant (tinted homemade marshmallow fondant) still buckled in areas. You might say I have a few ‘wrinkles’ to iron out. A neat trick I learned online was to sharpen the end of the dowel with a pencil sharpener, making it easier to insert into the cake.
7. Since I was pressed for time, the decorations on the cake were kept to a minimum. I made a microphone from fondant (held together with a lollipop stick), grey stars and last-minute silhouettes of dancers. These were all brushed with silver pearl dust. Then with Wilton decorator’s icing in different colors I piped on the music notes and the balls around the bottom tier. As I mentioned earlier, to fill in my gap between cakes, I whipped out a bunch of purple beads which I brushed with the pearl dust to give them luster.
I loved the look of this cake and the party-goers (and their parents) were sufficiently impressed so that I may do it again!

Did you use cutters to make the dancing people? If so where did you buy them?