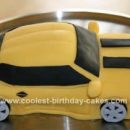
My son is a typical boy. He loves anything with a motor and if it can give me a heart attack by him being on or around it, even better for him. hahaha. I like to ask him what sort of cake he’d like because he’s very aware of what he likes and what he doesn’t. Heaven forbid I make him a cake that he says “Oh yeah, it’s ok” to. It would kill me. So this year he decided he wanted Bumblebee from Transformers. There was no way I was going to attempt him in his transformed state, but I figured I could do a car easily enough.
My main hurdle was going to be shaping the car because I haven’t done a lot of shaping in the past and this was going to be rather intricate. In the end I decided to go with the shape I did because it was easier for me. I was doing my daughters cake at the same time (submitted under ‘Coolest ‘Hoot The Owl’ 1st Birthday Cake’ if you want to have a look). On top of that, my daughter was sick. Just to make life easy for me.
So I made the cakes. 3 x 30cm square eggless chocolate cakes. Because I had so much to do in the week before their joint party, I made them the weekend before and froze them to ensure I had time to get it all done without being too hurried. I also made the side mirrors for the car ahead of time. I used a tiny bit of Tylose powder mixed in with my yellow Satin Ice fondant, shaped them (harder to make them exactly the same than you think!) and left them to dry.
When it came time to assemble and cover the cakes, I let them defrost, cut all 3 cakes in half and stacked them. One cake was cut into quarters so they could sit at the front of the longer layers. These pieces would be the bonnet, so it didn’t matter too much that they weren’t quite as high as the rest of the cake because it was going to be cut down anyway.
After I had the layers into the right spots, I chilled the cake again before sticking a traced drawing of Bumblebee to the sides of the cake. I used baking paper and dressmaking pins (clean, of course) to stick the cut out onto the sides of the cake. It gave me a rough idea of what shape I was going to need. After I had cut the shape, I carefully took the layers apart and put the ganache between the layers. I probably could’ve done it beforehand, but I wasn’t exactly sure where I’d need to place the pieces of the cake to get the right shape. Once the layers were filled, I put ganache on the outside of the cake and put it back into the fridge to set.
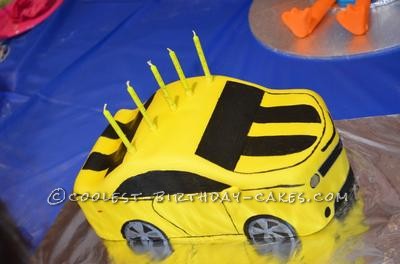
When it was ready to be covered, I took it out of the fridge and rolled out my yellow fondant. I use guide rings when rolling my fondant so I can get it even. I was pretty happy with how the fondant went on, but I had to be careful when the fondant went up over the spoiler of the boot because it was cracking a tiny bit. Not too bad but not perfectly smooth.
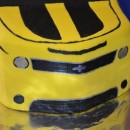
Then the hard bit began. I got my scalpel and lightly scored the fondant where I wanted the windows, mirrors, lights, etc to be. Then I dipped my tiny paint brush in my black gel food color and started painting. It was a long and nerve wracking process because I’d never done it before and there were quite a few fine lines I had to do.
It took me a couple of hours to paint the car with all it’s black bits but when it was done, it looked sensational (to quote my son).
I let it dry overnight and finished painting the lights, number plate and rims the next day. I was so proud of it. My son used all the big words he knows to describe just how much he loved it. hahaha.
He had an amazing time at the party and everyone was full of praise at how amazing the car looked. I won’t be afraid to try it again now.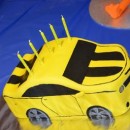


Your comment has been sent successfully.