This cool collection of Dinosaur cakes will give you Jurassic inspiration as you set off to create the coolest Dinosaur cakes ever. Good luck!
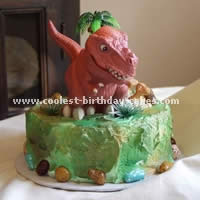
Roaring Cool Dinosaur Cake
Dinosaur cakes submitted by Meghan C.
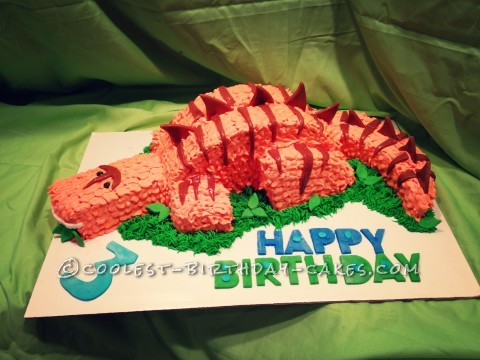
When I was first asked to make this cake, I must admit, I was a little apprehensive. I was worried it would be a complete catastrophe. My oldest son urged me to take on the task. I lI’ve making cakes. I feel like I did when I was in elementary school in art class. It is truly amazing what you can create out of cake and icing.
I made my roaring cool dinosaur cake out of two 10″ cakes (one chocolate and one vanilla). I cut the vanilla in half to form the middle. Then I cut out a head, 4 legs, and a tail out of the chocolate. I used a pipet to make the icing look like scales and chocolate fondant as the spikes and stripes. I had so much fun making this for Wesley. My youngest saw me make this and demanded a dinosaur party for himself. I really like the added fondant leaves and buttercream grass.
Everything was going great! I had the mock up of the dinosaur and the crumb coat complete. I had started the buttercream scale application and was moving onto the head. Then, I noticed the scales started to blend into each other. We live in Ohio and I chose the wrong day to attempt buttercream decoration. There was a heat index of 95* and the humidity was outrageous. Even though I was inside with the AC blasting, it was still hot. Lesson learned: decorate in the middle of the night! Haha!
After that mishap, everything went smoothly. I love how everything turned out. As I mentioned before, my favorite addition was the fondant leaves. It have the dinosaur a bit of a personality. If you asked me, it looks as though he has and orny smile. Making the dinosaur has given me a little bit more confidence in what I can do!
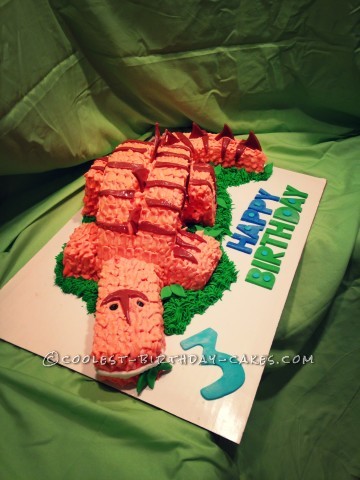
Awesome 3D Dinosaur Cake for a 4-Year Old Boy!
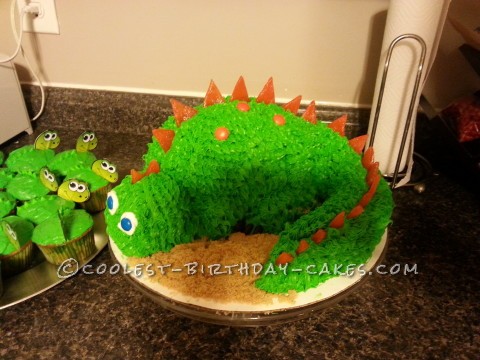
When my soon to be 4-year old son announced he wanted a dino party complete with a “real” dinosaur cake this novice baker had to do some real thinking.
After lots of internet research, I had a basic idea of what it should look like but still no idea how I would make this happen without buying expensive one time use pans which I hate to do…until, hidden in the back of the cabinet I found a long lost novelty cake pan to make a womans chest of all things. So, I have now officially gotten to use that pan twice. ;) With one breast pan and one 9″ round cake pan you too can create a “real” dinosaur cake. Throw in some homemade gummy spikes, some M&M’s for colorful detail & brown sugar dirt and your homefree. Everyone was very impressed including me, expect my 4-year old who didn’t think it was historically accurate enough so, spikes & colorful detail optional. lol
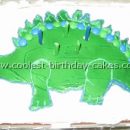
3-D Dino Stegosaurus Cake for 3-Year-Old Birthday
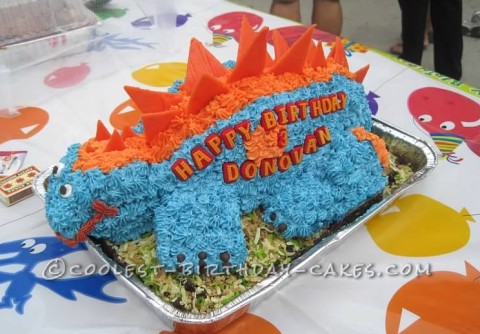
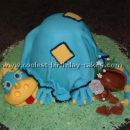
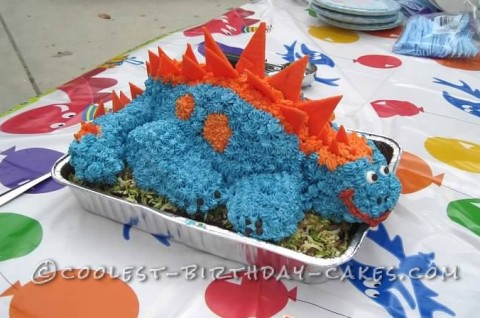
I made this cake for my son’s third birthday when he was going through his “Dino Dan” phase. Stegosauruses on the “Dino Dan” TV show are blue and orange, hence the color scheme here.
The dinosaur is made from two 9″ round cakes. For the body, you just cut one cake in half and stick the two halves together with icing. I found a pattern on the internet that indicated how to cut the other cake to get the head, feet and tail. The same website offered a diagram on how to assemble the feet, head and tail. I can’t recall the link, but I may have just Googled “3-D dinosaur cake” or something similar. I used toothpicks and icing to keep the head, legs and tail attached to the body.
After assembling the dinosaur, I used a star tip to decorate him. His eyes are mini-marshmallows with mini chocolate chips for pupils. His toenails are also chocolate chips. The spikes on his back are store-bought marzipan.
One needs a pretty stiff cake to pull this off. I found a recipe on the internet for a stiff sponge cake. Quite honestly, it was a little dry, but the kiddos didn’t seem to mind too much. Also, the dino’s “habitat” was a yummy rectangular chocolate cake covered with green-tinted toasted coconut “grass.” I decided to include the chocolate cake so we’d at least have one tasty cake even if the dinosaur sponge cake didn’t taste good.
Coolest Green Dinosaur Cake
Dinosaur cakes submitted by Nicole M.
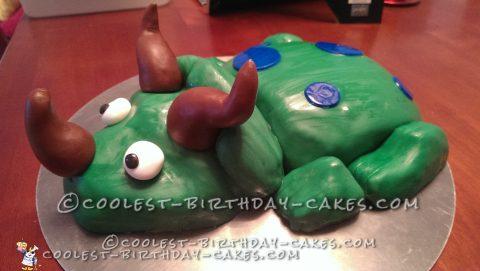
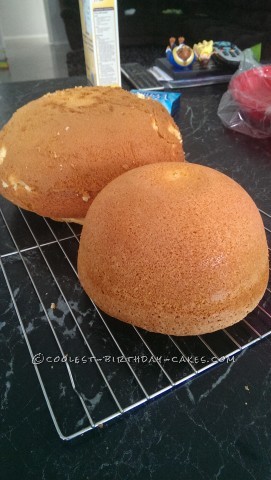
I created this dinosaur cake for my son’s 2nd birthday. Firstly, I started with using 2 packet mixes per large Pyrex bowl and baked for about an hour until they were booked. Make sure you grease the bowl well as one of the cakes got a little stuck!
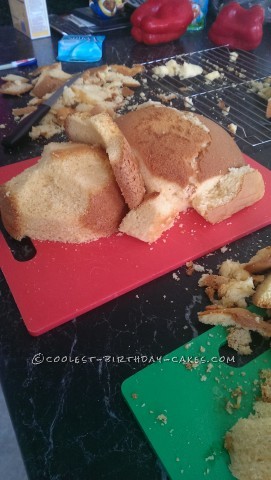
The body of the dinosaur was created from one of the cakes. I simply leveled the top of the cake and flipped it over. I carved a small semi-circle out of the dinosaurs body where the head was going to sit against the body.
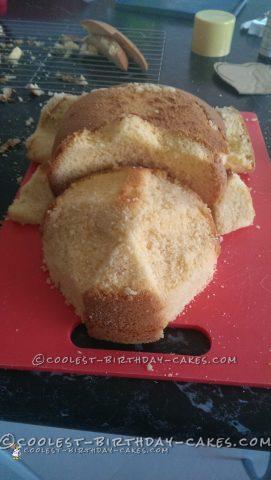
The head of the dinosaur was created from the other cake. I leveled the top of the cake and flipped it over. As you can see in the photos the head was carved to shape once it had cooled. The off cuts were then used to create the feet which I simply cut pieces off until I got a shape that I was happy with.
The frills behind the head were made from the off cuts from leveling the cakes. I created a template out of paper so that I could get the shape that I wanted and the cake was then inserted in between the two cakes.
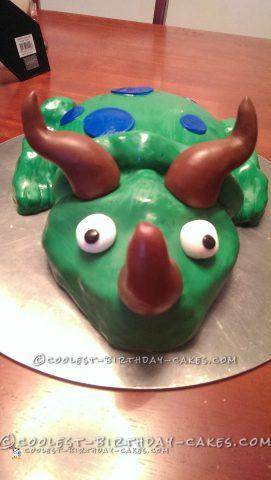
Then I crumb coated the cakes first and then covered each individual piece in fondant. I covered the body of the dinosaur in green fondant first. The feet were then covered and placed very closely against the body of the dinosaur. I used some extra icing to secure them there. I carefully covered the head and frills in fondant as the last piece and placed this closely against the body.
The dinosaur’s horns were made from chocolate fondant and the spots on the body are from fondant secured there with a small amount of water.
More Dinosaur Cakes
Cake by Carla B., Saskatoon , Canada
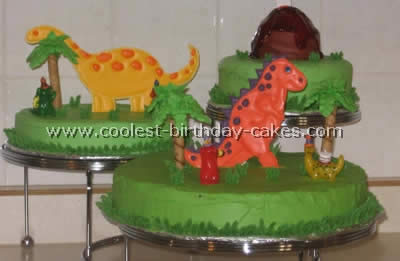
The Dino’s are made of color flow icing. I got the pattern for an easy birthday cake off the internet. Just took a lot of time on the Dino’s and they are very delicate. They break very easily.
Cake by Michelle H., West Bend, WI
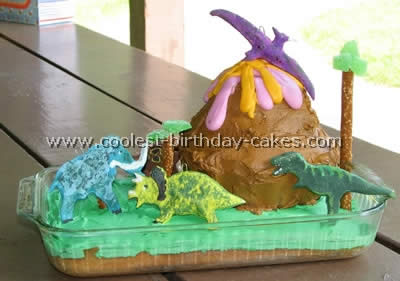
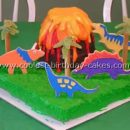
This dinosaur cake was made for my grandson Adrian’s third birthday. He loves dinosaurs so I knew whatever cake I made would have to have dinosaurs on it. Since I already had a dinosaur cookie cutters but didn’t want to spend lots of time decorating something else (besides the cake) that would be demolished in minutes, it seemed logical to make dinosaur ornaments (salt dough) to decorate the cake so that Adrian would have something lasting and useful.
I may make the same type of cake for my son’s birthday in November since he also is crazy about dinosaurs. The only change I may make is to incorporate the lollipop lava recipe that I just found on familyfun.com. (Looks like really cool lava). The recipe that I originally used for the volcano cake showed the lava as red on the bottom then orange and yellow on top. However that color scheme wouldn’t have gone really well with the colors that I painted the dinosaurs so I changed that. If you just microwave the individual lava frosting colors immediately before drizzling them over the volcano it works pretty well.
Cake by Rosemary N., Claremont, CA
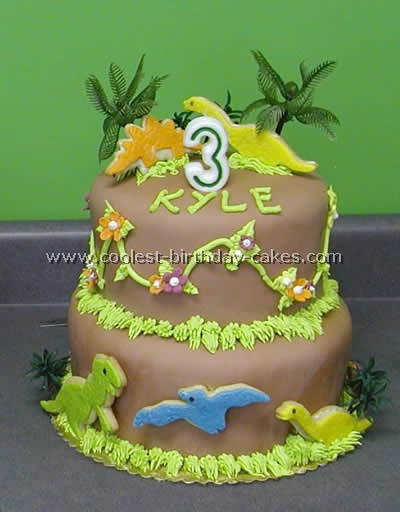
I made the sugar cookies first. Let cookies cool. I colored the fondant in different neon colors and used a small stone roller on the fondant to make the dinosaur skin look rough. Then I covered the cookies in the fondant and glued them onto the cookie with watered down royal frosting. I used black royal frosting for the eyes. (It dries hard).
For the cake I covered each cake in brown fondant (which I colored) and put 5 wooden sticks in the bottom cake to hold up the cake on top. Next I used the large grass or straw tip for the trim and adhered the dinosaurs on the cake with frosting. I bought some plastic trees to make it look more tropical. My three year old Grandson Kyle gave me a big kiss and said thank you Gramie. He loved it and so did everyone else at the party! The cake was a vanilla cake with espresso chocolate frosting in between layers and I used white buttercream frosting under the fondant. I also made cookies as favors for each child to take home.
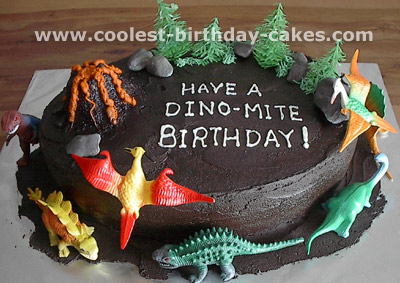
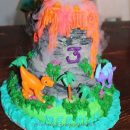
For this dinosaur cake, I used two layers of chocolate cake baked in a 9×13 oval pan, iced in chocolate/black butter cream. The volcano was made from a mixture of cake scraps and frosting with orange butter cream ‘lava’. The rocks were hard lumps of powder sugar airbrushed gray/black. The trees and dinosaurs were plastic.
Cake by Krystal H., Lancaster, CA
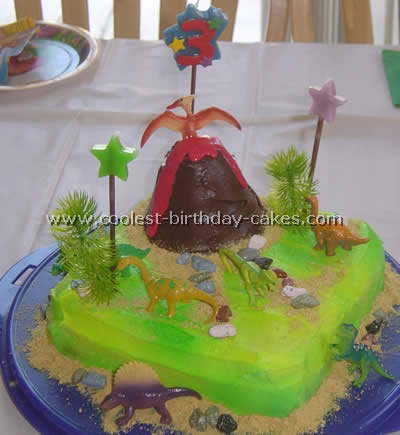
I made this cake using a combination of ideas for dinosaur cakes from this site. It is an 8×8 square. I used the spray color in green and yellow. The volcano is a regular cupcake turned upside down with a mini cupcake on top (also upside down). I found the candy rocks at the local candy store. They are like M&M’s. The trees are from a $1 aquarium tree. My son already had the little dinosaurs. He loved this cake.
Cake by Melissa P., Grosse Pointe Woods, MI
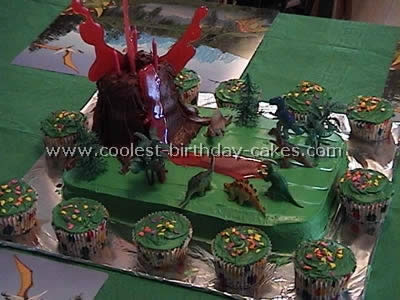
I got my idea for dinosaur cakes from this web site. Just baked a 13″ x 9″ cake and frosted it in bright green buttercream icing. The volcano is a “baby” bundt-cake on top of a round 6″ cake, frosted in chocolate icing.
The lava is melted life-savers candies (red, yellow and orange combined). The dinosaurs and trees can be purchased at toy stores or cake-supply stores.
The cake was a huge hit!
Cake by Jessica L., DeFuniak Springs, FL
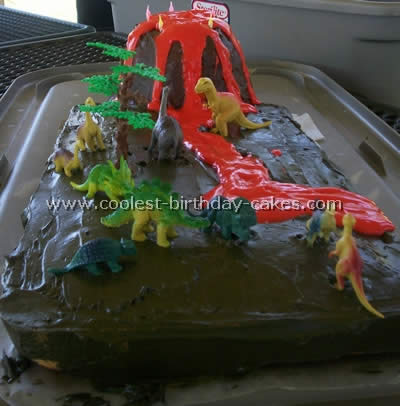
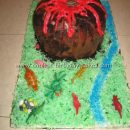
I made a sheet cake for the base (landscape) of the dinosaur cakes out of a pound cake. The volcano is made from three round cakes (yellow cake mix) each a little smaller than the next. I cut the cake at an angle from top to close bottom tapered. Then I used a biscuit cutter to put a hole in the top cake only, all the way through. I froze all the cakes for about 30 min (makes it easier to cut and brush crumbs away).
Then I cut a river like shape out of the pound cake about 1 1/2- 2 inches deep, colored pudding with red and yellow food coloring, colored chocolate frosting with the all colors to get desired color and frosted filled cake with pudding and filled the river.
One of the Coolest Dinosaur Cakes
Cake by Julie T., San Antonio, TX
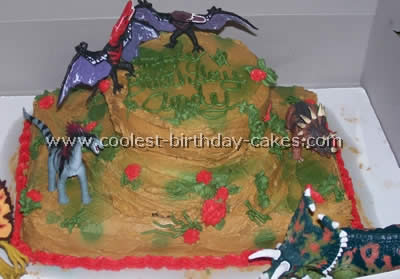
I wanted to make a dinosaur cake for my son’s fifth birthday. I surfed the internet and saw some dinosaur cakes with toy dinosaurs so I decided to use his toys and make a “Dinosaur Mountain.”
To start off, I baked a sheet cake and two round cakes (one 8-inch and one 6-inch). I stacked the cakes and frosted with butter cream. Then I used brown food coloring to get the sandy color and then I used spray food coloring to make it look a little like camouflage., (Next year I will use this same technique will make a soldier cake.)
I made pre-historic plants with a leaf tip and with orange frosting and a star tip. Then I arranged the dinosaurs and voila! One of my friends thought I bought the cake which was the best compliment ever!
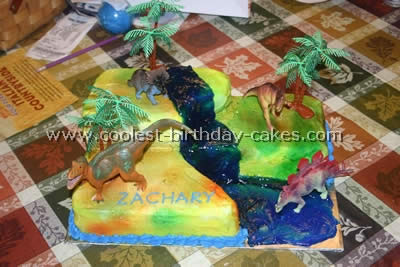
A friend at work has a son that’s crazy about dinosaurs so I agreed to make dinosaur cakes for his third birthday that fit the dinosaur theme. To create this cake I baked a regular size sheet cake. I then cut away the bottom right corner out of the cake to create the area for the “lake”.
Both the sheet cake and the section that I cut out were iced with a thin crumb layer of white butter cream and then I took the corner piece that I had cut away and placed it on the top-left corner of the sheet cake. I iced the entire cake in another layer of butter cream smoothing the areas to cover the seams where the two pieces of cake joined.
I purposely left it sort of rough to make it have a prehistoric look. Then the fun part: I used the Wilton spray-on icing colors (yellow green and red) and sprayed the different areas of the cake just like a graffiti artist! I then took some clear piping gel, tinted it with blue icing color and put it on the top of the cake spilling over the side and onto the cake board to resemble a waterfall and lake. Plastic dinosaurs and some plastic plants from the aquarium section of the local discount store completed the “landscape”.
The cake was completed by piping a bright blue shell border around the bottom of the cake to smooth any rough edges and to give it a more finished look. Zachary loved his cake and I have already been told that another dinosaur theme cake will be requested next year for his fourth birthday!
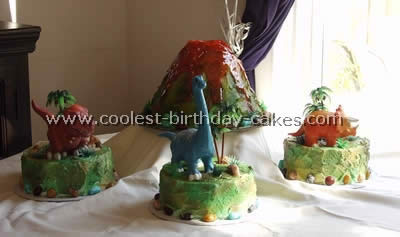
For smoke effect on volcano and dinosaur cakes, cut a hole in the top of cake and place a plastic cup inside. I purchased about 1lb. block of Dry ice (which was more than enough for grand effect at birthday sing time) and added broken up piece to a little water. You can use more if you want the cake to smoke for entire party. You will just have to keep adding more dry ice. Kids flipped out. You can purchase dry ice at Albertsons for about 1.19 lb.
I used a combination of airbrush color out of can (also available at your local market) and food gel with food coloring for lava. Super easy. Best thing it doesn’t have to be perfect. Surrounding volcano cakes I used my son’s favorite dinos and candies rocks and plastic bushes.
When airbrushing start with lighter colors first and use dark colors last using lightly in order not to cover the lighter colors. These airbrush cans are very messy, cover area including back counter (you can use a cardboard box helps cut down the mess).
Cake by Erin P., Montesano, WA
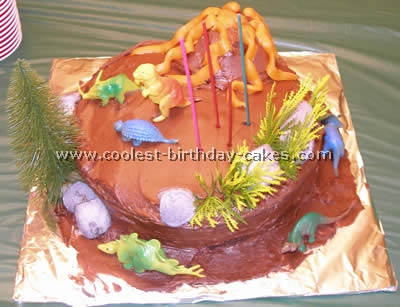
I got an idea for dinosaur cakes from one on your sites actually! I baked 2 round cakes, frosted the top of one and put the other on top. Then I frosted that and put a cupcake on the top for a volcano.
After tons of frosting I decorated with orange frosting for lava. I sprayed marshmallows black with cake spray and bought some aquarium plants for the ‘trees’ on the cake.
My son absolutely loved this cake and he got to keep the toys on it too.
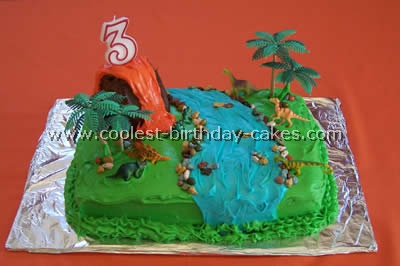
This is just a regular sheet cake with the volcano baked in a Pyrex two-cup measuring cup. The thing that really adds to the cake is the candy rocks. The kids were really excited to eat rocks.
For more dinosaur cake ideas check out the main dinosaur cake section…

