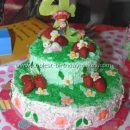
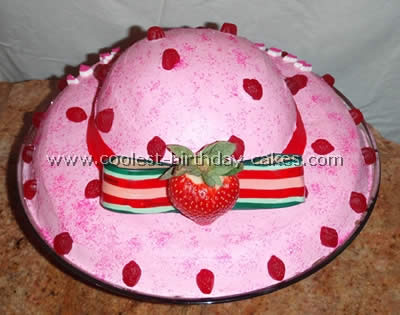
This was such a fun cake design. It was my easiest one so far! I got the hat idea from a friend’s birthday we attended a few years ago. I thought if they can do it so can I!
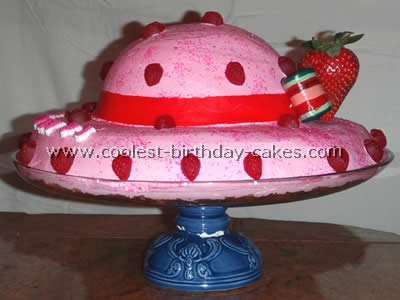
Baking the cake: I sprayed and lined a large square (15″) cake pan with parchment paper and baked a strawberry flavored cake in it. After cooling it I laid a large serving plate on top and cut around it to form a circle. I baked the dome of the cake in a smaller (9″) Pyrex bowl (I had a hard time figuring out the exact temperature and degrees that the dome should be baked at though. I recommend figuring that out first).
Frosting the cake: After the cakes were cool I placed the large circle on a cake pedestal (which reminded me of a Hat rack or something. It was cool.). I frosted it with Pastry Pride that I had tinted pink. Then I placed the dome in the center and frosted it with the Pastry Pride also. (Pastry Pride is a non-dairy product that that you whip to the desired consistency and add paste food coloring and flavoring though tastes best with its own light flavor). It is not sickening sweet like the frosting that you buy at the store. It is awesome! And so absolutely easy to work with! It spreads like cool whip but has a much stronger consistency and will hold its form if you whip it long enough. You can usually purchase Pastry Pride at cake supply stores but I buy mine at Cash & Carry. This cake used one quart. I will never use anything but Pasty Pride anymore! After frosting it pink I used a long metal frosting spatula dipped in a large cup of hot water and smoothed it out to a beautiful smooth finish. Dip, smooth, dip, smooth etc.
Making the edible-ish ribbon bow: I used regular fruit flavored rollup for the red ribbon around the cake (not the real fruit roll ups made out of 100% fruit). For the bow I bought two boxes of Yogo’s brand “fruit roll-ups”, one strawberry (red and pink striped) and one punch flavored (green and light green striped). I unrolled them, cut them into strips as needed and pulled them off their original paper backing. I laid them next to each (in the striped order I liked) on a piece of parchment paper. Initially I had to use my fingers a little to “pinch” or “push” them together but them laid another parchment on top and rolled on them with a rolling pen. It worked great! I cut out a cardboard strip from a cereal box and covered it with the striped ribbon (see note below) making sure to fold it over the top and bottom of the strip. I then turned the ends in together to form a sort of figure eight shape. I adhered it with toothpicks, six of them (see note below) poking them in at different angles so it wouldn’t slip off. Prior to putting the edible ribbon over the cardboard I poked six holes in it knowing that I would later need them for the toothpicks. Although the bow did not turn out edible because it stuck to the cardboard, it still looked great!
Decorating the rest of the cake: I used Welch’s Strawberry fruit snacks (thanks to another submission). I realized that like Strawberry Shortcakes hat, the strawberry’s should all be facing with their bottoms pointing down otherwise it looks really crummy, like they were just thrown on. I sprinkled it with pink sparkly flakes (made from starch?) and gently blew on them while I sprinkled so they wouldn’t be in a pile. I placed the “happy birthday P.J.” letters (premade) on the back rim of the hat. Then right before the party I adhered a whole huge strawberry. I stuck one (maybe two) toothpicks in the center of the ribbon and angled them upwards slightly so that later the strawberry could slide gently down (and sideways a little) onto them. I also placed a toothpick directly under the strawberry so that it would be supported from the bottom as well and not want to fall off.
It turned out beautiful! I got so many compliments on it when we had our party at Chuck E. Cheese’s. Everyone kept asking me who made the cake and where did I get this fun cake design from. I think placing it on a pedestal really helped “the look” as well. One lady did a double take and later told me she had thought I was carrying a real hat! It was nice to hear after spending lots of time on it.
 v
v
More Straberry Shortcake Fun Cake Designs
Cake by Heather K., Walton, NY
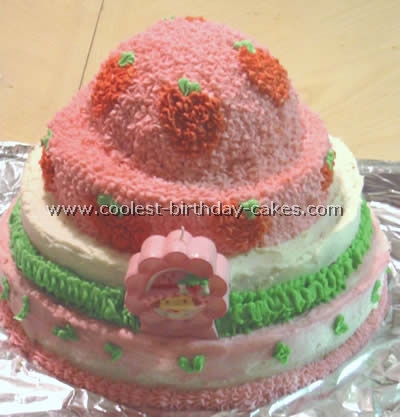
I made this kid birthday cake idea for my daughter’s fourth birthday. I used a 12″ round pan for the first layer, a 10″ for the second layer, an 8″ for the third layer, and the half of the Wilton sports ball pan for the top. I decorated accordingly to make the top look like Strawberry Shortcake’s bonnet. It was a big hit!
Cake by Dayle S., Pendleton, OR
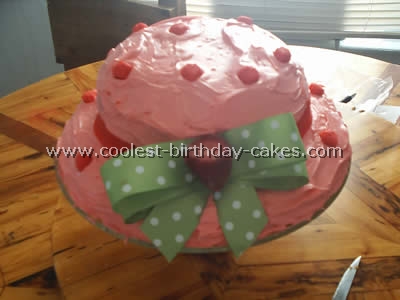
My best friend’s daughter loves Strawberry Shortcake so I started looking for a fun cake design to make her. I found this idea here on this site and what a blast! Everyone loved it and no one wanted to cut into it! I baked 2 cakes in a 12” round pan and a 9” Pyrex bowl. I used vanilla frosting tinted pink for the entire surface red fruit by the foot for the band, a piece of ribbon for the bow, and a real strawberry. Then I put strawberry shaped fruit snacks all over.
This cake was my very first shaped cake and it was very easy.
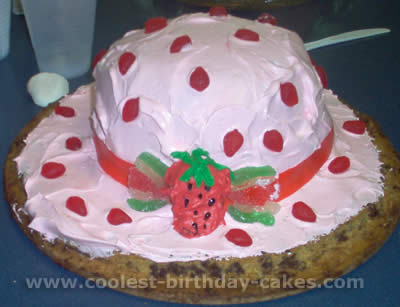
I made this cake for my daughter’s 4th birthday after seeing a picture in a magazine. I searched everywhere for a recipe, but when I couldn’t find one I put my imagination to work. The cake is a Taste of Home recipe called Ice Cream Brownie Mountain.
For the bottom, I mixed up some chocolate chip cookie dough and baked it on a pizza stone. For decorations, I used strawberry-shaped fruit snacks (by Welch’s), fruit-by-the-foot, gumdrops (rolled flat with a rolling pin) and an oatmeal pie I cut to a strawberry shaped and covered with red icing.
To make the cake, take 4 eggs, 2 cups sugar, 1/2 cup of vegetable oil, 1 1/2 c. all-purpose flour, 2/3 c. baking cocoa, 1 tsp. baking powder, 1/2 tsp. salt, 1 qt. vanilla ice cream (softened), 8 oz. frozen whipped topping (thawed and tinted pink).
In a mixing bowl, beat eggs, sugar, and oil. Combine flour cocoa, baking powder and salt; mix well and gradually add to the sugar mix. Spread into a greased 13x9x2 pan. Bake at 350 for 25-28 minutes (or until toothpick comes out with moist crumbs). Do NOT over bake. Cool on a wire rack. Line a 2 1/2 qt. bowl with a double layer of saran wrap.
Break brownies into pieces about 2 in. square; set aside a third of the brownie pieces. Line the bottom and sides of the bowl with remaining brownie pieces, pressing firmly to completely cover within 1 in. of the rim of the bowl. Fill brownie lined bowl with ice cream, pressing down firmly. Top with reserved brownie pieces, covering ice cream completely. Cover and freeze overnight.
Uncover and invert on top of a very large chocolate chip cookie. Frost cake and cookie with pink tinted whipped topping. Wrap red fruit by the foot around the bottom of the brownie/ice cream cake. Flatten red, green, and white gumdrops with a rolling pin and shape into a triangle. Place the icing-covered oatmeal pie over the fruit-by-the-foot and place the gumdrop triangles on either side of it.
I used green frosting for the leaves on the strawberry. Finally, randomly place the strawberry shaped fruit snacks over the entire “hat”.
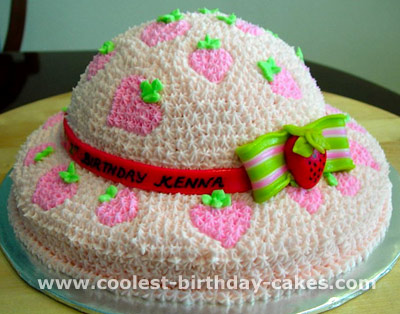
For this cake I used a half sports ball mould and a 9″ or 10″ round cake. Ribbons and strawberry are molded from fondant.
Cake by Miranda M., Thornton, CO
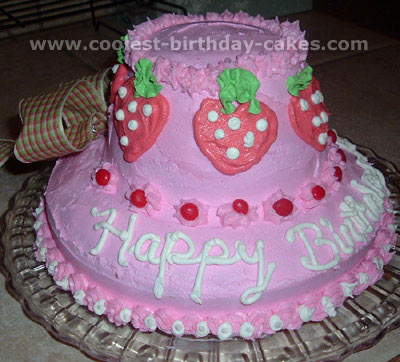
For my daughters 4th birthday she wanted Strawberry Shortcake.
A lady online gave me this fun cake design.
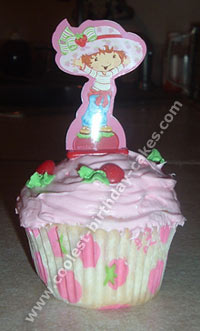
For a final touch to this fun cake design, I added a bow in the back that I made out of fabric. For the kids I also made cupcakes, I frosted them with butter cream and added Red Hots as the strawberries and topped them with a butter cream stem. I finished with a Strawberry Shortcake pick.
