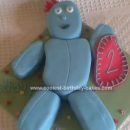
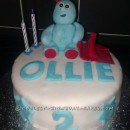
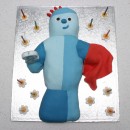
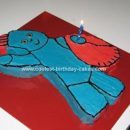
Ever since Julia was 4 months old she has been mesmerized by the cute characters of “In the Night Garden”. And so who else but Iggle Piggle would do for her first birthday cake? I scoured the internet searching for ideas on a Homemade Iggle Piggle Birthday Cake, but all seemed too involved with cutting out his entire body.

I remembered back to my childhood birthday cakes which we would choose from the Australian Women’s Weekly Birthday Cake book, like the Lion, Mickey Mouse or the LadyBug. That’s when I thought about just focusing on Iggle Piggle’s cute face.
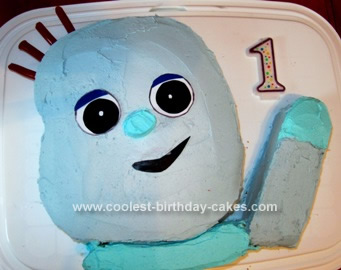
So I drew up the template on a 9×13 inch baking sheet and figured there was room enough to include shoulders and an arm. It turned out fantastic and it was so cool to hear Julia squeal with delight when she recognized him!
So here’s how I made Julia’s Iggle Piggle cake. First the cake recipe. It is a vanilla flavoured butter cake that is fairly dense, and is great for carving into shape; it’s not too sweet either.
*Taken from the Australian Women’s Weekly ‘Cake & Slices Cookbook’*
Basic Butter Cake Recipe:
Ingredients:
- 250g butter (1 cup)
- 2 tsp vanilla essence
- 1 1/2 cup caster sugar
- 4 eggs
- 3 cups self-raising flour
- 1 cup milk,
Method:
- Preheat oven to 180C (350F)
- Cream butter, essence and sugar in small bowl with electric mixer until light and fluffy; beat in eggs one at a time, beat until combined. Stir in half the sifted flour and half the milk, then stir in remaining flour and milk. Pour mixture into prepared 9×13 inch pan and spread mixture flat.
- Bake for 35 minutes or until cooked through.
- Leave in pan for 5 minutes before turning out onto wire to cool.
- I froze the cake the same day I baked it, and then defrosted it the night before the party. While it was still partly frozen I used toothpicks to secure the template to the cake, then cut out the head, shoulders and arm.
Here is the recipe for Icing:
- ¾ cup butter
- 3 ½ cup icing sugar
- 1 tsp vanilla essence
- 4 Tbsp milk, , Cream butter and 1 cup of icing sugar until light and creamy. Gradually beat in the remaining icing sugar, vanilla and milk until right consistency. I beat it for about 10 minutes, and like it to be thick for spreading., , To colour the icing I kept aside about ½ cup to tint aqua blue and the rest pale blue. For the pale blue icing I added blue dye first until it was a pale blue/green colour, then added 4 drops of red dye. You may have to adjust the blue tone after adding red, just be careful not to add too much red dye. The aqua icing was made only using the blue dye, so add drop wise until you get the right colour. I covered the top and sides of the cake with the icing and smoothed it with a hot knife. For the eyes and mouth I made them using white and black yogurt/icecream container lids and blue cardboard for the eyelids, and glued it together. Far easier than fiddling with fondant! For the hair; take a piece of red licorice and cut into 5cm lengths, round one of the ends and use toothpicks to secure the four pieces in place. Once the cake is decorated store it at ROOM TEMPERATURE in a cake keeper. If you refrigerate it the icing will go crusty or separate. The cake should keep for 2 days. Enjoy!

Your comment has been sent successfully.