I had been looking all over for ideas for a JoJo Circus cake and couldn’t find any for my daughter’s 3rd birthday. I should have looked here first
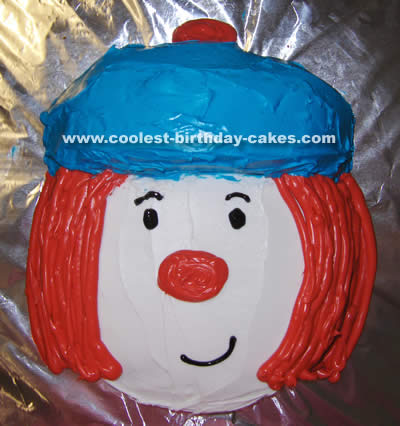
For the JoJo cake I made a 9″ round and a 10″ round. I cut a small section off the top of the 9″ cake to make a flat top then I cut a third off the 10″ and stood it up against the part that would be the head so that I could make JoJo’s hat! I used the Wilton gel colors of red and sky blue to make this cake. I used a piping bag with a large round tip to make the hair and black cake gel for the face.
More Jojo Circus Birthday Cakes
JoJo Circus cake by Chrystal R., Glen Ellen, CA
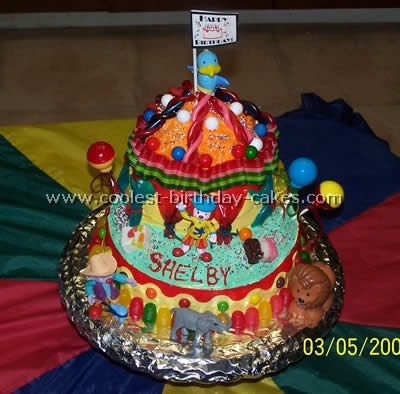
My daughter wanted a JoJo circus cake for her 5th birthday. The bottom of the cake is two – 8″ layers. The top I made using a Wilton football pan mold. After baking the football shape I cut it in half and fused the two halves together to make the “big-top” tent shape. This took a lot of sculpting on my part gluing the parts together with frosting and cutting the cake to look the way it did but it was really quite simple and frosting/candy hides a lot!
I had to do the big top sculpting “in-place” on top of the two-8″ cake layers. I used a simple delicious frosting recipe made only with whipping cream and about 3-4 tablespoons of instant vanilla jelly pudding mix. I used Wilton frosting colors since they are brighter than others. Since I’m not very good at decorating with icing I decided to buy a bunch of candy to decorate the cake that way. Pretty much ALL of the decorating you see is made with candy – different shapes of fruit rollups for the curtains on the big top, some licorice ropes to tie the curtains open, fruit roll-ups in the shapes of ribbons/strips bunched up. You can kind of figure it out by looking at the cake. I used lollipops for balloons and JoJo’s circus figurines on various parts of the cake. The kids were TOTALLY riveted by all of the candy on the cake. I actually had a friend ask me where I bought it!
JoJo Circus cake by Marcy S., Houston, TX
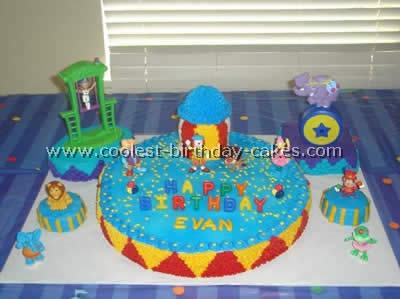
I made this JoJo circus cake for my nephew’s first birthday. Originally I had no clue who JoJo was and wasn’t able to find much on cakes with that theme so I looked at many sites and combined those ideas with my own vision for this JoJo’s Circus cake.
I used the JoJo’s circus characters (purchased at the Disney Store) and a set of generic circus items brought from Wal-Mart. The cake is a 16” round (one-layer) sprayed on top in blue Wilton food Color Spray can and sprinkled with stars; then bordered with rosettes with stars in the center and I got the corner of a book and indented the triangles on the sides of the cake to make a template.
The circus tent is 3-3” round cakes with a mini-wonder mold on top; I ran a dowel rod through it to help it stay straight. Also I did have to go a little heavy on the frosting to make the wonder mold appear larger than the rest of the tent. The two rear cakes are a 4” square and a 6” oval (it came in the Wilton course 2 box).
The front 2 small round cakes are the bottom half of 2 remaining mini-wonder molds I baked; I made extras in case something happened to the first one. I made and tinted the frostings the day before and I laid out the entire characters one the cake board just to make sure I knew where everyone was going to stand. It was a big hit.
JoJo Circus cake by Jodi C., Swarthmore, PA
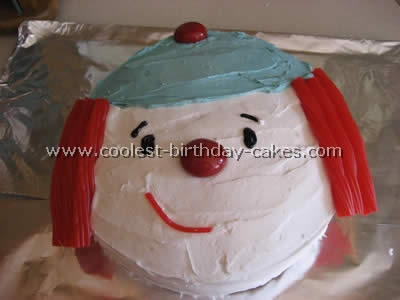
We simply used a 2-layer round cake for our JoJo circus cake and colored the frosting for the hat. The hair was made of Twizzlers and the nose and pom-pom on the hat were chocolate covered cherries. The eyes were drawn on with black decorating gel. We put a couple toothpicks in the cake to support the weight of the licorice hair – remember to take them out before serving!
JoJo Circus cake by Emily B., Marlborough, MA
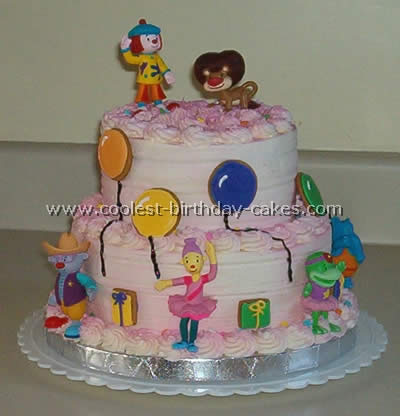
Friends of mine had asked me to make the jojo circus cake for their daughter’s JoJo’s Circus birthday. I wanted to do something that wasn’t too difficult but still looked really cute.
This is just a two-level cake with butter cream icing.
I used a decorative comb to make the sides a little more interesting and piped large rosettes all over the top and along the borders.
I sprayed the cake lightly with pink food color spray and sprinkled candy confetti all over it.

The balloons and presents are just sugar cookies with royal icing – attached to the cake with butter cream. The balloon strings are black decorator icing. The characters were purchased by the birthday child’s parents. It’s a very pretty cake with not too much effort!
JoJo Circus cake by Christy F., VA
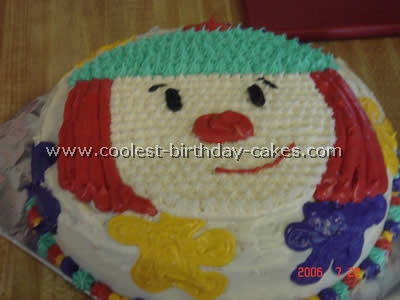
For this JoJo circus cake, I used a regular boxed Funfetti cake to make a round-layered cake. Then I frosted it with store bought vanilla frosting and drew JoJo on top with a toothpick. I colored the rest of the frosting the colors I needed and started with the hat and a star tip. I did the hair second, piping it like ropes and then the face.
I did the “splats” last just freehanded them where I thought they would look good. I finished by alternating tips and colors to give the cake a color and cover up the spaces between the cake and plate. The JoJo circus cake was a hit at my 2-year-old birthday party and it matched her shirt (and all the decorations) perfectly!
JoJo Circus cake by Amy B., Powell, TN
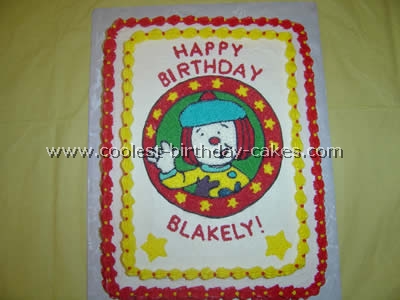
I don’t have any step-by-step pictures to share but I hope you can post this picture of my daughter’s 2nd birthday cake. She loves JoJo Circus, but to my surprise there was not much out there to help me with her cake.
My Mom and I made her cake for her 1st birthday so we decided to continue that tradition. It is a lot of work but something special that I’m glad we can do together. Since we were determined to do JoJo, my Mom and I decided to make this one on our own using the plates and napkins from Birthday Express as our inspiration.
We did it in one day…Although it took us until late into the night to complete (the party was the next day). We baked two large sheet cakes – 2 different sizes using 3 cake mixes. My mom did all of the detail and filling in, I did the actual design.
We made about 5 or 6 batches of buttercream icing, divided it, and tinted it with gel coloring for the colors we needed. The blue was the hardest to achieve and the next day our fingers were still a little stained from our many attempts. To begin the design we put on a base (crumb layer) of white. Then I “etched” the circles and JoJo onto the icing with toothpicks. I used some cut out paper templates of circles and a JoJo I had sketched to guide me on that part. My mom went over the outline with black icing and then filled the design in with a star tip using the appropriate colors.
For the stars on the JoJo circus cake I purchased a fondant set of star cutters. I made a light indentation in the icing and then my mom filled those in with a smaller star tip. Then she filled the rest of the circle in with the red icing. We stamped the letters on with the same method using a letter set Wilton makes.
Going over that with icing as well. Finally Mom went around the edge of the layers with icing to set it off. We were very proud of the final product and my daughter was thrilled! We set the JoJo circus cake on a cake board covered in white paper before we started icing it. Then after we finished icing it we carefully slid it into a cake box until the party.
JoJo Circus cake by Miranda M., Thornton, CO
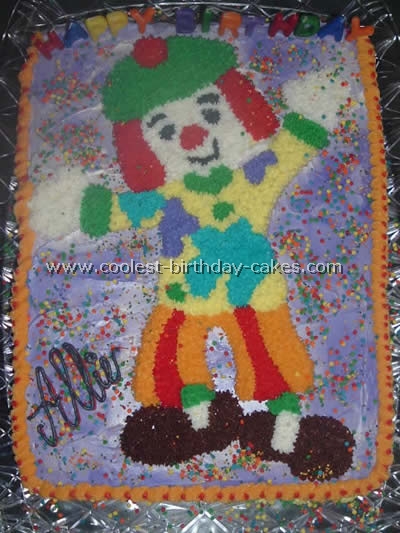
For my daughter’s 5th birthday she requested a JoJos Circus theme. I looked all over for a cake idea. I could not find anything I liked so, I ordered a JoJo Circus coloring book online and found a picture of JoJo.
I enlarged it to fit on a half sheet cake. I then traced the picture on to a piece of parchment paper with a sharpie. I flipped it over and retraced the drawing with black icing gel. I then placed that on top of the cooled half sheet cake that I had covered with buttercream frosting and used Wilton spray to tint purple.
Once I had an outline I began filling it in. I used the #16 star tip and the following colors: *Wilton Red: hair, nose. ball on hat, and stripes on pants., *Wilton Violet: spots on shirt., *Wilton Yellow: shirt and stripes on pants., *Wilton Chocolate Brown: shoes., *Wilton Black: nose, eyes and mouth (I used the #13 star tip)., *Wilton White: face, shoes and hands (#13 star tip).
The following colors are from a care-bear kit I found at Michaels, it had all the colors I needed and it was a $$$$ saver to buy this kit.
**Teal: hat, shirt, collar, cuffs, socks and spots on shirt. **Blue: spots on shirt. **Orange: stripes on pants.
When I had JoJo done I used the remaining teal, a large shell tip, yellow and a large star tip for the bottom border, alternating between the two.
For the upper border I used the remaining orange and a large shell tip. I added some red with a small writing tip to break up the orange. I then added some primary colored sprinkles on the top of the cake.
As well as some candles that spelled out Happy Birthday. The last things I added were a #5 candle and my daughter’s name.
Start to finish, this cake took me about 1-1/2 hours to complete. The look on my daughter’s face when she first saw her JoJo Circus cake made it worth the time.
She LOVED it.
JoJo Circus cake by Tracy W., Lugoff, SC
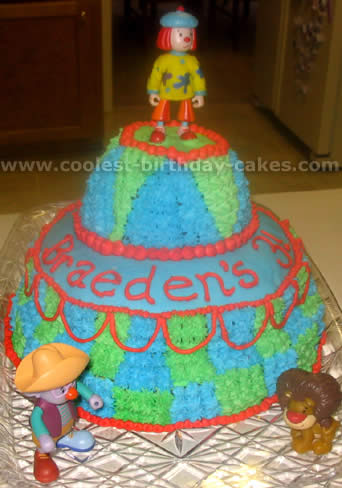
For my son’s third birthday, he begged for a clown cake but I’m not really good yet at making flat cakes and drawing faces. So I came up with the idea to make a JoJo circus cake with the toy characters.
I used a 10-inch and 9-inch cake pan for the ‘stage’ and then used the small Pampered Chef batter bowl to make the circus drum like lions perform on. The rest of decorating was “a piece of cake”.
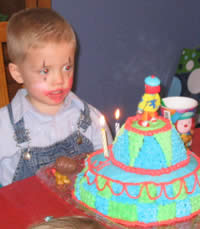
JoJo Circus cake by Marianne A., Green Bay, WI
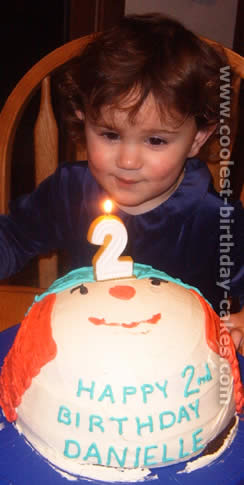
I received the new “bake and fill” cake pans for Christmas this year and thought I would use them to bake my daughter’s birthday cake. I planned to make a cake where the cake is a dress for a Barbie doll but after I baked the cake my husband suggested I make Jo Jo’s face since our daughter loves JoJo Circus.
The JoJo circus cake was baked with a hollow that I filled with chocolate pudding (of course it could also have been solid and baked in any round bowl). I frosted the cake with buttercream frosting made using margarine rather than shortening so it has a slightly off-white color. Then using decorator frosting tinted reddish orange; I made the hair using a rose tip (Wilton 104).
I mentally figured where the hat should be and started there, going down toward the chin. I started with the hair that would frame the face and worked to the base of the cake, making layers of frosting to look like the individual strands of hair JoJo has.
Then I used frosting tinted teal to draw the hat. I frosted over the area first and then used the rose tip to build up the edge of the hat. Using a #3 tip I drew lines to represent the gathered edge of the hat. Next I used the #3 tip to draw a ball on top of the hat with the reddish orange frosting.
I also drew the nose then mouth. Using black frosting I drew the eyes and eyebrows and JoJo was done. While I was still decorating, the face wasn’t even done yet, my daughter came in, saw it and immediately said “JoJo” and I hadn’t mentioned to her that that was what I was making.
To finish it off, I wrote Happy Birthday on the chin area of the JoJo circus cake, which was neat because from the top of the cake you don’t see it so it doesn’t distract from the design but from the side you can see it clearly. My daughter no longer asks for cake, she asks for JoJo.
JoJo Circus cake by Amanda S., Kokomo
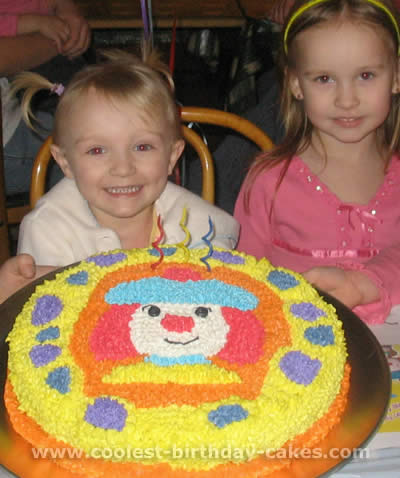
My sister made this JoJo circus cake along with another cake. The other cake just said “happy birthday haliegh” and was done in the same colors, size, and shape.
This JoJo circus cake was a homemade chocolate cake and all she did was made homemade icing. She had to make lots and lots of colors. She got this idea from a coloring book picture. She iced the outside first and then iced the outline she made of JoJo’s face last (a helpful tip for you).
This cake turned out super cute and everyone thought it was perfect for her JoJo circus party! Hope your little one enjoys it as much as mine did!!
JoJo Circus cake by Karyn A., Medford, OR
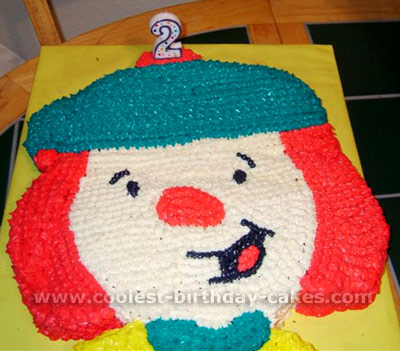
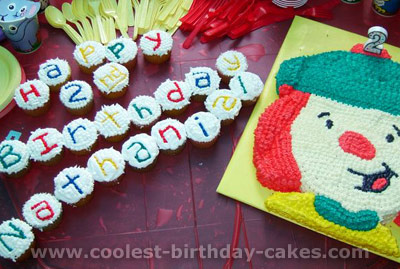
For my son’s 2nd Birthday party I decided to make a JoJo cake for him. I took a photo of JoJo to the local copy store and had it blown up as big as I wanted the party cake to be.
I baked two 9×13 cakes according to the directions. I then froze the cakes to make them easier to cut out. I traced the shape of JoJo onto wax paper in order to see the cake and where I was to cut easier. Once cut, I used a star tip to frost the party cake appropriately.
I made 24 cupcakes also and placed them next to the party cake with “Happy 2nd Birthday Nathanial” on them since there were a lot of children and adults there, this also let me write his name and Happy Birthday without having to write on JoJo.
My son absolutely loved this cake as did the other children and adults at the party!
