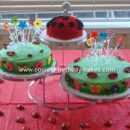
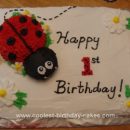
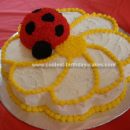
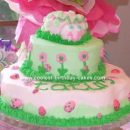
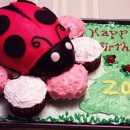
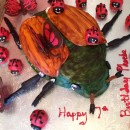
We wanted to make the cake for our daughter’s first birthday party. We looked all over for themes in the party stores and only found a few that we liked.
The flower and ladybug theme were our favorites. We decided to go with the ladybug cakes since it was just a bit cuter. We only bought the cups, napkins and plates and decided to make everything else i.e. the invitations (front inside), thank yous, cake, party favors, signs, etc. Luckily I’ve used CorelDraw a ton and could reproduce the graphics in vector format to create all of the stuff we wanted to make. Once the vector art is done it makes it easy to manipulate into many different arrangements.
The ladybug cakes really just came from the theme. Ladybugs. Well we first thought about just making one large half sphere ladybug cake but that seemed much too easy and a little boring for our daughter’s one and only first birthday party. So we came up with adding flowers and a mushroom to the idea. Hey, ladybugs like flowers and mushrooms I suppose? In order to make it more 3D the only thing we could think of was to try to make them look like real flowers which meant raising them off of the table. Not too hard to figure out what would do that – stems.
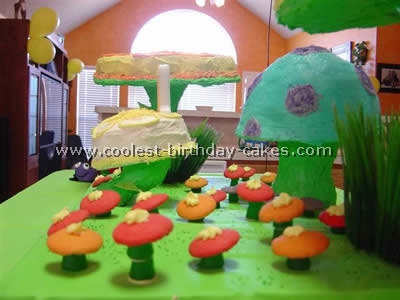
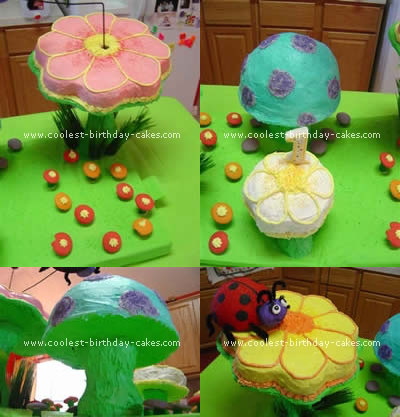
We decided on two large flowers one large mushroom and a small flower that Sydney could eat alone. We figured that this would also be enough cake for everyone that would attend the party.
I constructed the stems out of plywood and Styrofoam. I really wanted the stems to NOT come straight up. So I made it a point to have them curve and angle to add a little organic effect.
I just cut the 3/4″ plywood into some curvy shapes and glued/tacked them together. To add roundness I first started with some strange packing foam from computer monitor packing but it just flaked apart when cut so I had to abandon that stuff and go with some real classic Styrofoam packing. I used the Dremel tool to shave away until it rounded out to match up with the wood. Then I ran over it with some 60 grit sandpaper to finish it off. I then wrapped the stems with masking tape just to make sure the foam did get bonged up somehow.
I traced the cake molds to cut the platforms of the flowers and mushroom. I added some very short dowel pins to the small stem of Sydney’s ladybug cakes and corresponding holes in its platform. I made sure they were nice and tight so that the cake didn’t plop off on its own once the cake weight was on there.
Next the platform for the flowers to set on. It was going to be a flat 3/4″ plywood but it sounded neater to make a small hill. So I attached another piece of ply and added some Styrofoam to that as well to create a small hill. Too bad it is difficult to notice once the entire cake is assembled.
To make the ladybug birthday cake fly: Lili made some really nice Styrofoam ladybugs. We found a hobby motor for $2.50 at a local hobby shop. After experimenting for a bit with a bent clothes hanger we found what arm length would work to make the bug go a nice easy speed. Having done that I made a second official wire hanger nice and straight and spray painted it black. To connect the hanger to the motor I again hit the hobby shop for some small aluminum tubing. I epoxied the aluminum tubing to the motor shaft then ground the wire hanger to match the inside diameter of the tube so that it could be slid inside once the cake decorating was complete. (I originally tried this with some lexan but it wasn’t very stable).
Here’s a video of the ladybug cakes in motion:
Once the hobby motor was installed I ran the wire down the stem and out the bottom. I routed a groove for the wire to lay from the stem to where the battery would be hidden. It worked out real nice. I covered the main platform with 4 layers of green table cloth we got at the party store. I used 4 because it was so thin and transparent. I even had to paint the base white to add in color coverage otherwise it would have taken 8 layers!
Next I drilled the holes in the stems for mounting. And then attached the ladybug birthday cake platforms to the stems.
I also tacked down some plastic grass we had in a box left over from apartment decorations way back in Seattle.
On the night before the party I added the aluminum foil to the bases in prep for the next morning. The butterfly was a last minute addition that just seemed right to add. Very simple really. Another wire hanger straightened and painted black. The butterfly itself is made of printed glossy photo paper glued together with a pipe cleaner body and some googly eyes glued on. A nice effect for very little work.
The mushroom was made of two cakes stacked up then cut to a nice round shape. The larger flower is from a very common cake mold you can find just about anywhere. The small flower was a round cake that we hand cut to match the base.
We frosted all the way up the stems so that the entire flower would have the effect that it was completely made of cake.
The baby flowers and baby mushrooms are colored vanilla cookies setting on top of green Dots (the candy). Another nice effect for almost no work :).
Good luck with your own ladybug cakes!
