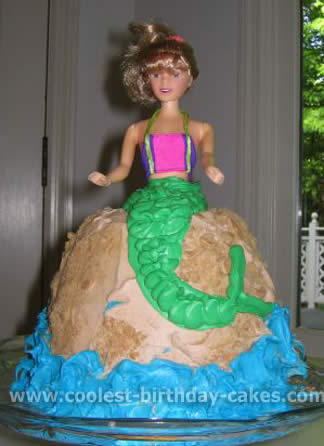
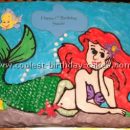
I used a Pampered Chef batter bowl to make this mermaid cake. I iced the cake with a tan colored frosting and used bright blue at the bottom. I then crushed graham crackers and pushed into the tan icing. I added the green fin last. It was a huge hit and very easy to make.
More Mermaid Cake Ideas
Mermaid cake by Kay C., Frankfort, KY
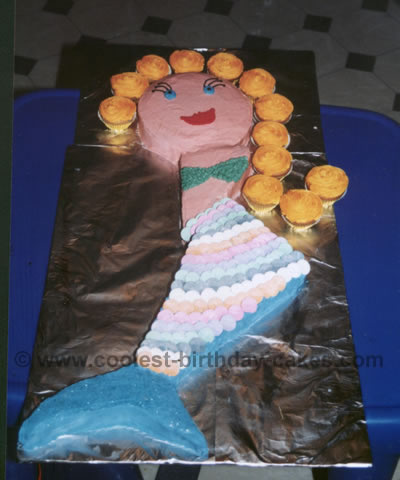
When my youngest daughter turned 5, her favorite movie was “The Little Mermaid”. I saw a version of this birthday cake recipe on the Internet and had to try it. It looked like so much fun to make – and the results were amazing! All the parents were taking photos of the cake before it was cut so they could show their friends.
For this birthday cake recipe you’ll use a round layer pan, a regular sheet pan, and 12 cupcakes. It took two cake mixes to prepare this cake.
The cakes were prepared and baked according to instructions on box. After cooling, the sheet cake was cut and assembled according to the diagram below:
One tip that I have found especially useful when cutting cakes into various shapes is to refrigerate it for a few hours first. The cake will be firmer and less “crumbly” when you start cutting it. Also, try to use a serrated edge knife for a cleaner cut.
I used toothpicks to anchor the various sections of cake together, as well as a little icing as “glue” between the different parts. The round layer and torso section of the body was iced in a peach/flesh tone; the tail and fins were iced in a teal color. I used green icing to create a “bra” on the torso. The scales on the mermaid are good old fashioned Necco wafers! Just push them into the icing enough to anchor them. Start at the bottom and work your way up, so that the wafers overlap one another like shingles.
The mermaid’s face was completed by using red and black licorice whips for lips and eyelashes. The cupcakes were iced using a large star tip in a “swirl” motion, then arranged around the layer cake to resemble hair. I also purchased some teal edible glitter that I sprinkled on the tail and fin sections of the mermaid for some extra sparkle. This birthday cake recipe was great in that the smaller children at the party could eat the cupcakes and didn’t have to fight with utensils.
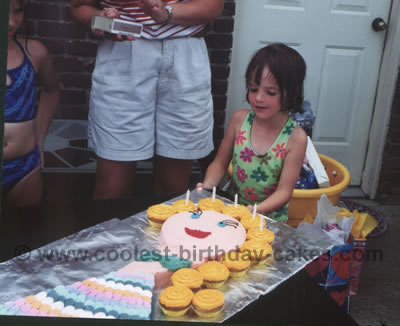
Mermaid cake by Melissa H., Winston-Salem
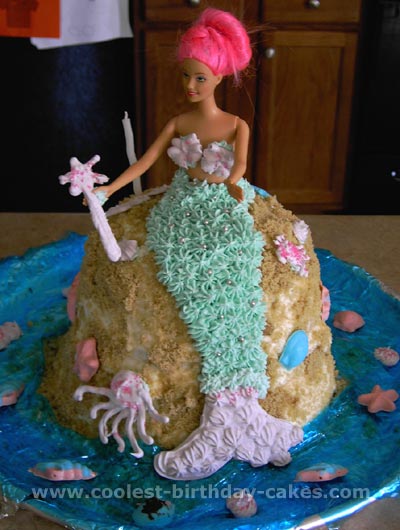
My daughter wanted a Barbie cake. But then she wanted something more whimsical and so we came up with the little mermaid cake idea. This is really easy! The pan is just 2 glass Pyrex bowls (I believe they are two and a 1/2 qt and one qt in size). Use one cake mix for each bowl.
Then layer the rounded small bowl cake on top of the larger cake size. Another option is to make it with the biggest bowl- with 2 cake mixes (if you do this, you will have to watch your cake baking because it takes more time with 2 mixes).
We took a Barbie and put plastic wrap around her legs real tight. I happened to use the actual Mermaid Barbie and just took her tail off (it detaches). Once the cake is cooled I cut a small hole in the top and pushed the doll down into both cakes up to the waist.
The day before I used a royal icing recipe and freehanded some tail fins and ocean animals. I also used the star tube to make a wand, and her bra. Make a bunch and let them harden – that way if any break you should have one that you can still use.
I also bought a chocolate candy mold of seashells and let my kids make chocolate seashells. It is really easy with the new kits they have out now you can use the microwave! (or use candy).
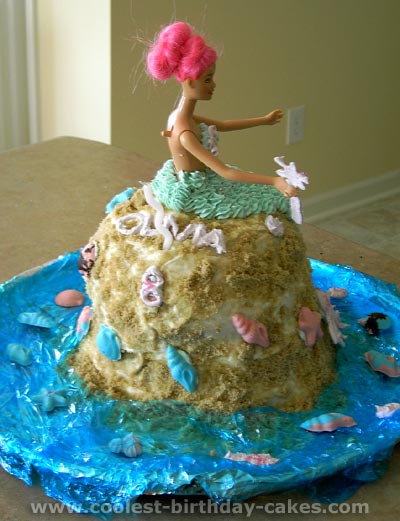
I frosted the little mermaid cake with the Barbie in it with white frosting and then covered with brown sugar to make it look like sand, which I patted on with my hands. Then I took butter cream frosting (I used store bought white), tinted it teal, and used a star tip to make the actual full-length tail. I used a toothpick to draw out a line where I should put the frosting, then began to decorate with the star tip. I added the royal icing fin and bra top.
The girls added the chocolate seashells all over the cake. This is actually a big cake and I believe this would feed well over 12 people. You could use this same idea for other Barbie themed cakes like fairies, brides, princesses, etc.
Mermaid cake by Shivani S., Auckland, New Zealand
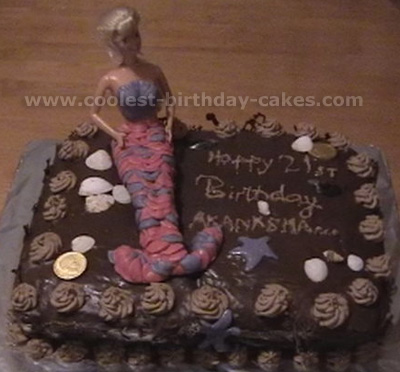
I made this mermaid cake for a young friend who turned 21. She wanted an under the water theme but also wanted a chocolate mud cake, so I combined both by using mud cake as the base with a mermaid on top. She just loved it and so did everyone else.
I made a 12″x10″ fudgy chocolate for topping and used chocolate ganache’ for the mermaid. I used a Barbie doll and dressed her with sugar paste icing tinted in pink & purple colours. I also made a few star fishes etc. also with tinted sugar paste and added a few chocolate coins to look like treasures on the mermaid cake.
Chocolate mermaid cake recipe: 555g butter, softened, 675g cups castor, sugar, 9 eggs, 675g cups self-raising flour, 330g plain flour, 1.5 cups cocoa, 3 cups water, grease deep 10×12″ rectangle pan, line base with baking paper. Combine ingredients in a large bowl of an electric mixer, beat on low speed until ingredients are combined, then, beat on medium speed until mixture is smooth & changed in colour. Spread mixture into prepared pan. Bake in moderate oven for 1.5 hrs. Stand cake 5 minutes before turning onto a wire rack to cool.
Mermaid cake by Jillian K., Cedar Rapids, Iowa
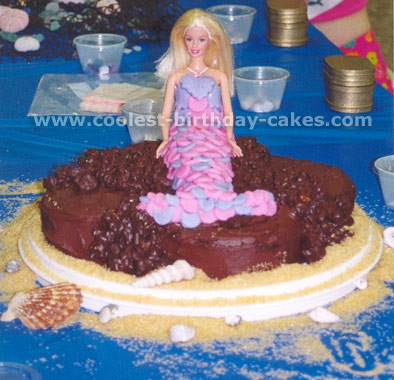
I made this mermaid cake for my daughter’s 7th birthday. To make the cake: use a 10-inch round cake pan and frost the cooled cake with chocolate frosting. To make it look rocky, melt a 12-ounce package of chocolate chips and mix in 2 cups of popped popcorn. Pour the popcorn mixture over the frosted cake and pile it in areas to create a place for the mermaid to sit.
Tint one-third of a package of already-made Wilton fondant pink and two-thirds lavender. Roll out half of the lavender fondant to a shape 2 inches longer than a Barbie doll’s legs and wide enough to wrap around the doll. Wrap the legs of the doll (which have been brushed with apricot jam to keep the fondant from sticking) and pinch the end of the tail to form a fin shape.
Position the doll on the mermaid cake. Then, roll out both colors of remaining fondant and use a small circle cutter to cut crescent shapes. Start at the fin end and layer the scales (using the apricot jam to make them stick together) all the way up the doll. Cut a larger shape for the mermaid’s top (I used three small fluted heart-shaped pieces).
Once the mermaid cake is where it will be served, pour “sand” (raw sugar crystals) around the cake and on the table and decorate with shells. I found this mermaid cake idea in a cake decorating book.
Mermaid cake by Pam R., Champaign, IL
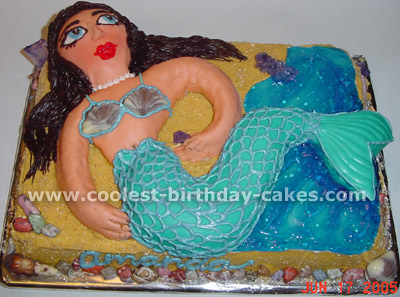
I made this mermaid cake for a friend’s daughter, who was having a swimming party for her birthday.
The “beach” for the mermaid cake is a chocolate mix sheet cake frosted with canned vanilla frosting. I left the frosting under the water white, and tinted the rest a tawny color and then sprinkled it with “sugar in the raw” to get a sandy effect. I tinted some piping gel blue and applied it over the white to make the water.
The mermaid is vanilla cake from a mix (I added a little meringue powder to the batter to make it denser so it’s easier to work with.) Her body is actually just cut out from a round cake pan (I curved one of her arms inward and added cake scraps to lengthen the tail so it’s harder to notice it was cut from a circle.)
I happen to have some egg-shaped muffin pans that I use for Easter treats, so I used one of those for her head. (A cupcake top would make a good face, too, but rounder.)
I covered the mermaid cake in fondant, added a fondant nose, and then added additional details with piped canned vanilla frosting, tinted in various colors. Chocolate shells, candy rocks, and crystal candies from the candy store at my local mall provided the finishing touches for the mermaid cake.
Mermaid cake by Sjanna J., Yarmouth, Canada
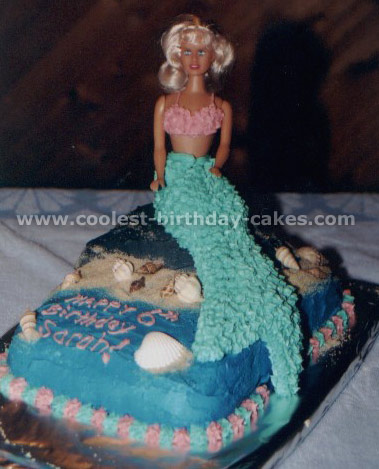
This mermaid cake was so much fun to make! First of all I bought a cheap doll from the dollar store.
To make the tail of the mermaid cake, and have it stay in the correct shape I wrapped it in fruit roll-ups and then put the doll in the fridge upside down in a jam jar so her tail would harden. I also iced the tail in the back while she was in the jar (to help her stick to the mermaid cake).
For the mermaid cake I just made a slab cake and then reserved a bit of batter for the “rock” and baked that part in a Pyrex bowl. For the sand I used sugar cane, “raw” sugar that I purchased at a health food store. The shells were also purchased from the dollar store and added for a beach-like look!
After the mermaid cake was all decorated I placed the doll on top and her tail hung down over the side of the mermaid cake. Then I just iced on a bikini top for her. A little tip for icing dolls: before putting the little stars on, spread some icing over her with a knife and put it in the fridge to harden, then after it’s hardened the little stars will stay in place better.
Sarah loved her mermaid cake and so did all her little friends!
Mermaid cake by Shannon J., Minooka, IL
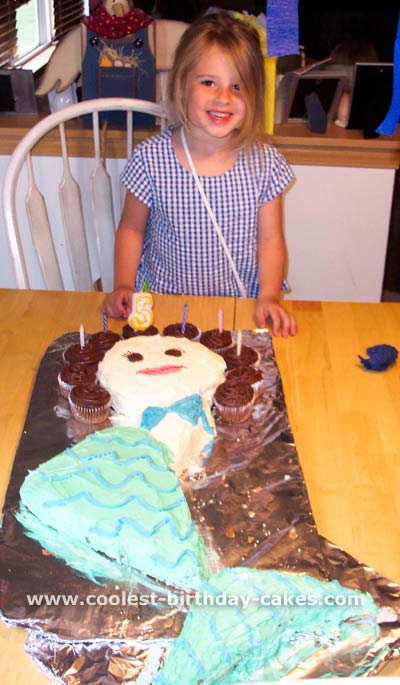
Read Shannon’s “Party-Tale”: The story behind the cake…
Mermaid cake by Angela N., Singapore
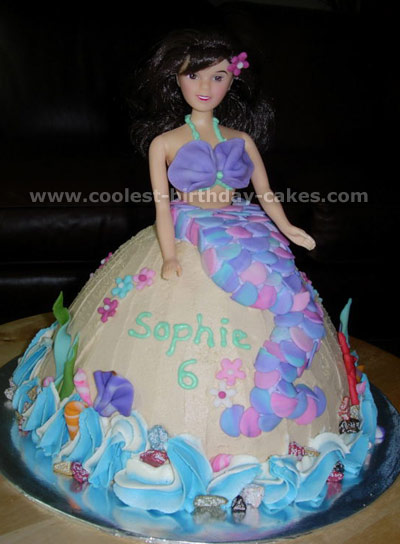
This mermaid cake was made using a doll pick. To get a realistic and interesting wave, I added two different shades when I piped it. The mermaid was shaped using fondant; the scales were marbleized fondant glued together.
Mermaid cake by Angela N., Singapore
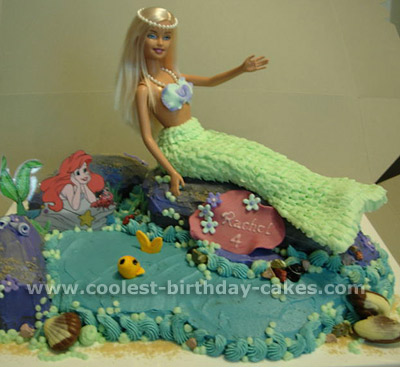
This mermaid cake was a full size Barbie, molded with fondant. The scales were then made using butter cream. The sea was a 9×13″ cake, cut into irregular shape, and the rocks using small loaf pans.
The mermaid was sitting on a large loaf cake. I added a string of pearls in her hair to add interest and make her look more elegant.
