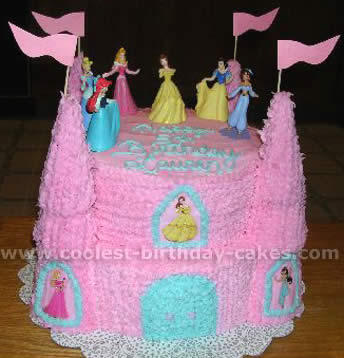
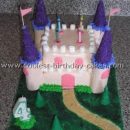
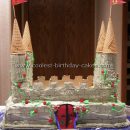
My daughter asked for two cakes this year for her fifth birthday (one for her party with her friends and another for the family party). For her friend’s party she wanted a Princess castle cake, which I knew would be a challenge.
I made several round chocolate cakes with icing in the center and stacked them on top of each other. For the towers, I cut a Styrofoam cup in half for the bottom of the tower, the middle section was a cake cone and the top of the tower was a sugar cone. Each stacked on top of each other nicely and simply decorated them with icing.
I used clear Princess stickers for the princesses in each window and placed all of her princesses on top of the Princess castle cake. I made the flags out of toothpicks and construction paper.
This Princess castle cake was the talk of the party. All the parents were asking where I bought it from and when I told them I made it myself, they were amazed. I must say with all the details, this cake took approximately 7 hours to make, but definitely well worth the time.
When my daughter saw it in the morning, she said: “it’s beautiful mommy! I love it!” I was overwhelmed with joy, a moment I will never forget.
More Princess Castle Cake Ideas
Castle cake by Nicole C., Wichita Falls, TX
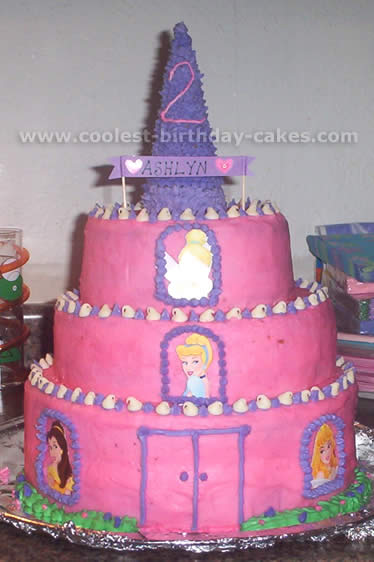
For this princess castle cake, I first made the smaller cake (for a smaller family party). This was a great way to learn from my mistakes without feeling like I had so much to loose.
I baked each cake (10in, 8in, 6in) all together, and then iced them one at a time. On the bigger cake I doubled the bottom layer to give more room for decorating.
I made a template for the arched windows and after I iced the princess castle cake, I put it in the freezer to harden the icing and then took it out and set the template on the icing.
I used a toothpick to outline the window. Then, I used an icing decorating kit to draw the window or used a dot pattern (same method for the door).
For the bigger cake I cut out the princesses from my daughters invitations and placed them in the windows (put the characters on, then use the template to do the window).
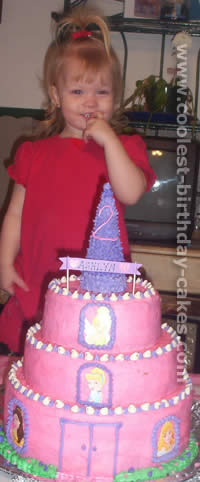
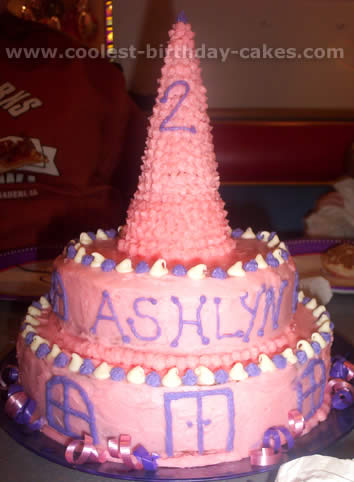
For the trim of the princess castle cake, I used alternating purple icing dots and white chocolate chips. Last I used an ice cream cone on a cupcake and dotted all over and placed on top. I used the icing kit to put a #2 on it and made a banner for her name.
I used Chocolate as my biggest layer, Vanilla the medium and strawberry the smallest layer. I made my icing from scratch using 2/3c butter, 1lb powder sugar, 1/4c milk, and 1tbsp vanilla (I tried other recipes, but this one worked best). If you need to thicken it, use a little bit of powdered sugar. Use Wilton’s cake coloring to tint the icing. It took a lot of time (& patience) but definitely worth it!
Castle cake by Tobie F., Davis, CA
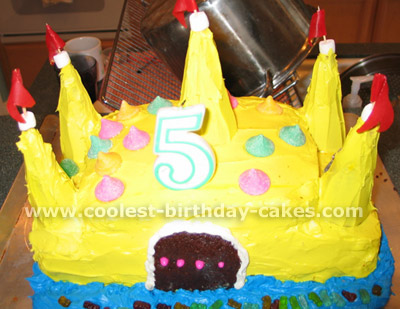
This princess castle cake was very easy and fun to do!
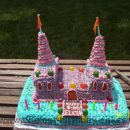
I baked 2 sheet cakes and cut one slightly smaller to fit on the top. I placed five-sugar ice cream cones upside-down and frosted everything. I used small marshmallows on the top of the cones to put toothpicks through and wrapped fruit roll-ups cut to look like flags around them.
I decorated the top of the princess castle cake with sugar candies (any kind will do) and placed the number candle on top. Around the princess castle cake I put blue frosting and placed gummy fish in the “moat”. With the extra cake I had from the smaller sheet I cut out a drawbridge door, frosted it in place and decorated it with small round candies.
Castle cake by Jana P., Malaysia
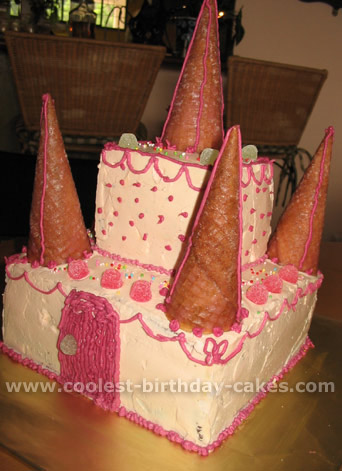
I prepared this princess castle cake for a friend’s daughter’s (Celene) 7th birthday. Celene wanted a ‘princess’ party and wanted specifically a chocolate cake. So I baked a rich moist chocolate cake; two 12″ x 6″ since I didn’t have the right type of tins.
For this princess castle cake, cut the first cake in half, ‘glue’ together with chocolate butter icing and leave it in fridge to harden. The other half, cut into four equal squares (you will get some leftovers), stack them all four up and ‘glue’ it to the first cake with icing and again let stand in fridge to harden.
I used butter icing but added more icing sugar to make the icing harder and not so soft. I used pink icing for the lining and for the princess castle cake cones I added some pink tinted sugar syrup.
To cover up some chocolate cake crumbs I added some pink dots. I also decorated the princess castle cake with some jelly gummies. Everyone loved it so much they were all going for the cones.
The princess castle cake was a hit!
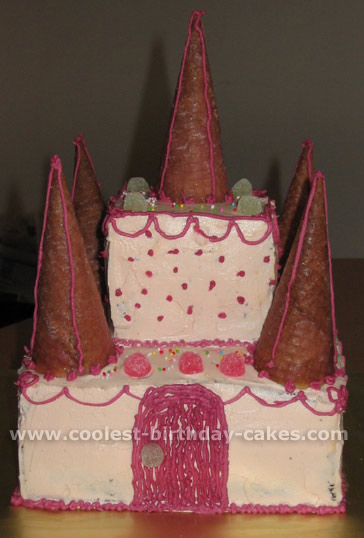
Castle cake by Rachel S., Granite Falls, NC
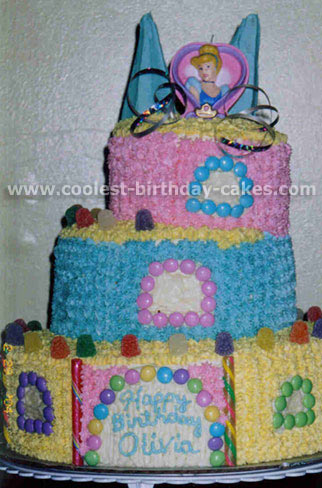
This princess castle cake was for a friend’s daughter’s 6th birthday. We wanted a cake that would really make her go WOW!!! This princess castle cake took 3 Duncan Hines yellow cake mixes.
Bake the cake in 2 of each pan: 6-in., 8-in., and 10-in. (This makes a lot of cake!). For this princess castle cake, you will also need gum drops, pastel-colored M&Ms, candy sticks, 2 sugar cones, Disney Princess candle, curling ribbon and dowel rods.
Put the 10-in. layers together with frosting in between. Insert dowel rods level with cake. Center the first 8-in. layer on the bottom layer. Put the next 8-in. layer on top of bottom layer with frosting in between. Insert dowel rods level with princess castle cake.
Put the first 6-in. layer off center on middle layer. Put the next 6-in. layer on top with frosting in between. Insert dowel rods level with princess castle cake. Decorate the princess castle cake with candies as shown. Cover sugar cones with frosting. Decorate as shown.
Castle cake by Angela N., Singapore
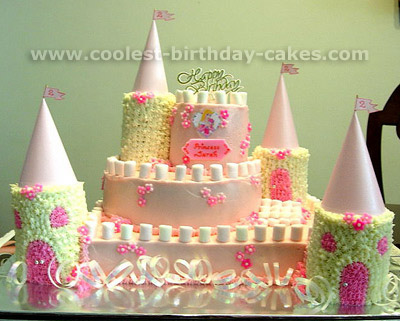
This is a fairly large princess castle cake- about 5kg. To secure the pillars of the princess castle cake to the board, I used some royal icing.
The curly ribbons (white) give the princess castle cake a cloudy look.
Castle cake by Jamie W., Tampa, FL
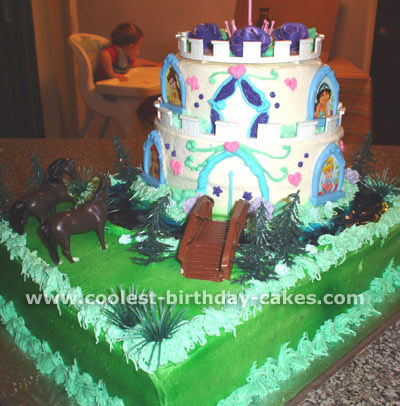
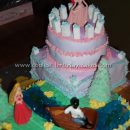
This princess castle cake took me a really long time, I came up with the idea partly on my own. The castle is a cake kit from decopac, but my friend was having about 60 people at her party and needed more cake! So I used a half sheet cake and put the castle on top, I made the half sheet into a moat around the castle with horses, a bridge, trees, flowers etc.
The princess castle cake turned out really well. The castle was made using an 8-inch on the bottom and a 6-inch on top. The castle kit has all the windows, and the top plate with the flag as well as the separator plate.
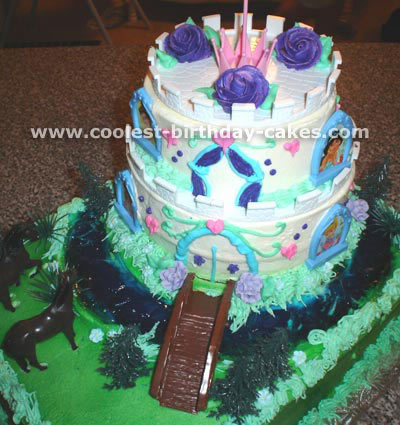
Castle cake by Siew P., Melbourne, Australia
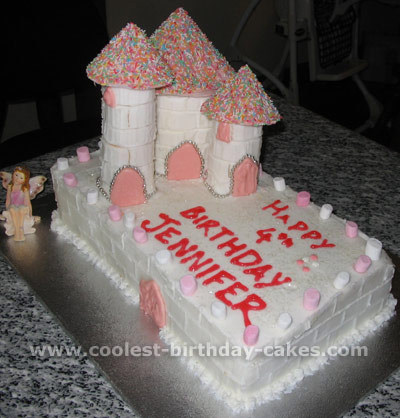
This is a fairy princess castle cake I decorated for my daughter’s birthday party. I got the princess castle cake idea from a magazine and other ideas and tips from surfing websites like this one. So thank you!
Because I’m not good at baking, I actually bought plain sponge cakes and Swiss rolls from the supermarket but decorated the princess castle cake completely from scratch by myself. The towers are Swiss rolls (one big one and several small ones stacked on top of each other).
I didn’t want to use ice-cream cones for the roofs, because of the different sizes of the towers, they just wouldn’t have sat properly. So after much researching, I decided to try using normal melted chocolate, which I think worked very well. I made the cone shapes from normal baking paper and then simply spooned melted chocolate over it. Before the chocolate set, I sprinkled the 100’s and 1000’s over it.
To assemble the princess castle cake, I first put the plain rectangular sponges together on the cake board. Then I placed the Swiss rolls on top, trimming off bits till I had them the right height that I wanted. If I made this again, I would place the towers a little bit further apart from each other (this would make decorating easier and also allow space for the roofs to sit properly).
Once I had the Swiss rolls in the right spot, I stuck a wooden skewer right through each one down to the sponge cake below to keep them in place.
I used normal white butter icing to decorate the whole princess castle cake, then simply used a wooden skewer to make the ‘brick’ marks all over. Using the same melted chocolate as for the roofs, I piped some onto baking paper to make the doors and windows. Small coloured marshmallows helped complete the princess castle cake – my daughter enjoyed helping put them on too!
A sprinkling of edible glitter all over the top not only added a touch of magic, it helped cover up any mistakes on the surface of the princess castle cake!
I must admit- given that this was my first attempt at cake decorating, I was very pleased with the result!! (This princess castle cake did take me 4-5 hours though!!)
Castle cake by Alisa C., Friendswood, TX
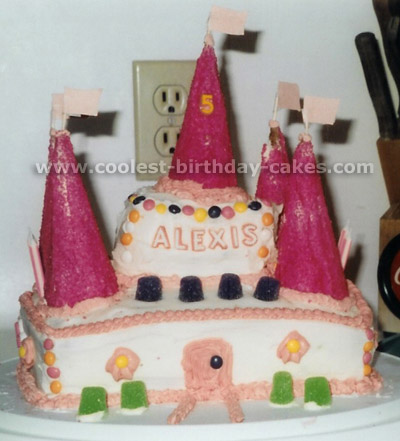
I had to scale this princess castle cake down. So I used an 8 x 8 square cake and then cooked another and cut it in fours. I used two of the four squares for the middle tower. The ice cream cones were covered in icing and then rolled in sprinkles. This princess castle cake is a lot of fun to make and decorate.
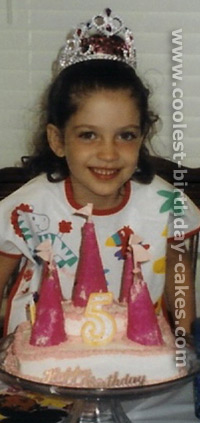
Castle cake by Jennifer S., Williamstown, NJ
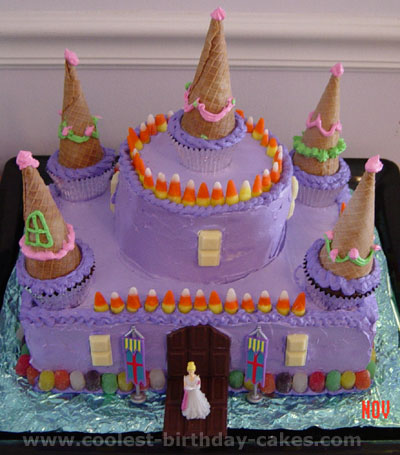
The first theme cake I ever made was a fire engine for my son’s 2nd birthday. This prompted my soon to be 5 year old daughter to insist on an equally special cake for her birthday. She chose a very vague “castle” theme for her party. After many searches through this site and others we modified a cake found on the Ladies Home Journal (LHJ) website. , The most difficult part of making this princess castle cake was finding 6 in. round pans (LHJ claims these are standard size pans, but I found them only at a specialty store) and fitting it in the fridge after it was assembled. Most of the princess castle cake was frosted with whipped cream icing (bought the icing mix at a local craft store to ensure it would be edible, I don’t make the best frosting).
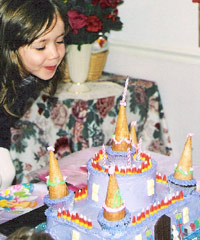
If I were to make this again I would save myself some time and use store bought tub icing. We used 3-box mixes total; the base is made of two 9×13 sheet cakes layered with butter cream icing. The top is made of two 6 in. rounds layered on top.
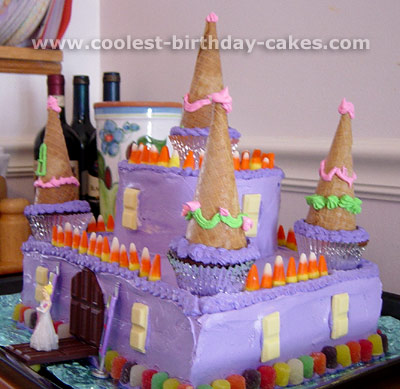
We split the batter used for the rounds to make 6-8 cupcakes in foil cups, which were topped with sugar cones to create towers. I suggest leveling the sheet and round cakes with a knife, I did not and the round tower has a bit of a lean to it. Straws or dowel supports through the center may also have helped.
The moat of the princess castle cake is crinkled foil wrapped in blue/aqua cellophane. The door and drawbridge are Hershey bars, the windows are white chocolate, and gumdrops and candycorn finish the look. We intended to put the candles on top of each sugar cone but the icing didn’t support them. I would suggest carefully cutting the tip of the cones to the diameter of the candles to make this possible; otherwise flags could also be fashioned out of toothpicks and paper/stickers.
Overall I received many compliments and requests for future party cakes, but most important was the delighted smile on my daughter’s face the morning of her party when after a late night I revealed the princess castle cake in the fridge. Have fun with your own and visit the LHJ website for more in depth details and hints about the preparation.
Castle cake by Miriam R., Paterson, NJ
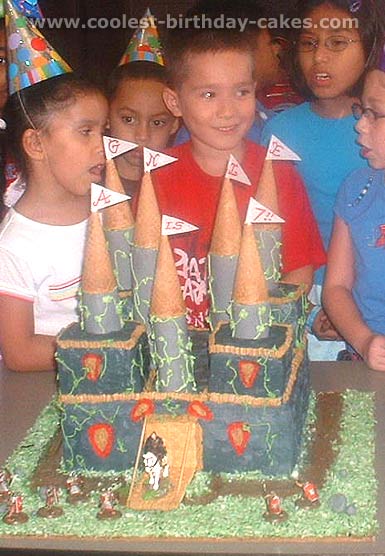
My grandson wanted a castle cake in dark gray, no blue-green-pink colors to be used. One week in advance I prepared 7 turrets (each one for each birth year) and covered them in gum paste. I baked two 12×12 yellow cakes and filled them with strawberry filling. I also baked two 10×10 chocolate cakes, filled them with pineapple and cut them in 4 small squares for the 4 towers.
I placed clear gel around the castle to represent water around it (not blue as it was not an ocean). I tinted coconut in green and spread around to resemble the natural surroundings. The door and bridge to the castle are 2 graham crackers and the hinges are 2 strands of spaghetti covered with matching colored icing. Then I prepared the flags gluing them to toothpicks with royal icing. All the kids were fascinated.
Castle cake by Angy H., Minot AFB, ND
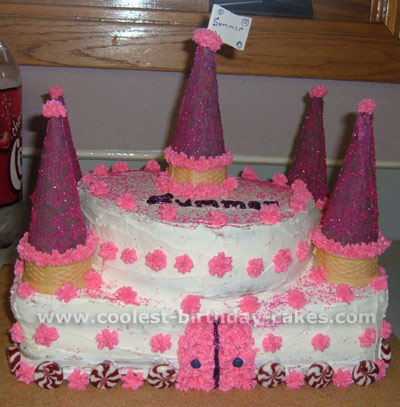
My daughter Summer was trying to decide what to do for her 8th birthday party. She was extremely indecisive so I took the initiative and started planning for a princess party. I didn’t want it to be a Disney party or have any particular theme. I just wanted her to feel like a princess.
I started out by searching out pictures on the net to find some ideas for a princes castle cake. I didn’t want to pay a ton of money to have one done, so I browsed some pics and put some ideas together and came up with my own. I was amazed at how easy it was!
I got 3 boxes of cake mix and made two 9×13 cakes, and two 9-inch round cakes. I frosted the middles of all the layers so every bit of cake got some icing. I set it up to where I had the two rectangle cakes on top of each other, and then put the two round cakes on top of them.
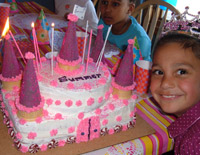
I used 3 cans of store bought icing and 2 cans of spray pink icing that come with tips already. As decoration for the very bottom around the entire princess castle cake, I used raspberry crème savers. To make the “towers” of the princess castle cake, I used sugar cones and regular ice-cream cones.
I looked around on the Internet and I saw that people were scooping out cake to put the towers in. I didn’t really like that idea. So instead, I cut 3/4 off the handle part of the regular cones, and then fit the sugar cone right over the cut off part. That allowed for a good sturdy bottom, and then the frosting of the princess castle cake acted like glue and the towers stayed right in place.
When it came time to cut the princess castle cake, we just removed the towers, and cut into it.
Don’t be afraid to try and make these amazing looking cakes yourself- some of the pictures I saw on the net were very intimidating, but I sucked it up and went for it. Nobody could believe that I made this princess castle cake myself. People kept asking where I bought it. My daughter had tears in her eyes when she saw it for the first time. She told me it was the most beautiful cake she’d ever seen. That made it all worth it! Good Luck with your party planning and have fun!
