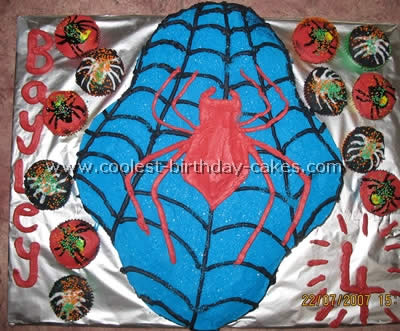
My son Bayley and I were actually on this site looking for inspiration by looking at the pictures of a Spiderman cake when he decided the type of cake he wanted was not an actual Spiderman face but a spider with webs. Such a huge sigh of relieve from the resident theme cake maker in our family, me!
I actually used four store bought sponge cakes and after filling them with jam and cream I fashioned them into the above shape then got to work on the icing, a long process when all you have is the basic blue and red food dye. However persistence is the key and it all worked out in the end. It was a great hit with the birthday boy and his cousins. I will be back for more inspiration in September as my daughter is turning one.
More Pictures of Spiderman Cakes
Pictures of a Spiderman cake by Canan H., Portsmouth, VA
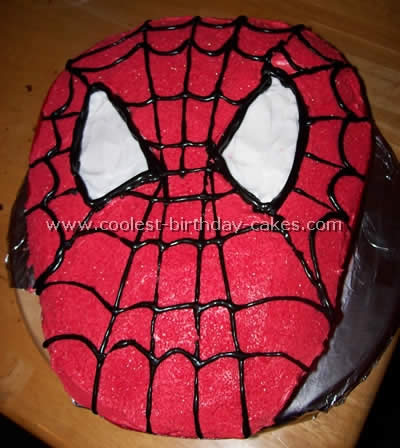
I baked two packets of store bought Vanilla Sponge cake in one big sheet form. I drew a freehand close up of Spiderman’s face copied from pictures of a Spiderman cake I saw on this site. In order for the white in the eyes not to mix with the red I cut out the eyes on the paper cutout and traced the entire face on the cake, cut the cake to the shape of Spiderman’s face and where the eyes used to be on the paper cutout if I traced the eyes with a knife very gently and removed a small amount of cake of the surface so it was easier for me just to fill that space up with white icing.
I used white icing and mixed it with red to achieve the red icing. For the black web-lines I used chocolate icing with black food coloring. First I applied the red icing everywhere but the eyes, and then I used red sugar crystals and sprinkled it onto the surface of the entire cake. I did that first before I filled in the eyes. I didn’t want to have any crystals on the eyes.
With a pipe filled with white icing I filled in the eyes and for any little slip ups on the edges I sealed and hid that with black icing as a trim around the eyes. All that was left to do was to fill the entire face with black icing webs. I used the smallest tip for the icing bag and started between the eyes and moved on further. It is very easy to do. It looks more complicated than it actually was. My son loved it.
Pictures of a Spiderman cake by Kim S., Fresno, CA
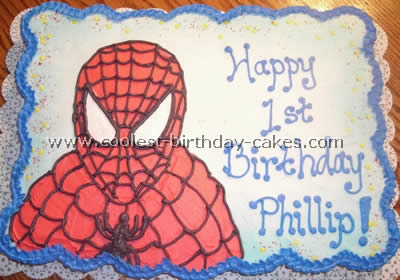
I started by making cupcakes. I cut the tops off to level them. I arranged them in a rectangle shape and frosted the top of all of them like a cake. I drew the picture on with a skewer, copying pictures of a Spiderman cake I had seen on this website. Then I frosted in the colors and decorated the detail.
Pictures of a Spiderman cake by Diana R., Arizona
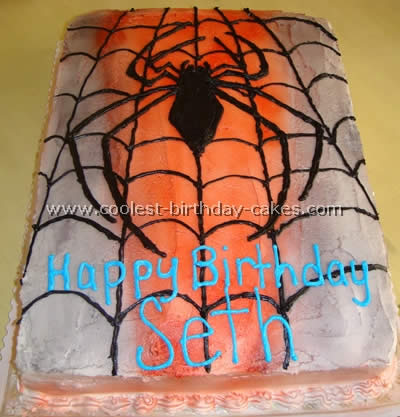
I made this cake for my nephew’s birthday! It was chocolate with fresh strawberries. The way I made it was with a regular rectangle half a sheet pan. The frosting is regular buttercream frosting that I made and for the design came from pictures of a Spiderman cake my sister-in-law found on the web of a Spiderman’s chest.
I used the spray bottle can from Wiltons to add the black and red color and the spider was done with the buttercream frosting dyed black.
Pictures of a Spiderman cake by Michelle H., Bloomington, IL
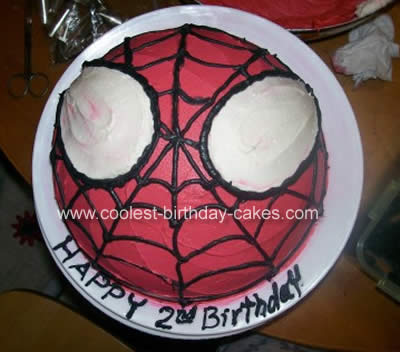
For the Spiderman 3 cake I used a hexagon cake pan and two Duncan Hines French Vanilla cake mixes. I frosted it in homemade black and white royal icing. The Spiderman mask was made from a Betty Crocker Bake – n – Fill pan, one Duncan Hines French Vanilla cake mix and filled with Vanilla ice-cream. I decorated in red, black and white homemade royal icing.
My son Harrison turned two on March 21st and is a huge Spiderman fan (thanks to his comic book loving father) so I found pictures of a Spiderman cake that would represent the coming out of the new Spiderman 3 movie and the new costume Spiderman is wearing in the comic books.
My icing recipe is as follows: 1/2 cup of shortening; 1/2 cup of butter; 1 tsp of clear vanilla extract; 2 tablespoons of milk; 1 pound of powder sugar. Cream shortening and butter together. Add clear vanilla extract. Add powder sugar, 1/4 cup at a time till crumbly then add your 2 tablespoons of milk. I use paste coloring for the dying of the frosting, it won’t make the frosting runny.
Pictures of a Spiderman cake by Tim L., Montgomery, TX
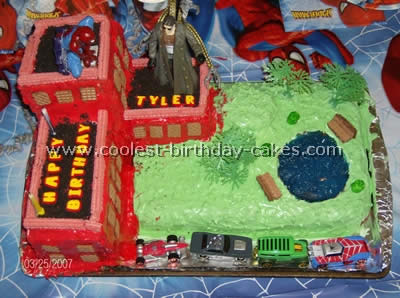
My wife and I used four cakes, one 9×13, two medium loaf pans and one large Loaf pan. We used fishing line to cut the cake evenly. We used white Cream Cheese icing and colored it with food coloring. (Recommend buying red icing instead of trying to color).
I used sugar wafers for windows and border around roof with crumbled Oreo cookies to cover top of cake. I used jelly for pond in the park and more sugar wafers for benches with colored marshmallows as shrubs. I used toothpicks to hold cake together. We got this idea from pictures of a Spiderman cake on this site along with the Spiderman 2 game on PS2.
Pictures of a Spiderman cake by Theresa T., Bunker Hill, WV
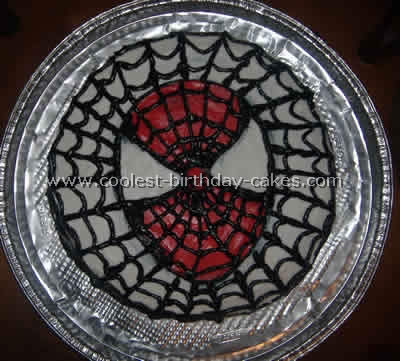
I made this for my nephew for his 11th birthday. This cake was done completely free hand from pictures of a Spiderman cake. I thought this would be one of the easiest cakes I’ve done but I was wrong! The contrasting colors kept mixing into each other. I found out the hard way that white, black and red do not mix nicely! I use a toothpick to sketch the general picture onto the actual cake and then filled it in with icing.
Pictures of a Spiderman cake by Vivian H, Santa Clara, CA
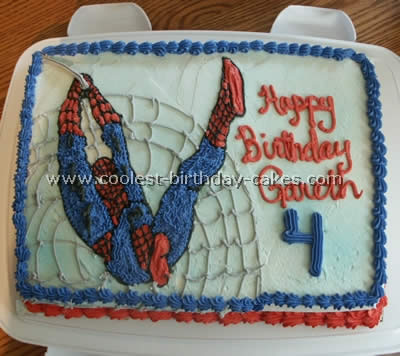
I got the idea for this cake from pictures of a Spiderman cake on this site. I iced a 1/4 sheet cake with white icing.
I laid a piece of wax paper on top of a picture of Spiderman from a coloring book. I then cut out the picture and laid it out on the cake.
(What I didn’t do which you should do is be sure that any part that should be air is cut out as well like between his arms).
I then sprayed blue over the cake which provided an outline of Spiderman when removing the wax paper. Then outline with #2 in black. Then pipe in the red and smooth out. Then with #1 create webbing over red. Blue was #16. Then with #3 I made the webbing around Spiderman… Voila!
Pictures of a Spiderman cake by Angela M., Clintwood, VA
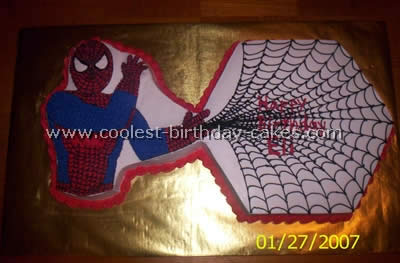
The Spiderman part of the cake is made from a Power Ranger pan and the web is a hexagon pan. I didn’t want to buy another pan so I adapted the power ranger into Spiderman.
Since a larger cake was needed I decided to have Spidy shoot his web onto the other cake. Spidy is a chocolate cake and the web is a white cake so that there was a variety for all the party goers. The webbing on Spidy is made with a #2 tip and the black icing is thinned with clear corn syrup to make smaller lines than the ones used for the web.
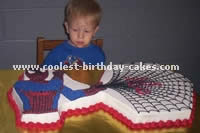
The web is made with a #3 tip and regular black icing. Although he doesn’t look very excited in the picture the first time Eli my great nephew saw his cake he was jumping up and down in his mother’s arms. The pictures of a Spiderman cake were taken at the party and there were too many people standing around watching him he got shy.
Pictures of a Spiderman cake by Cary D., Alberta, Canada
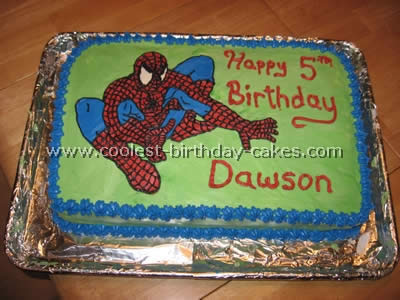
I was looking on this site for pictures of a Spiderman cake and saw some great ideas on this one. I didn’t want to spend lots of money at a bakery or buy a specialty pan. So I made a large cake and froze it for 2 days.
Then I started the layers of icing. The first layer was just white to prevent the cake crumbles from showing in the icing. After that froze (tip the icing will start to harden immediately as you decorate because the cake is still completely frozen)
Then I made my colors the night before as they needed to become quite vivid for this cake. I printed off a coloring page of Spiderman making two copies. With one copy I placed it upon the cake in the desired area and secured it with toothpicks. I then proceeded to use my green marble icing and ever so slightly covering the edges of my paper and the rest of the cake. As it cools the icing firms and then I carefully removed the paper leaving a perfect indented outline of Spiderman.
The next step was to freeze it again and then cut out all the blue areas of my pattern on the next paper leaving only the red and eyes intact. Then using toothpicks I realigned the new patter and using blue icing I piped in the blank spaces. Repeat with the red but make sure you cut out the eyes and use them as templates as well. Then just refreeze before tracing out the black.
Pictures of a Spiderman cake by Karen K., Uxbridge, MA
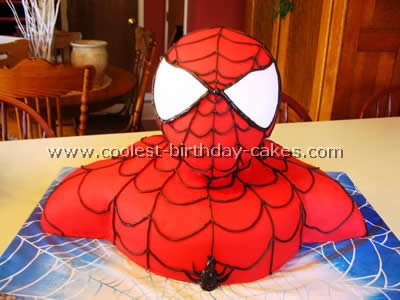
Spiderman was made for a little three year old boy. I wanted to do a bust of Spiderman about the size of a person to really surprise him. I found many different pictures of a Spiderman cake and decided to go for it.
Spiderman’s body is made of (2) 9 inch layer cakes. I used chocolate butter cream icing between the layers. I used (1) 8 inch layer and cut it in 1/2 and 1/2 again to get four equal quarters. Two were used for each shoulder with icing gluing them together. The head and neck were molded by hand out of rice crispy treats (10 oz of melted mini marshmallows and 6 cups of Rice Krispies. I used rice crispy treats because they would not weigh as much as cake.
I iced the cake with chocolate butter cream and then placed the head and neck on top separated from the cake by a cake board cut down to approximate size of neck and using dowels underneath to help support it. Dowels went down through the center of the head neck and cake board and into the bottom layers of cake touching the main cake board.
I then iced head and neck with chocolate butter cream and covered in red fondant. I coved head first and worked out any folds. I then covered arms chest and back in that order separately with red fondant. Black royal icing was used for the web and white fondant for the eye mask adhered with vanilla extract.
The spider on his chest was also black royal icing. He was a little larger than the 3 year old who absolutely loved him. We took lots of pictures of a Spiderman cake.
Pictures of a Spiderman cake by Carol H., Davisville, WV
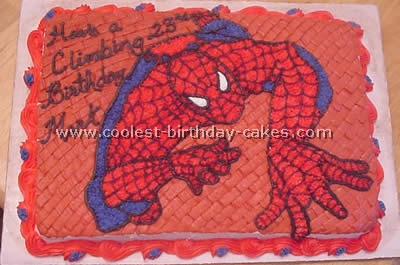
I traced pictures of a Spiderman cake onto waxed paper and used it as a stencil to trace it onto the iced cake. I used the basket tip to make the bricks and freehanded the stripes on spidie for the most part.
