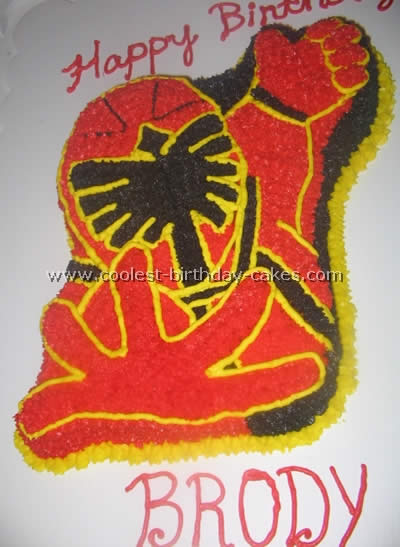
I made this cake for my god son. I was shopping around for a Power Ranger cake pan and could not find one. My god son who was turning four said “why don’t you use my Spiderman and draw him like Red Ranger” and the light went off! I used the 2006 Wilton’s Spiderman pan and took a picture of a Power Ranger from the Party Wear for Coloring. It was actually easier than Spiderman was!
More Power Rangers Cakes

I made the Power Rangers body by using a 9×13 baking pan. For the arms I used two meat loaf pans (that is what I call them), for the head I used an 8×8 square pan and just cut the shape of the head that I wanted.
I used vanilla icing and added almond flavoring. I used Wilton icing coloring (red no taste). For the eyes I used chocolate chips and for the belt I used white chocolate chips and yellow sprinkles. This was made for my friend’s four old child.
Cake by Angie L., Hamilton, OH

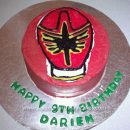
I used the Mighty Morphin Power Rangers cake pan that I got off EBay and free handed the mask to change to the Mystic Force Power Ranger. I used the star tip to cover the cake in red, yellow-gold, black and white. I used black to outline the details. This was made for my son’s fourth birthday.

I used a square pan to create a two-layer cake to make this Power Rangers cake. I used buttercream icing. And I used Piping Gel to create the colors needed for the Power Ranger.
To find the picture I used a coloring book and I traced the picture on to wax paper. I then re-traced the picture with black piping gel and pressed the tracing onto the cake to make the outline of The Red Ranger. I then used the black piping gel on the outline on the cake to give more definition to the shape. The last step was to color it in with the red and yellow piping gel.

My kids wanted a Power Ranger cake. The Wilton pan was retired. Also I had a lot of people coming so I needed more than just a character pan sized cake. I used four cake mixes and put 2 1/2 sheet cake pans together to make a full sheet.
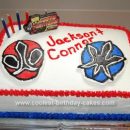
I got the look of the Power Rangers from the Wilton web site under the Power Ranger instruction sheet. They had it on line for anyone that might have lost the one that originally came with the cake pan. I frosted the cake white and using a toothpick drew the Rangers in the cake. After I drew them I used black frosting to go over my toothpick marks. My son wanted Green Ranger and my daughter wanted Pink Ranger. After outlining in black I filled in the colors accordingly.

My son requested a red ranger cake from the power rangers for his 4th birthday. I used a basic sponge recipe in a round tin and once cooled I carved the head shape.
Using red sugar paste to cover the whole cake I then cut out the shapes for the eyes and mask using a cardboard template. Using gold icing dust and alcohol I painted the white mask gold.
Cake by Lisette M., Taunton, MA

For this Power Rangers cake I started here on this site for suggestions. My son is crazy about the Power Rangers SPD and I wanted to create that theme for his birthday.
I purchased a Wilton Mighty Morphin Power Rangers cake pan on eBay and decided to decorate it myself as an SPD Blue ranger rather than following the decorating guidelines that came with the pan. I used a blue Power Rangers action figure as a guide and I think it came out good.
I followed the Wilton cake baking, pan preparations and buttercream icing recipe. I used the following dyes (all by Wilton) to create the colors, Royal Blue, Black, Lemon Yellow and plan frosting as white.
Cake by Denise R., Lutcher, LA

I made this cake for my friend who’s son loves Power Rangers. I got the design from a Power Rangers coloring page off the internet. I printed the picture on card stock and then cut it out.
Once I traced the outer image, I cut out the Power Ranger himself, placed it back on the back and traced his outline. Then I cut off his legs, placed it back on the cake to draw the belt line. Then I cut off the belt, placed it back on the cake to draw the bottom of the gloves. I continued this until I sketched the entire Power Rangers picture onto the cake.
I then used the #16 star-tip to decorate the picture, using colors that the child selected. I used the #2 tip for the black border, drawing the fingers and muscles.

I made the cake for my son’s 8th birthday party. The best site to offer practical ideas and tips was this one! I live in a remote area with limited things available.
The cake is Pillsbury confetti mix cake. I made it in a Pyrex 9 by 13-inch dish (it was made in the morning). I got the picture of the power ranger off the net, and then pasted it onto a chopping board. I put wax paper over the chopping board and fixed it with tape.
I tried butter cream icing but I couldn’t get any unsalted butter so the icing (even though looked better and stayed in place much better) was not that good of taste. The icing used on this cake is simple cream mixed with icing sugar on slow speed with a beater.
The colours are liquid colours. I put small amounts of icing in small plastic bowls and added colours as needed. I then put the coloured icing in small plain plastic shoppers. I snipped just a tiny bit off the corner and piped the outline onto the wax paper with cocoa icing first. Then I did the yellow and blue icing bits.
I put it in the freezer in between each colour for at least 10 -15 minutes. The red was added last because it was really runny. I had to use a lot of red colour because my son didn’t want a pink or dark pink ranger, but a red one!
I put it in the fridge for at least 1 more hour. In the meantime I iced the rectangular cake with simple cream and plain sugar mixed together. Just half and hour before the party I dealt with the power rangers image. I cut out the wax paper icing image and placed it on top of the cake. I used a cutter to cut out the image so no paper showed and it stuck to the white icing really well. I piped happy birthday with the remaining cocoa icing on the cake.
Originally it was supposed to freeze and then could be turned over onto the cake. You can do that with butter icing but not with the cream one that I was using because cream icing doesn’t let the paper peel away easily. My son really loved it.
Cake by Antoinette N., Paarl, Cape Town, South Africa

Firstly, I don’t bake! I order a half “plaatkoek” from our local supermarket and request that they don’t put any icing on. Then – I spend some time on the internet or coloring-in books looking for pictures.
Once I’ve found something to work with, I print and enlarge to an A3. I then cut out the picture and place it on the cake, holding it with pins. I cut around the edges so that you have the basic outline.
I then spread a thin layer of butter icing over the whole surface (for each cake I use a 500g brick margarine and about 1kg icing and a lot of different food colorings). Use a toothpick to make “pencil lines” for your insides. I fill in between the lines first and then do the outlines.
For this Power Rangers cake, I used a plastic mask for the face, chocolate and silver balls for the belt and a lot of patience!
For each cake I use a 500g brick margarine and about 1kg icing and a lot of different food coloring.

Cake by Heather M., Aurora, IL

My son wanted a Power Rangers cake for his sixth birthday. So, I came up with this power rangers cake to go with the blue ranger he had from the show. I used the Wilton T-shirt cake pan to make the body. That took a whole cake mix.
Then I made the head from a square pan and trimmed the corners off to make it look oval (I made another cake mix for the square pan and also twelve cupcakes with the remaining batter). I used a toothpick to freehand draw the features of the blue Power Rangers figure onto the cake.
I then used royal blue Wilton food coloring in homemade butter cream frosting to achieve the blue color. I used black Wilton food coloring for both the black on the 2 and the gray frosting. I used plain butter cream for the white frosting. I frosted all the blue first, including around the sides of the power rangers cake.
I then used a circle tip for the gray frosting. I outlined each shape first, then filled it in with the tip, and then spread it smooth with a knife. I followed with the black frosting areas next, again using a circle tip to outline and fill in; then smoothing with a knife.
And finally I used the same process with the white frosting. I added the red and blue to the shoulders of the power rangers cake last. This was a real hit with the kids at the party, and especially my son.
