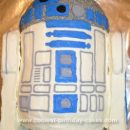
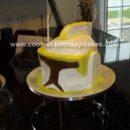
My son wanted a Star Wars party for his 5th birthday, and was requesting that I make an R2D2 cake. I Googled “R2D2 cake”, and the search led me to this site. With some great examples of previous cakes made, I was able to put my son’s cake together.
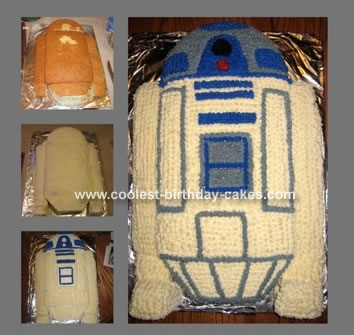
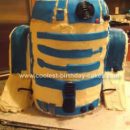
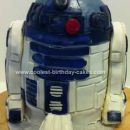
There’s only so much “originality” I can handle, so I used regular store-bought cake mixes. I used 4 mixes total: 3 9X13 cakes and 2 8-inch rounds. R2’s body is 2 of the 9X13 cakes stacked on top of one another. I cut one of the rounds in half and stacked the pieces, putting them at the top of the body to make his dome.
Then I did the same with the second cake round placing it on the bottom of R2’s body. Then I trimmed the bottom round pieces so they were angular, forming his bottom. The last 9X13 cake was used to make R2’s arms and feet. The arms were only a single cake layer high (when frosted, this gave definition to R2’s body shape).
I wish I could say how I made the feet work, but I’m still not sure myself. I experimented with some of the leftover cake pieces and toothpicks until it looked kind of right. Then I stuck the whole thing in the deep freeze for a few hours. I will never frost an un-frozen cake again!
Once the cake was frozen, I frosted a white base layer with store bought frosting. Partly so the cake wouldn’t peek through the star tipped design I was planning to do later (this has happened to me before), and partly to seal in the crumbs so the decorative frosting would be easier. Then I put the whole thing in the freezer overnight. Really, it was late and I had already worked on the thing for hours. I needed a break!
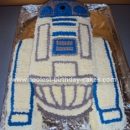
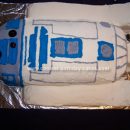
For the decorative frosting, I made a batch of homemade buttercreme frosting (a family recipe, but the buttercreme frosting recipe that Wilton gives on its cake pans and probably their website works well, too). I think my recipe makes about 6 cups of frosting. I don’t like store-bought frosting for piping on icing; I don’t think it’s stiff enough to hold the designs. I freehanded R2D2’s design into the frozen base layer with a toothpick to have a guideline of sorts, and mixed up my colors. Then I spent the next 2 to 3 hours piping on all those little stars….. The red and black circles on his dome are sprinkles I had leftover from Halloween and Christmas.
It was a lot of work, but well worth it. The cake was a hit with my son and at his party. And my husband still thinks I’m crazy for taking it on!
Wow! This cake looks like the real thing. I bet Aiden was thrilled!! You should be a professional!!! Great Job!!!
This looks perfect. I am going to follow your instructions and make this cake for my son’s 6th birthday. Thank you for the great photos also.
Your cake is just perfect. My son wants an R2D2 cake and was so excited when he saw yours.
Thank you so much for sharing!!!
I love the narrative and the cake…you did a beautiful job…I hope I can come half as close!
I just finished making the cake from your instructions – they were perfect. I used an Oreo cookie & a red jujube instead (of just icing) just to make it a little different. I sent my son my cake photo & he was impressed (it will be for my grandson’s 6th birthday) He is a Big Star Wars fan (as is his father). Thanks for the inspiration.
Finally, a cake that’s laying down but looks good and doesn’t require a pan that costs an outrageous amount of money! Thank you for the really good instructions, I’m looking forward to making this in about a month. Oh and my almost 7 year old approved how it looked (while disapproving of many others). Thanks!
My son wanted a r2d2 cake for his birthday. It was a hit
What piping tip did you use?
What piping tip did you use?