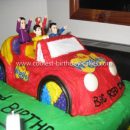
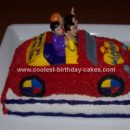
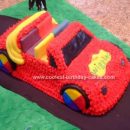
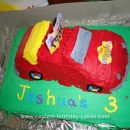
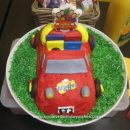
For this Wiggles cake, I baked a traditional rectangle cake and cut it in half using the Wilton Cake Leveler to make the base for the Big Red Car. To create the Big Red Car, I used the Wilton 3-D Cruiser Pan.
Once the cake was completely cooled, I cut the roof off of the car to make it a convertible. I mixed all my colors in advance using Betty Crocker Vanilla Frosting and Wilton Icing Colors and made my decorating bags (this made it easier to decorate because there are so many different colors).
I started with the four tires, added the logos (which were done free hand), did the windshield and headlights, the back window with “Happy 2nd Birthday, Nicholas” written across it and finished up with the red for the rest of the car. The only regret was not frosting the insides of the front and back “windows” (it was a delicate part of the cake and I was worried I might wreck it but the unfrosted parts stood out).
A friend of mine (whom has made Wiggles cakes) was unable to make my son’s cake so I decided to take on the task myself. I am so glad that I did because my son absolutely loved it!!! This is the first specialty cake I have ever made and no one could believe I made it myself. If I can do it, you can too!!! Good Luck!!!
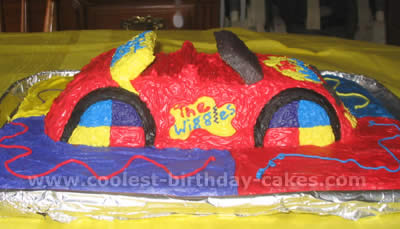
More Wiggles Car Cakes
Cake by Chris D., Atlanta, GA
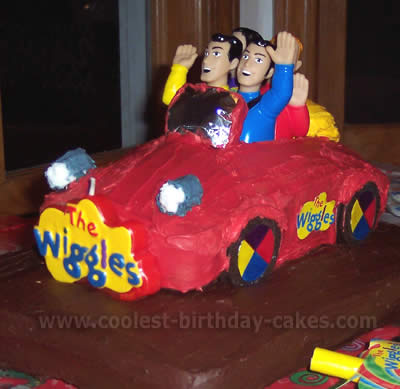
Our whole family LOVES the Wiggles, so it was natural to have a Wiggles party for my son’s 2nd birthday. I got the idea to make the Wiggles car off of this website (Thanks, Moms!), but I had no idea where to find a Wilton car mold.
I’m not the best at baking, but I’m pretty creative, so I thought about making one by using a loaf pan and putting it on a 13×9 chocolate sheet cake. I made and iced the sheet cake first, and put it on a cutting board that I wrapped with themed wrapping paper. It sure looked more colorful than plain old tin foil! I used a devils food cake mix for the car and put the batter into two loaf pans. (One for spare, in case I messed up!)
My son has the Big Red Car toy, and I found out that I could unscrew the characters and pull them out! After the cake had cooled, I set the guys on the top and cut a square around them. I cut a chunk out of the top, but was careful to keep what I took out intact, so I could use it for the details of the car.
I sliced part of the ‘chunk’ to use for the windshield and used a toothpick to secure it. I cut a piece of foil for the glass, and ‘glued’ it on with icing.
For the red icing, I used canned vanilla whipped frosting and almost a whole big bottle of red food coloring, so it wouldn’t be pink! Tracing Oreo cookies, I cut out 4 wheel wells where the wheels would go. I iced the entire car, except for the very bottom, and then put it onto my chocolate frosted sheet cake.
I slid the characters in and touched up the bottom of the car with the red icing. I turned one side of the 4 Oreos backwards for a flat surface, and stuck all four wheels in their ‘wheel wells.’ For the hubcaps, I traced a fifty-cent piece and colored paper circles that I stuck on with a bit of white icing.
For the yellow part of the car behind the characters, I died white icing yellow and used two slices of the ‘chunk’ that I had taken out of the middle. For the headlights, I used more little pieces I had left over and stuck them on. I made the color for them by accident – trying to make purple – and iced them using a toothpick. I used white icing for the ‘lights.’
I already had 2 Wiggles Happy Birthday banners for decoration, so I cut the cardboard Wiggle insignia off of the packages to put on the doors. They were the perfect size! I added the themed candle that I found at the party store in front of the car instead of on the hood. (It looked too big and took away from the guys!).
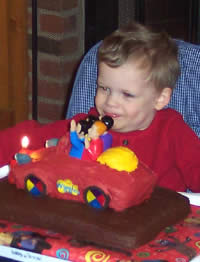
We had planned on eating the sheet cake around the car, but I had iced and decorated the other loaf pan cake, so we left the Big Red Car untouched! Since today’s party was just family, we’re going to have a kids party next Saturday and use it again. For now, the Big Red Car is parked in the fridge, and this tired Mommy is going to bed! Thanks, again, for all of the ideas. This website is awesome :-)
Cake by Mary D., Mukwonago, WI
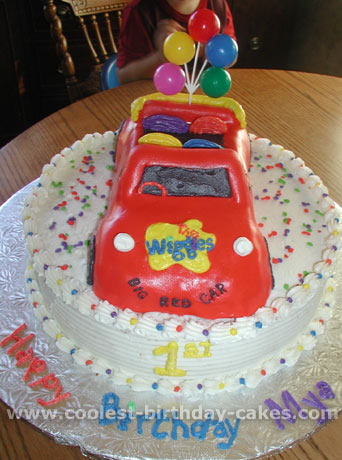
I got the idea for the car from previous submissions. I began by making two 12″ cake pans using a recipe I found on line. You start with a box cake mix and add 1 package of pudding, 3/4-cup oil, 3/4-cup water, 4 eggs, 1 tsp of butter flavor and 1 tsp of vanilla flavoring.
Next I made the car pan using a box cake mix per instructions on the box, and the butter cream frosting doubling Wilton’s recipe of 1/2c butter, 1/2c shortening, 1 tsp clear vanilla flavoring, 4 cups powder sugar, and 2 tblsp of milk. I also made butter cream fondant using 1 cup shortening, 1 cup corn syrup, 1/2 tsp colorless butter flavoring, 1 tsp vanilla flavoring, 1/2 tsp popcorn salt, and 8 cups of powdered sugar and red die (you will not need all of the fondant to cover the car). Tastes 100% better than store bought.
I leveled, frosted and stacked the round cakes on the cake board. Next using a frosting comb I went around the outside of the cake. After cutting the Wiggles car’s shape I placed a small amount of frosting wherever I needed the red fondant to stick.
After rolling out the fondant 1/8″ thick and large enough to completely cover the Wiggles car I laid it on the car and smoothed out edges. Next I cut out the wheels, windshield, side windows, inside of the car and the logo on hood, being careful not to cut too much away.
I then placed the car onto the prepared round cake. Using butter cream frosting colored I finished of the Wiggles cake by piping using #1 tip to write ‘the’ on the hood and #2 tip for the ‘wiggles’. I used the #3 tip for the inside of the wheels, yellow of the logo and for the dots around the cake. I used the #6 tip for the seats and outer wheels. I used the #21 tip for the shell piping around outside of the cake.
The balloons and note confetti were included with a Wiggles cake decoration kit. As an added extra, I angled the lettering for Happy Birthday Mya, the same as the logo.
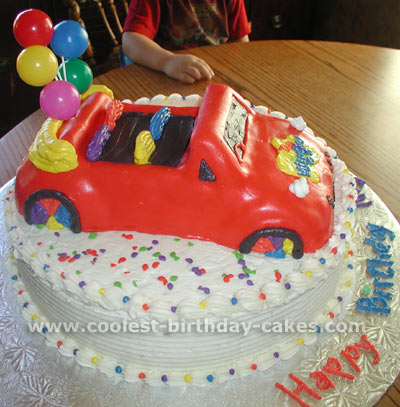
Cake by Chris S., Toronto, Canada
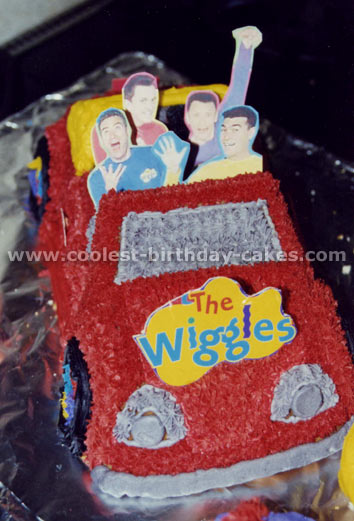
Hello all. This is the same Wilton car mold that has been used by others to create the Wiggles car.
The hint that I wanted to pass on was a shortcut to adding the Wiggles characters and the logo to the car – just scan images of the characters from whatever material you have (e.g., book, video/DVD cover, CD, old toy packaging).
Print the images onto paper and cut them out. Mount them onto some cardboard and tape a couple of toothpicks to them. Then stick them into the cake. Presto, you have a very realistic looking set of characters in the Wiggles car. From certain angles, they can look almost 3-D.
This will work for any character or image you want to attach to your cake. It’s cheap to do and your kid will love it. Good luck.
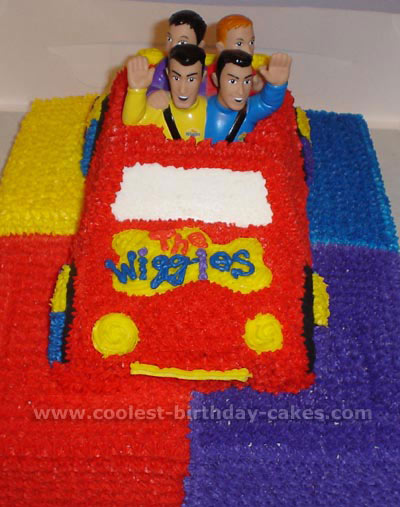
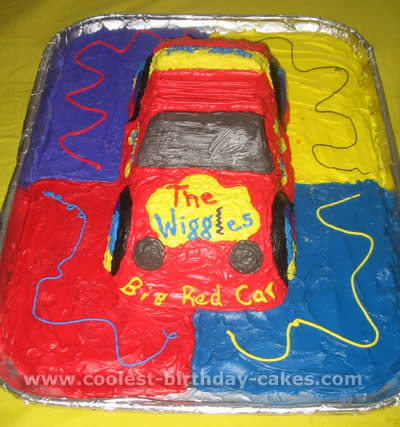
For this cake I started with a half sheet cake for the base under the Wiggles car. I put a thin layer of white icing over the whole Wiggles cake and then marked it into 4 corners. I decorated that cake first using a #18 star tip. It took a really long time to do it with that tip (I think it looks nicer with a smaller tip- a larger one will work just as well though).
After finishing the 1/2 sheet I set the Wiggles car on top. I used the 3d cruiser pan to make the car and I cut out a space behind the windshield to put in the Wiggles guys.
This cake was done mostly with a #18 tip. I used a small spatula to smooth out the tires, windshield, and headlights. I found a picture of the Wiggles logo for the front of the Wiggles car online and just freehanded it.
I was very happy with the finished Wiggles cake and so was the little boy!!
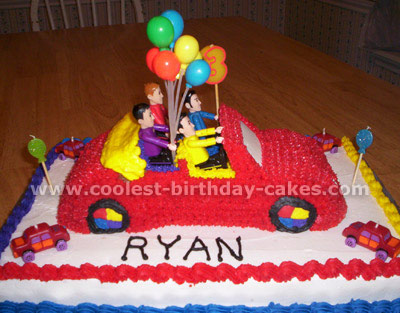
This is a Wiggles cake that I made for my son, Ryan’s 3rd birthday. He LOVES the Wiggles and I bought him a Big Red Car and figurines. I wanted to make a shaped cake, so I bought a 3-D car cake pan.
I cut the Wiggles cake to make a convertible car. The figurines fit just perfect! I put the car on an 11×15 cake. I just used a box cake mix and standard butter cream icing. I decorated the car to look just like the Wiggles car. Everybody loved this Wiggles cake, nobody wanted to cut into it!
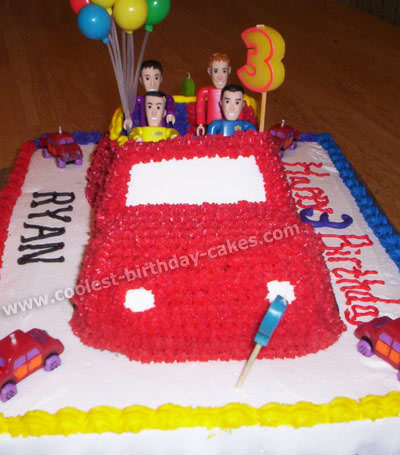
Cake by Susan T., Myrtle Beach, SC
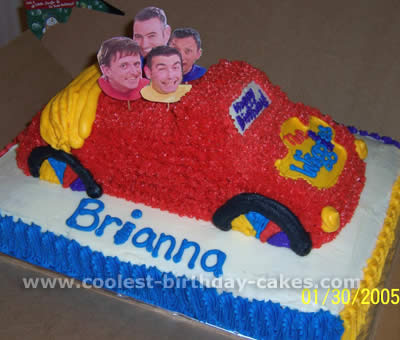
I used the car pan from Wilton to create the convertible car from the Wiggles. I looked at the Wiggles logo online and drew it on the car., Instead of using icing for the guys’ heads, I printed their pictures from the internet and taped them on toothpicks. A stacked cake presentation created a color contrast opportunity as well as yielded a few more servings (the car pan is not very big).
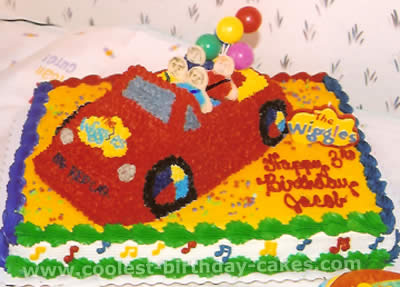
My 3 year old loves The Wiggles. I was browsing the web and found this neat website. I got one idea from Lena G. Wiggles cake. I got another idea from pictures and just combined them all together., The base of the cake is a 1/2-sheet cake. To find a big enough sturdy board, go to a party shop. We were having a big party, so I wanted to make sure there was enough cake. That layer is devils food boxed cake mix (it took 2 boxes).
The icing was a basic buttercream recipe. I made 3 batches and had a little left over. Make sure you buy enough icing coloring. It takes a lot to get it the right colors, especially the red. I decorated the sides with music notes using tip #3 and the top with confetti sprinkles around the Wiggles car.
To get the icing very smooth on the top and sides before you add the border, put your stainless steel spatula in a tall glass of hot water to get it hot. Shake off water. Then smooth out the icing. It spreads better.
For the border I used tip #32. Carefully, place the Wiggles car on top of the sheet cake. The Wiggles car is made from a 3D car cake pan. I used the box confetti cake mix for the car. The kid’s thought that was neat with Wiggle colors on the inside. But you have to cut the top to make it look like the big red car.
Then I cut out some of the inside (make seats) for the sugar cookie wiggles to sit. Use a gingerbread man cookie cutter for that. Buy the sugar cookie dough at the local grocery store. After that bakes let it cool, then decorate with food color markers.
I had a Wiggles big red car toy to go by to decorate the car. I used a #16 star tip. I recommend baking the layer and car the night before. Wrap the cake up tight with Saran Wrap, so it won’t dry out. Then decorate that morning of your party. It took almost 3 hours to decorate. Hint: Make sure someone is watching your kids, so you won’t have to keep stopping. Thanks to Lena G. for her idea that got me started!
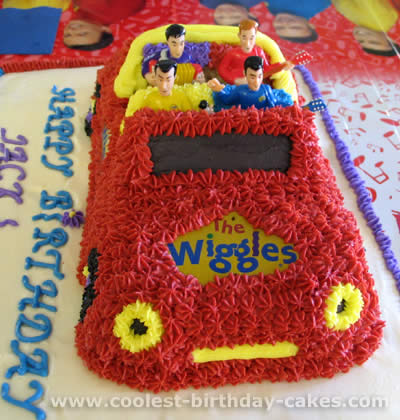
I got my idea from the other Wiggles cakes here. I made it easier, I hope!
I made the Wiggles car, using the Wilton car pan, with Rice Crispies instead of cake! I followed the Rice Crispies directions and let it cool. I used the star tip to decorate like you would a cake.
I then stuck my son’s Wiggles toy figurines in the car! It was great to eat!
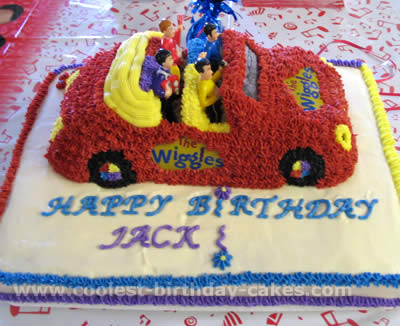
Cake by Lara R., Winnipeg, MB Canada
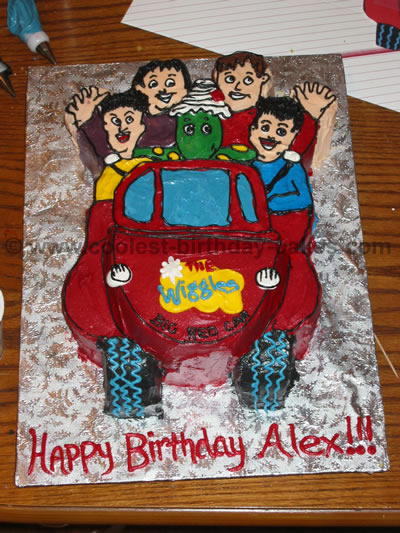
For this Wiggles cake, I started with a rectangular cake. I printed the image off on the computer, and placed it on to the cake. I carved around the paper to shape the cake. Then, I iced the Wiggles characters freehand using butter cream icing.
Cake by Lena G., Clermont, Florida
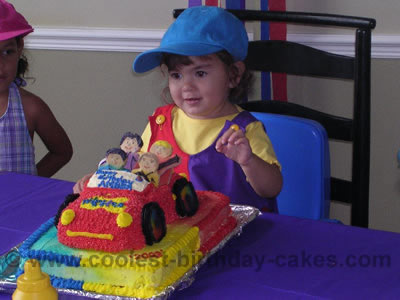
This cake was created for my daughter’s (Amber) 2nd birthday. She is a big Wiggles fan so we decided to make her the “Big Red Car” and of course the four Wiggles.
The base of the cake is just a large rectangle cake pan. The car was a cake pan in the shape of a race car. After the cake was baked we cut the top of the car off to make it a convertible.
For decorating we used piping and the new cans of edible spray paint.
The four characters were made with all ready made sugar cookie dough and we cut out the dough with ginger bread men cookie cutters and painted their features with edible color markers.
Cake by Jeana B., Red Bank, NJ
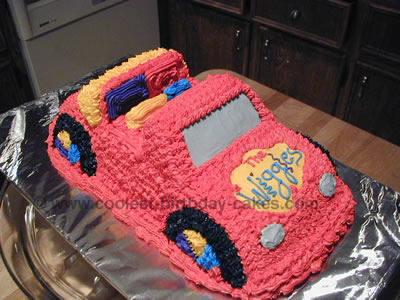
My son is a Wiggles Junkie and he loves their Big Red Car. I was on a Wiggles craft site one day and saw a picture of a cake that a mom had made her son of the Big Red Car, so I emailed her to find out where she got the cake mold… Wilton of course, so I got the mold and embellished on what she did.
I used the standard Wilton “star” decorating technique (despite the fact I never took their class, but it was easy enough…I made a standard flat Blues Clues cake the year before, so I was ready for a vertical challenge), but I used some creativity to make the Wiggles car cake a CONVERTIBLE car cake.
I used a Wilton 3D cake mold. It took 2 boxes of batter. I bought 3 cans of Wilton Ready to use icing. I mixed 1 1/2 cans with A LOT of Red food coloring. I used Wilton ‘s paste color (you may need more than 1 jar of the red to get it right). 1/2 can mixed yellow, 1/4 can (each) in royal blue, violet, black. I mixed some of the left over (not a lot) white with a little black coloring to make the grey.
Here’s the tricky part. Once the cake is cooled, I cut out the top to make the convertible. I angled it a little so the front “window” tilts in. Then I just went to town with the icing. I drew in the logo first and then iced it flat to write “The Wiggles” and a rectangle on the back to write “Happy Birthday Adam”.
I then did the grey on the windshield and lights. Then I did RED. Lots of it, it is easier to start at the bottom so the stars stack on top of each other. Then yellow for the convertible and then the tires. I used the icing to “build” the seats just like the Wiggles have. (Don’t forget they drive on the right side of the car, so Greg (yellow) sits front right!)
My son just LOVED it! :)
*WARNING – The icing on this cake STAINS everything it touches!*
