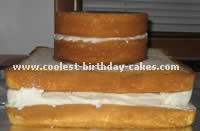
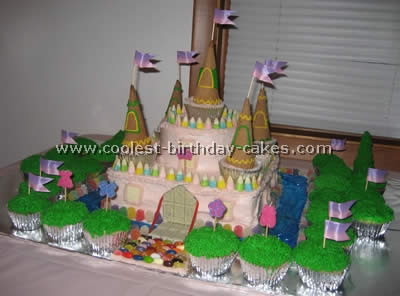
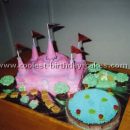
I really enjoyed making this Disney princess castle cake for my daughter’s fifth birthday. It was my first attempt and it was so easy to do! I used four boxed cakes (total). I baked two 10″x10″ pans and sandwiched them, two 6″ circles and four cupcakes. I used another box to make the “grass” cupcakes. The key to the process was stabilizing the cake with straws in each layer.
I used four straws in the middle of the square cakes and one in each corner. I put a circle of cardboard under the sandwiched circles and a straw in the middle. Finally I put skewers from the bottom layer through the cupcakes on each corner. To decorate I used gumdrops to surround the bottom of the cake and the moat and Easter candy corn for the tops of the walls.
I used white chocolate for the drawbridge and windows and red pull apart licorice for the drawbridge ropes. The moat is actually blue saran wrap, the pathway is made of jellybeans and the flags are made from toothpicks and ribbon. I used tip #233 to create the grass effect on the cupcakes and tree.
More Disney Princess Castle Cakes
Cake by Jenny O., Cape Town, South Africa
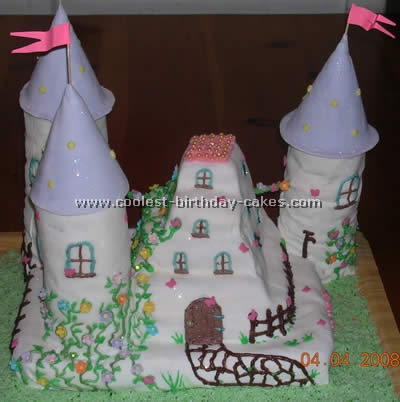
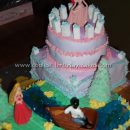
My girlfriend’s daughter, Savannah, wanted a pretty shiny Disney princess castle cake for her birthday cake. It took a lot of cake to get the height. My towers were a mistake; I cut circular pieces from a large cake and glued them together with butter icing (using kebab skewers to keep them up right). Next time, if there is a next time, I will try to make them just using plastic icing and let them go hard, maybe fill them with sweets and try to cut out windows.
The castle part was a bit of a disaster but didn’t turn out too bad! I covered the whole lot with plastic icing and then went to work with my icing tubes (which I love). The little flowers and butterflies and stars I bought from the local baking supply store (an easy way to go about it, they have wonderful things available). Finally I dusted the whole castle with some edible glittery stuff.
The Disney princess castle cake weighed a ton when it was done I have to admit that needs a bit of improving on although we ate cake till it was coming out of our ears but I never heard anybody complaining! The trickiest part was driving this monstrosity 60 km. through the city to Savannah’s house. About 200m from their turning I hit a huge pot hole which resulted in a slight leaning tower of Pisa effect. Thank heavens for skewers and lots of icing and I was able to salvage all with little damage to the overall picture. Doubtless to say Savannah was delighted with my contribution.
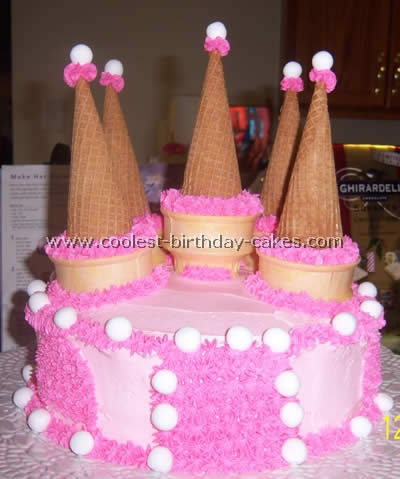
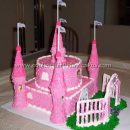
I made this Disney princess castle cake with two 9′ round pans. The icing is butter cream. I used chocolate covered candies and sugar cones to decorate with. Very easy cake to make.
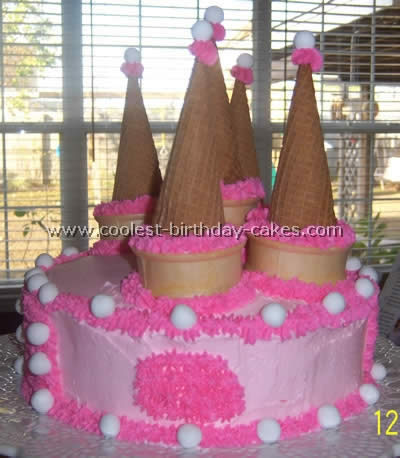
Cake by Samantha C., Strongsville, OH
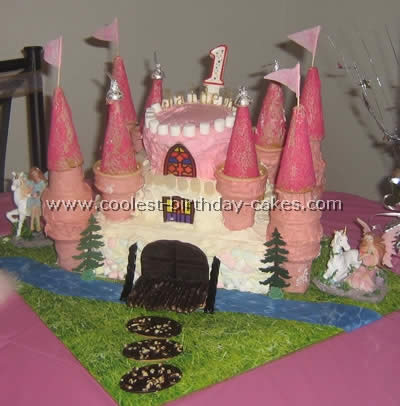
I actually got the idea for this Disney princess castle cake from this awesome website! We did her whole party in fairy princess theme. I baked one large 13 x 9 cake with two boxed mixes. To dense it up I added a box of instant pudding mix to both the chocolate batter (for the large base cake) and the vanilla cake mix. I also used milk in place of water. It made for a much more manageable and malleable cake.
I layered the cakes and the topmost one I used a bowl as a stencil to make a smaller round cake out of the baked round cake. I then used Milton white icing mix but added my own icing sugar and margarine to make more plus a 1/4 teaspoon of vanilla extract. It was enough to cover both the base cake and the middle plus to use as adhesive for the cone columns.
For the columns I covered the ice cream cones with pink chocolate twice and used sugar cones for the top towers sprinkled with pink sugar. I topped four with silver Hershey kisses and the flags are crepe paper attached to toothpicks. For the other extras which my dear husband did we used chocolate for the door. He made a knife blade hot in a flame and used that to distort the chocolate to make it look like wood! He used mint chocolate sticks for the bridge and black licorice for the draw. He printed a water image from Google for the moat. We found grass printed paper at a craft store for the base and he used trees from a scrap booking sheet and stuck that into two green spice drops! He used Pepperidge Farm cookies for the stepping stones and more cookies for the back of the castle. We got the fairies from a dollar store.
Overall in the beginning people thought the Disney princess castle cake was an ornament for the party and was astonished that it was the actual cake. It was a huge hit and very delicious. Now my older daughter (2) wants the same cake for her birthday! It took about six hours total to complete and we did it the night before the party and removed a shelf form the fridge to accommodate it!
Cake by Natasha W., Saint George, UT
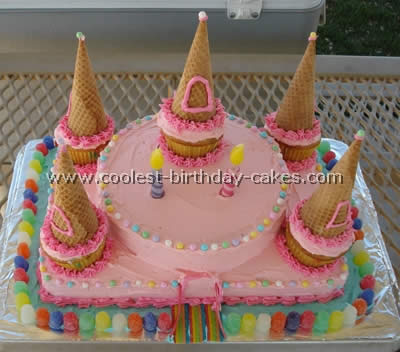
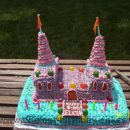
I got the idea for this Disney princess castle cake off this website. Originally I was going to make a Minnie Mouse cake but since I didn’t want to buy a special pan to make it I decided instead on this one. It was really easy!
The bottom layer is just your normal 9×13 size pan and the top round layer was a spring form pan. The corners have cupcakes and then on top of that are ice cream cones. To make frosting easier I froze the cakes and cupcakes overnight and then took them out of the freeze right before frosting. I used a buttercream frosting recipe for the pink and blue (water). The brighter pink was a can of frosting that I bought that came with tips, this way I didn’t have to mess with a decorating bag or tips. The decorations are gum drops and small sugar candies that I bought at a craft store.
This Disney princess castle cake took about two hours to make and then was eaten about an hour and a half after that so three or four hours of thaw time is plenty long after being in the freezer overnight. The cake wasn’t cold but was extra moist from freezing. The cakes were made with a box cake.


Your comment has been sent successfully.