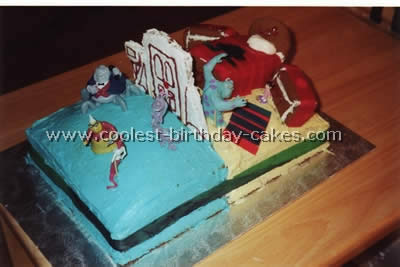
I always make “theme” cakes for my son’s birthday. This time I made a Monster Inc cake. It was a big hit and very easy to make. I usually use a boxed cake mix and use the cake as a canvas. For this cake I used monster inc. figures and made the door bed and night table with gingerbread. The bedspread and carpet are made from fruit rollups.
More Monster Inc Birthday Cakes
Monster Inc. cake by Joelle S., Shawnee, KS
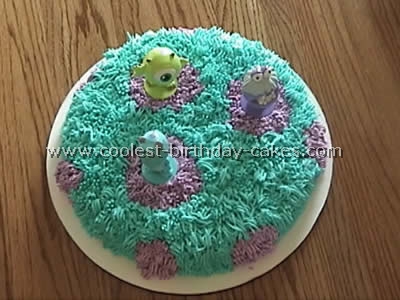
This Monsters Inc cake was made to look like Sulley’s fur with a Wilton tip. Then since we had so many Monsters Inc characters already, I ordered these bobble-heads off eBay (a Kellogg’s promo), and put them on the cake.
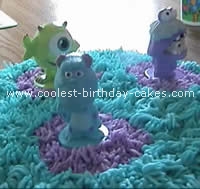

Monster Inc. cake by Carrie L., Paramus, NJ
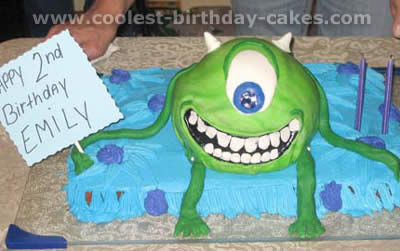
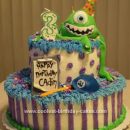
My daughter loves the Disney movie Monsters Inc, so I wanted to have that for her theme for her 2nd birthday party.
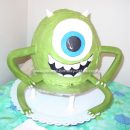
I first made a sheet cake and used the Wilton ball pan to make Mikes’ body. I frosted the cake with Wiltons buttercream icing. I put food coloring in to copy Sully’s fur design. I then frosted the ball cake and used fondant to cover and mold over the body. I shaped it to look like Mike; I used fondant to make his eyes, teeth, horns, arms and legs.
I used lollipop sticks to anchor Mike to the sheet cake, and I also used toothpicks to attach his arms and legs to his body. I finished by making a sign and hot gluing it to a lollipop stick to wish my Emily a happy 2nd birthday. Everyone said it looked good, it took a while to make it but it was fun too!!!
Monster Inc. cake by Amy A., Moscow, Russia
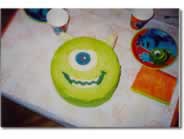
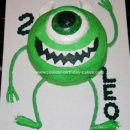
When: I made this cake for my son Misha’s 4th birthday, in March of 2002. He was a total Monster Inc. fanatic at the time.
Source of the idea: My own. I didn’t know that there were so many birthday sites on the web and it never occurred to me to search for Monster Inc cake ideas that year. I am a terrible artist, I didn’t want to try to re-create a picture of Mike and Sulley on the top of a cake, and the idea of making Mike’s face with a round pan just “came to me”.
A good friend then copied this Monster Inc. idea to make a round Elmo cake for her daughter and I can think of a variety of other characters that you could do with the same general idea – Ernie, Cookie Monster, Grover, and almost any of the other monsters from Sesame Street, Bob the Builder. Anyone with a simple, round face.
Why I chose this option:
Short explanation:
- Very little sculpturing required (only the horns on the top of his head, and they were really easy to devise)
- Relatively simple design
- Limited number of frosting colors required
Long explanation:
I’m a working American mom, living in Russia . This means that I’m both busy AND have very few baking materials available to me. Almost everything has to be made from scratch, nothing can be ordered from overseas and delivered (customs regulations and the unreliable Russian postal system get in the way!), and I need to stick to relatively basic – cool and creative, but basic – ideas.
My collection of pans here is extremely limited: Two 11″ round pans, one bread pan and one rectangular roasting pan. Period. I didn’t have time or energy to sculpt a cake and needed an idea that I could realize in either round or rectangular form.
I have only one Wilton decorating bag and about five decorating tips (again, no option of buying pre-made frosting or decorations). I dreaded the thought of having to use a large number of frosting colors with a single decorating bag – just too much emptying, washing and re-filling involved! I’ve used heavy duty zip-lock bags in place of regular pastry bags before, and although that works in a real pinch, it’s difficult and messy. Hence, my desire to limit the frostings.
My background in cake decorating and things is generally artistic: My mother took several cake decorating classes when I was growing up and she taught me the very basics – how to put the decorating tips into a decorating bag, how to color frostings, and how to pipe out stars and straight lines. Other than that, my practical experience is very limited. I have absolutely no training in drawing, but can usually copy a simple picture in pencil or frosting.
How I went about creating this Monster Inc. cake:
Step 1: Finding the right Monster Inc. picture to copy. Not being an artist, I needed something relatively simple to copy. Coloring book style pictures are usually the best in this respect, so I went to the official Monster Inc. website to begin my search for coloring pages. Turned out that they had large print-and-color masks of Mike, Sulley and Boo – absolutely perfect for what I needed. It gave me a big, simple picture of Mike’s face.
Step 2: Drafting the Monster Inc. cake design. I traced the bottom of my round cake pan onto a piece of paper, to use for design sketching. I then cut out the eye and mouth from the mask and positioned them to make sure that they’d fit.
Step 3: Baking the Monster Inc. cake. Any kind of cake (scratch or boxed mix) would do, as would any size round cake pans. I used my 11″ round pans. To make the horns, I cooked extra cake mix in a bread pan, then cut the “loaf” into large, triangle pieces.
Step 4: Preparing the frosting for my Monster Inc cake. I used a standard buttercream recipe, enough for a normal two-layer cake. I would have preferred to use a Crisco-based frosting for the sake of spreading consistency, but I can’t get vegetable shortening here and had to stick with a mixture of margarine and butter.
Step 5: Coloring the Frosting for my Monster Inc cake. I had Wilton icing colors which I’d brought from home. I set aside about one cup of frosting to leave white. Made 1/4 cup darker blue for the center of the eye, 1/4 cup bright blue for the rest of the eye, and 1/2 cup greenish-blue for the inside of his mouth. The rest (probably around 3-4 cups), I made lime green.
Step 6: Frosting the round part of the Monster Inc. cake
I traced the eye and mouth on first, using a medium-sized round frosting tip. I filled them in using same tip.
I traced around the eye and mouth in lime green, using the widest, round frosting tip that I had. Then U used a knife to spread lime green on the rest of the Monster Inc. cake.
I tried do smooth the icing. It didn’t work because my frosting was too soft and buttery (lack of appropriate ingredients), but ideally, you’d smooth it flat.
To smooth the icing, you need to prepare a deep pot of boiling water and use the longest, flattest knife that you have. Although my mom has a special long, flat spatula for this purpose, I’ve found that almost any dinner knife will usually work.
Dip the knife blade into the hot water and hold it for 5-10 seconds (or until it’s basically burning hot).
Shake off all drops of water and very carefully and lightly run the hot knife across the frosting. This will literally melt the butter or shortening and give it a glossier, smoother look. Start on one side and smooth as far across in one sweep as possible. Re-dip in the boiling water as soon as the smoothing effect ends and you start to “drag” the frosting.
Do not press down too hard. You might wind up removing most of the frosting from the cake.
I usually do the sides first, then the top. I then carefully flatten out any overhang.
Make sure that the knife is not too wet when you place it on the cake. You don’t want to ruin your frosting with puddles of water.
Step 7: Frosting and attaching the horns of the Monster Inc. cake:
I covered the triangle pieces in white frosting
I pushed a toothpick halfway into the “bottom” end of the horn (the part which touches the head), positioned the horn appropriately at the top of the head, and pushed the toothpick in to attach it.
I did the same with the second horn.
Step 8: Step back and admire your Monster Inc. cake!
Monster Inc. cake by Beth W., Newport, RI
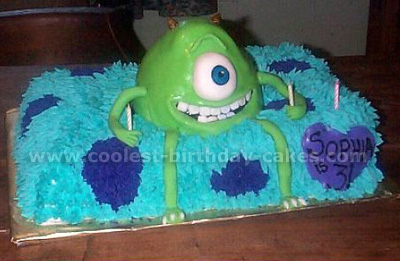
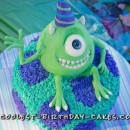
This Monster Inc cake was for a little girl named Sophia who lived two doors down from me. I came up with the idea to have “Mike” sitting on top of a blue “furry” cake that resembled Sully’s spotted fur.
First I baked a sheet cake. Then I tinted the white buttercream to the turquoise and purple I wanted, and used a triple star tip to pipe the “fur.” I used it the same way I would make grass, by pulling it up so to give the desired effect. Once I had that done, I baked a Wilton ball cake pan and covered it in green fondant. I placed it on the top of the cake and doweled it, so it looked like Mike was sitting on top of the furry cake.
I used fondant for all his detailing: His eye, his teeth, his arms and legs. I used toothpicks to attach his extremities to his body. This may look hard but once you use fondant icing (you can buy pre-made if you like), you realize it is just like clay, and you can do anything with it!
For this Monster Inc cake your imagination is the limit!
Your comment has been sent successfully.