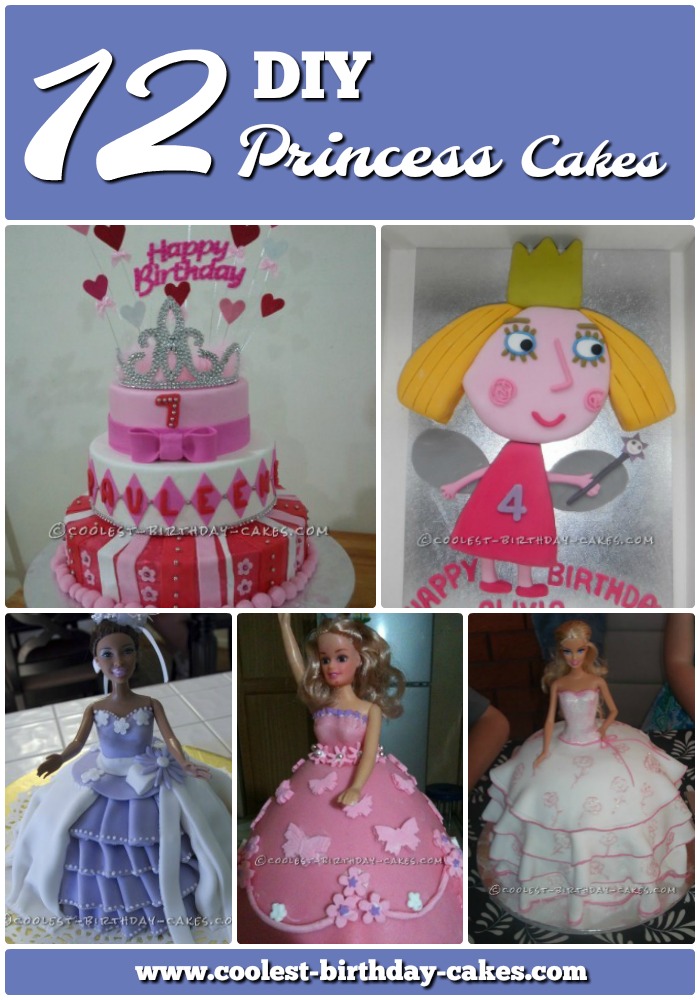
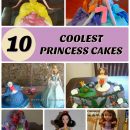
This awesome collection of Princess birthday cake ideas and designs is sure to provide you with creative inspiration as you set off to create the coolest Princess cake ever. Good luck!
Princess Holly Cake
Princess birthday cake submitted by Michelle
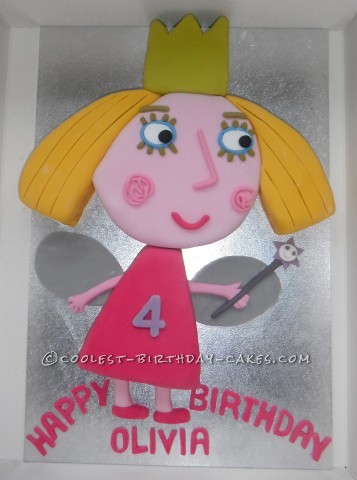
I was asked to make a Princess Holly cake for my friends’ 4 year old daughter. I started making celebration cakes as a hobby about 6 months ago having been inspired by your webpage! Back in December, I made a Peppa Pig cake for my own little girl’s 2nd birthday. My friend asked me to have a go at making a Princess Holly cake for her daughter after seeing my attempt at Peppa (which was a great success – my daughter loved it!).
I started off by making a Madeira cake in a 8″ x 10″ cake tin. I let it cool and then wrapped it in foil and left it overnight. The following evening I started to decorate it. I used a paper template to cut the required shapes out of the cake. Then I took each piece of cake and spread a thin layer of strawberry jam (that I melted for 20 seconds in the microwave) over it first, then spread a thin layer of butter cream over the jam. I then rolled out the sugar paste on a clean smooth surface coated with icing sugar (so the icing did not stick to the surface). I placed the sugar paste over the shape and molded and cut around the cake to coat it in the icing.
Once I had done this for each shape I then stuck them together with icing glue using a thin paintbrush (used solely for cake decorating!). Once the basic shapes were assembled I traced the face of ‘Holly’ on to parchment paper and used that as a guide to ensure I got the features in exactly the right place. I rolled out and carved each feature and stuck them on to the face with icing glue. I then rolled out and shaped the wings, arms, wand and legs and stuck then down with icing glue. Finally, I cut out the lettering for ‘Happy birthday Olivia’ and number 4 with small cookie cutters I purchased. Then I stuck these down to the board, again with icing glue.
I really enjoyed making this cake, and the best part was seeing Olivia see her cake for the first time at her party and blow the candles out. It made all the effort worth it!
Looking forward to my next challenge… !
Dragon and Princess Birthday Cake
Princess birthday cake submitted by James a. Ruth F
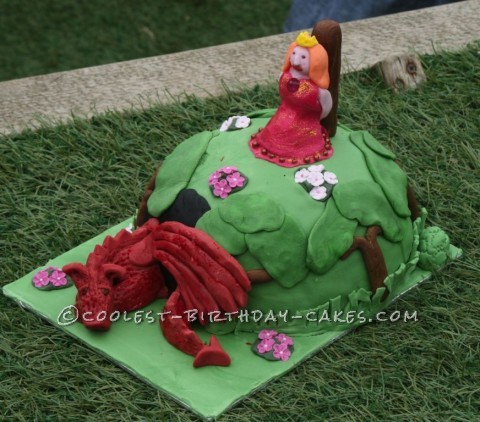
This was supposed to be a Peppa Pig cake, there was to be her house on the hill and she and George sat feeding ducks below until I realized I didn’t have any blue icing, shops were shut and I didn’t have the means to make any blue, so no George or pond!
So here is my dragon in his cave and the rather dumpy princess tied to a stake at the top. No special methods here, the cake was cooked in a Pyrex bowl and has cream filling, then I used fondant to create the scene. Quite easy, trees are just sticks with green blobs on and the cave a simple black arch. I have never made a human figure and I must admit I think the girl could do with a nose job at the very least!
Dragon was easy as any icing marks I covered over with the scale pattern made by a knife. I then painted edible glitter over it. I only made his head and tail as well as I am lazy. Both Princess and post have wood in them to keep them upright but that’s all.
Princess Barbie Cake Using Wilton Classic Wonder Mold
Princess birthday cake submitted by Rose
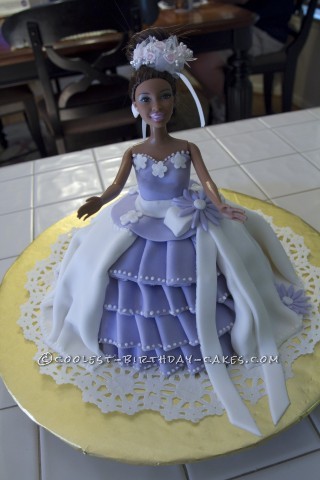
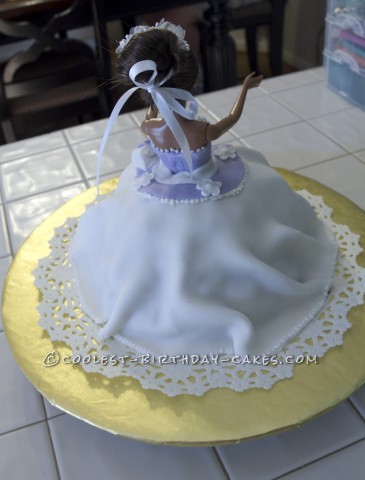
I used a basic cake mix using a Wilton Classic Wonder Mold for this princess Barbie cake. I used cranberry marmalade instead of butter cream because of storage concerns. Then I colored the fondant with violet and kept the main skirt white. Ruffles went on first, then the doll body top and styled her hair. I used a real doll, removed the legs which can be put back on later for another play day. I kept the design simple but I think she will enjoy it.
Princess Cake with Marshmallow Pops
Princess birthday cake submitted by Stacey B.
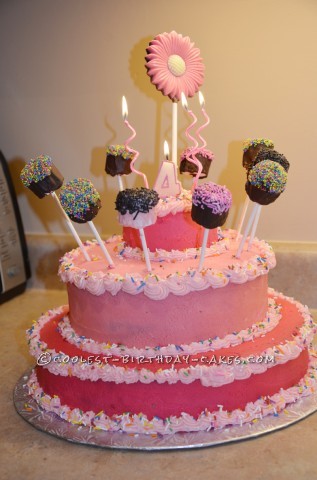
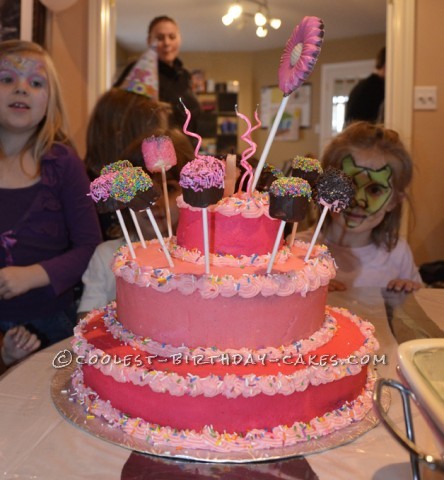
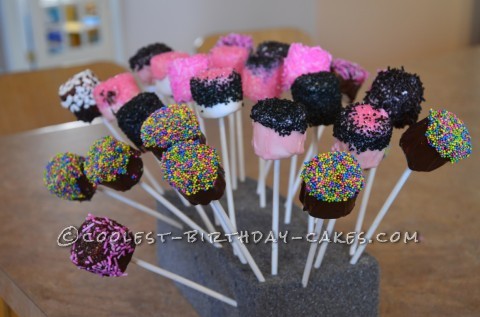
This Princess cake with Marshmallow Pops was my first attempt at a cake and I want to share it with the world because I am so proud! It was a lot of work but it was worth it to see the look on my daughter’s face. Most of all though, I think the kids loved the marshmallow pops the most.
First I made the marshmallow pops. I covered marshmallows in white and milk chocolate and dipped them in sprinkles. Then I put them in a ziplock and froze them. The next step was to start making the cake. I baked and froze all of the cakes. The bottom cake was a 2 layer-12 inch cake (chocolate with chocolate buttercream). The second layer was a 2 layer-8 inch cake (chocolate and chocolate buttercream). The top layer was a 2 layer 4 inch cake (marble with chocolate butter cream).
The day before the party was a flurry of icing and decorating and taking care of a four year old and an 11 month old. It was a long, exhausting day. My husband helped a bit with the icing of the cakes. He has a lot of experience with drywall mudding so he was great at getting it flat. He also cut the dowels for me.
Overall, everyone at the party was surprised that I made this cake. Some thought I ordered it and that is the reaction I was looking for. It all got eaten too!! Next up is a sesame street cake for my son in 2 weeks!
Princess Doll Cake with Pink Dress
Princess birthday cake submitted by Remi S.
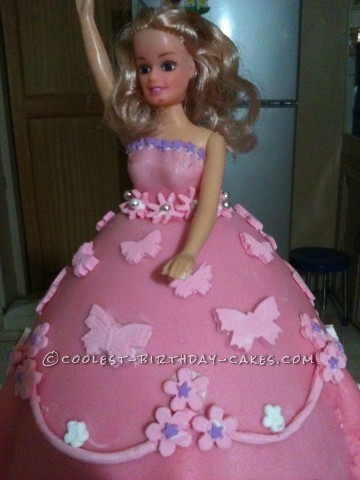
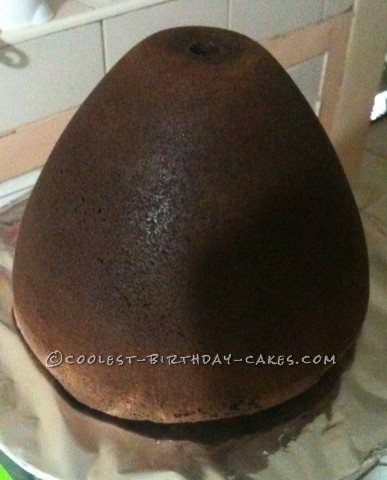
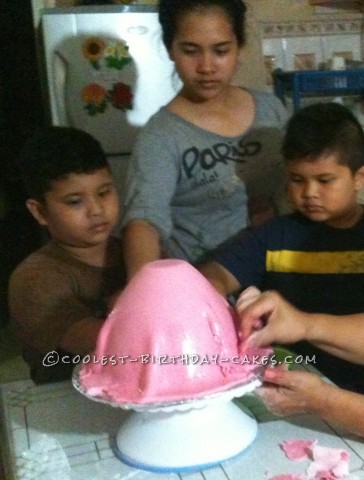
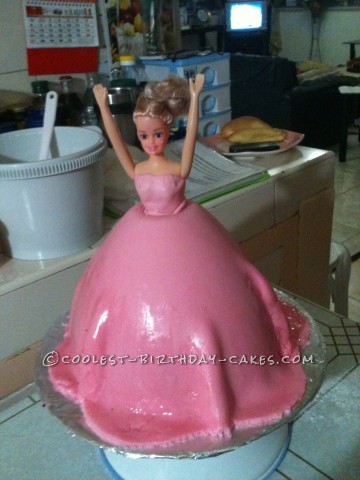
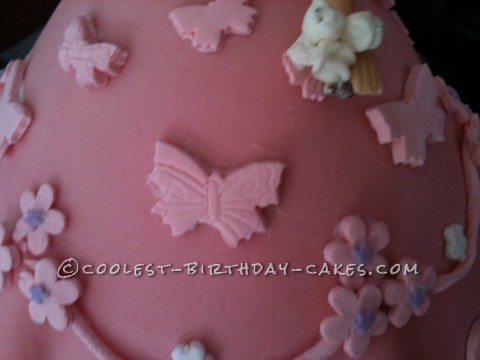
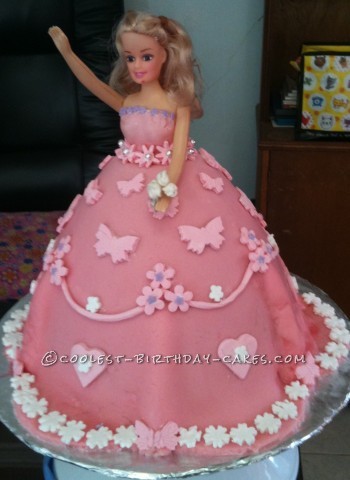
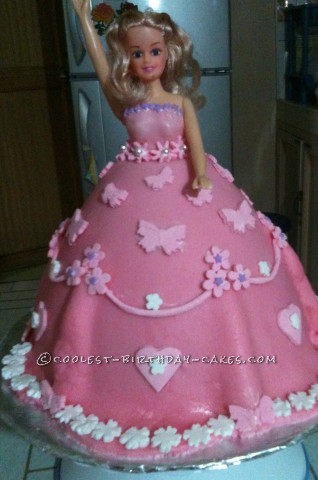
A week after my rolled fondant seminar, I tried my skill to put in practice what I learned. It was smooth procedure doing my first ever doll cake. Though, was also with an aim of giving a first hand learning to my 3 grand children who were on their summer vacation. With them, we went through the gum paste preparations and cutting, did royal icing and the fondant of course. Finally, dressed up the doll into a lovely doll cake. So easy.
Easy 1st Birthday Princess Cake
Princess birthday cake submitted by Elizabeth M.
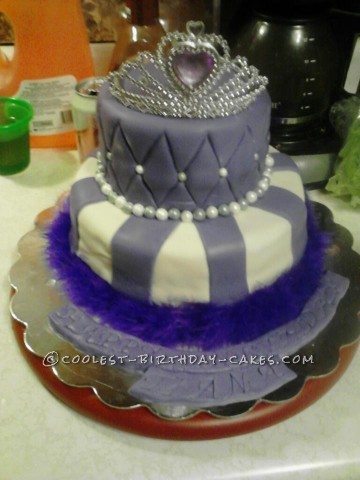
I decided I wanted to try to make a princess cake for my niece’s 1st birthday. I had never really tried anything like this before but I figured what the heck, I would give it a try. Everyone was so amazed by the cake and I really loved it. The kids just kept asking if it was a real cake that we could eat. I am so glad I tried something new. It turned out so great!!
Princess Doll Cake
Princess birthday cake submitted by Darah G.
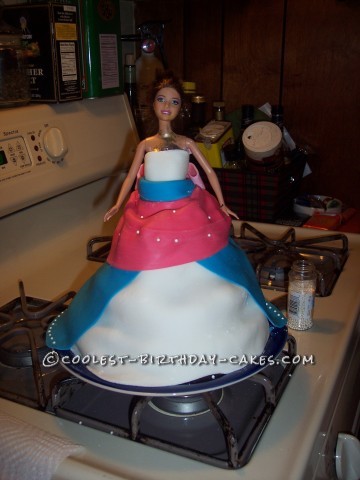
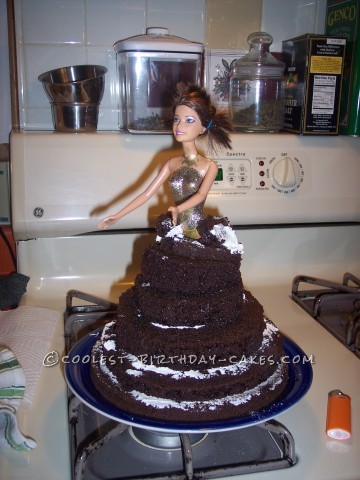
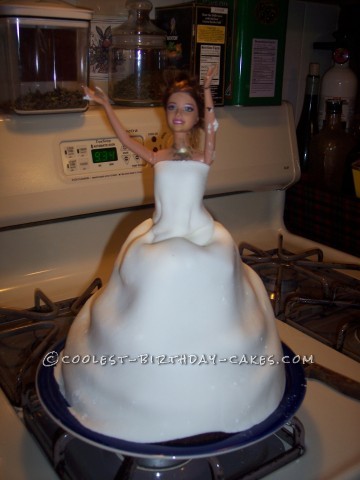
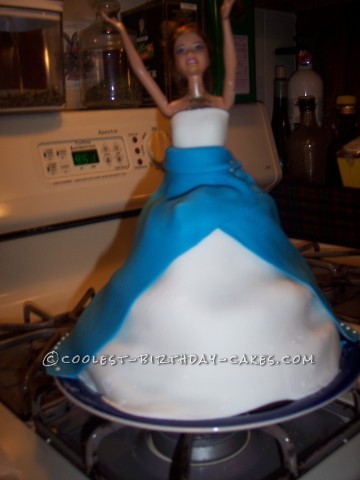
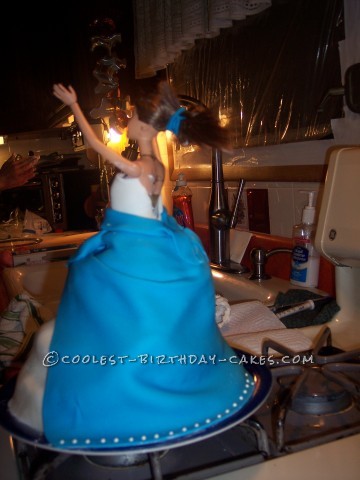
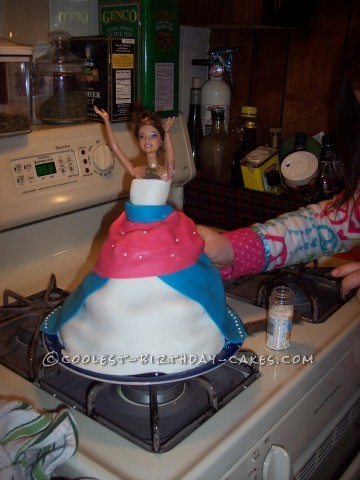
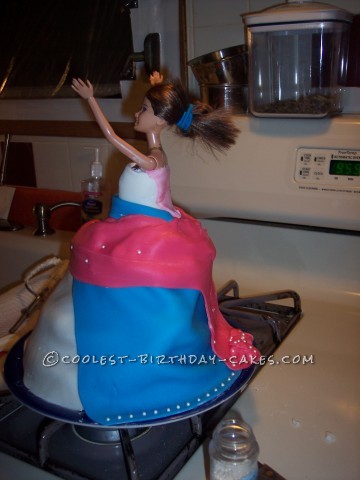
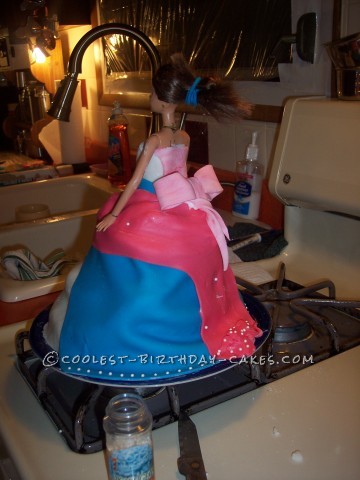
I had to be away for my daughter’s 7th birthday last fall. I promised her when I got back and we were all settled that I would make her any birthday cake she wanted and we would have a very belated birthday celebration. My daughter wanted a fairy princess cake with a Barbie in it… so we looked online at all the ‘fairy’ images and she saw some more princess looking cakes that the liked better- so I was off to the kitchen with about four different ‘princess’ cake ideas she liked!
I made the marshmallow fondant this morning. Then I baked 4 round dark chocolate cakes, let them cool and put them in the freezer; it makes it easier to cut the pieces in the the shapes you need. I made vanilla butter cream icing for the layers. It was based of ideas I had gotten from images online, then kinda evolved into this beauty!
Princess Cake for my 4 Year Old Daughter
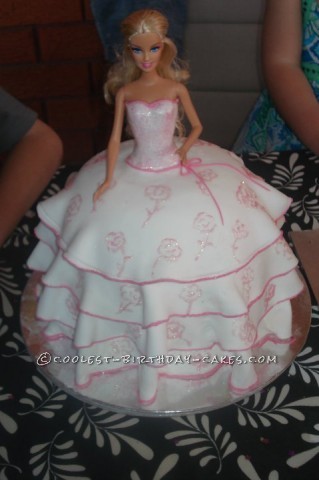
My daughter wanted a Princess cake for her birthday. I had never made a Princess cake before and I thought I would give it a go. I bought a glass round bowl that was oven proof and two round cake tins. Then I made three round cakes and one bowl shaped cake then once cooled placed one round cake on cake board, with second round cake. Before you place it on top of the other cake use a round cookie cutter big enough for Barbie’s legs to fit in then, butter icing the top of the bottom cake and place second cake on top. Do this again for the third round cake. Now put the round shape cake on top making sure you use butter icing to join together then using a large sharp knife shape to desired dress shape.
Barbíe’s Bodice:
Strip Babie of any clothing she has on and use fondant to create the bodice. Once I had done this I piped the top of her dress for a little color.
Back to cake:
Put Barbie in the hole of the cake (should be middle), make sure she is stable. Roll out your fondant and using a knife cut a cross in the middle. Using your roller roll fondant onto it and roll over cake/Barbie. Ensure that the cut part of the fondant goes over Barbie’s head and pull down until you get to the cake. Now work in (rub) the fondant to Barbie’s bodice.
Cut bottom of fondant to create the flowing dress look, move to desired waviness. Do the above step until dress is layered like the picture or you could just have one layer. Using the piping I went along the bottom of each layer of fondant to create more color. I also piped flowers on the dress and pink glitter to the bodice. I piped a ribbon where the fondant came together at the bodice to help cover any issue’s.
My daughter and friends/ family still think it’s an unreal cake. Looks hard but it’s not that hard to do once you get going.
Fairy Princess Birthday Cake
Princess birthday cake submitted by Emma
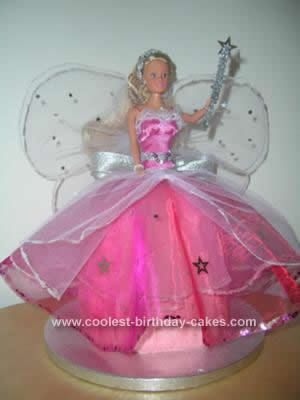
I made this Fairy Princess Cake Design for my friend’s little girl who was 4. It was really simple to make but looked stunning.
I used Victoria sponge mix in a 2 pint Pyrex bowl for the dress, and put it on top of another round sponge cake so it was tall enough to stand the doll up inside. Then I carved out a hole in the middle of the cake for her to stand in. I cut the cake into several layers and filled them with jam and whipped cream. I then iced the skirt with pink butter icing.
The dress for the doll is a few circles of tulle decorated with glitter glue, as are the wings, gathered in the middle. Needless to say she was speechless when she saw her cake, and wouldn’t let us cut it! She still plays with the doll, and I had to adjust the skirt later so she could dress her in it.
I had a lot of fun making this!
Princess Crown Cake
Princess birthday cake submitted by Janet
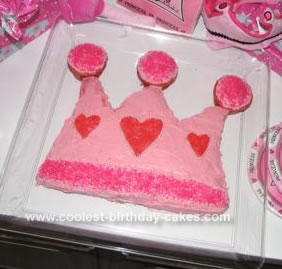
My daughter had a princess theme for her 2nd birthday. So I decided to go with a Princess Crown Cake.
I baked a 9” x 13” cake using a strawberry cake mix and then carefully cut out triangle sections to make the three points of the crown. I also baked some strawberry cupcakes and used three of them to make circles at the tops of the points. Next, I iced everything with strawberry icing first and then added the decorative parts afterwards.
I used pale pink edible pearls that I got at Michael’s to outline the stripe at the bottom, the three hearts in the middle, and around the cupcakes at the top. That was definitely the most time-consuming part of the process. I used bright pink sprinkles to fill in the stripe and the cupcakes.
Next, I used sparkly pink gel icing to fill in the hearts. I found some crown candles at the store that were perfect to go on top. It wasn’t very difficult to make, and it turned out pretty cute. And my little princess loved it!
Three Tiered Princess Cake
Princess birthday cake submitted by Cecille P.
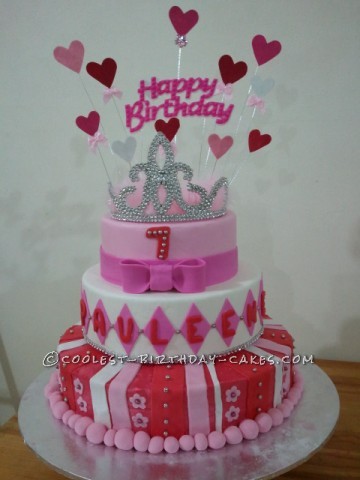
This is the first fondant cake I have done. Although it took me 3 days to finish this cake it was a very enjoyable experience. Using all the tools I have purchased was indeed exciting. The mother of the celebrant, a friend of mine didn’t actually expect a cake this big, contrary to what she have requested which is a simple rectangular cake. And the best thing as always, the big smile on Pauline’s ( the celebrant) face. The color of the cake even matched her princess dress.
Pretty Princess Birthday Cake
Princess birthday cake submitted by Janna A.
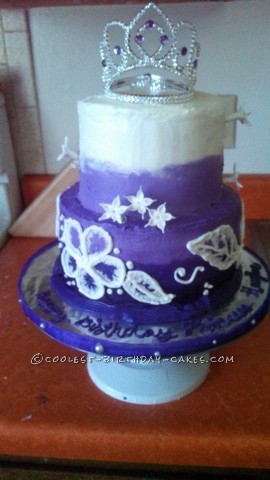
It’s a purple ombre butter cream frosting with chocolate and purple polka dot cake on the inside. I piped royal icing flowers on and took a brush over it to make it look like lace. Finished it off with gum paste Stephanotis flowers and a crown. My niece loved it!
The cake is two tiers one 6 inch and the other is an 8 inch. The cake was chocolate and I made different shades of purple cake balls for cake pops. Then I baked them into the cake batter. I piped the different shades of purple butter cream on using tip 789. It made the sombre layers all the same size. Then I smoothed it out with a warm spatula to give it a fondant look. No one in my family likes the taste of fondant. I was nervous making it but I’m very proud of how it turned out and of course it tasted so good.
For even more Princess birthday cake ideas check out our main Princess cake section…



Your comment has been sent successfully.